17
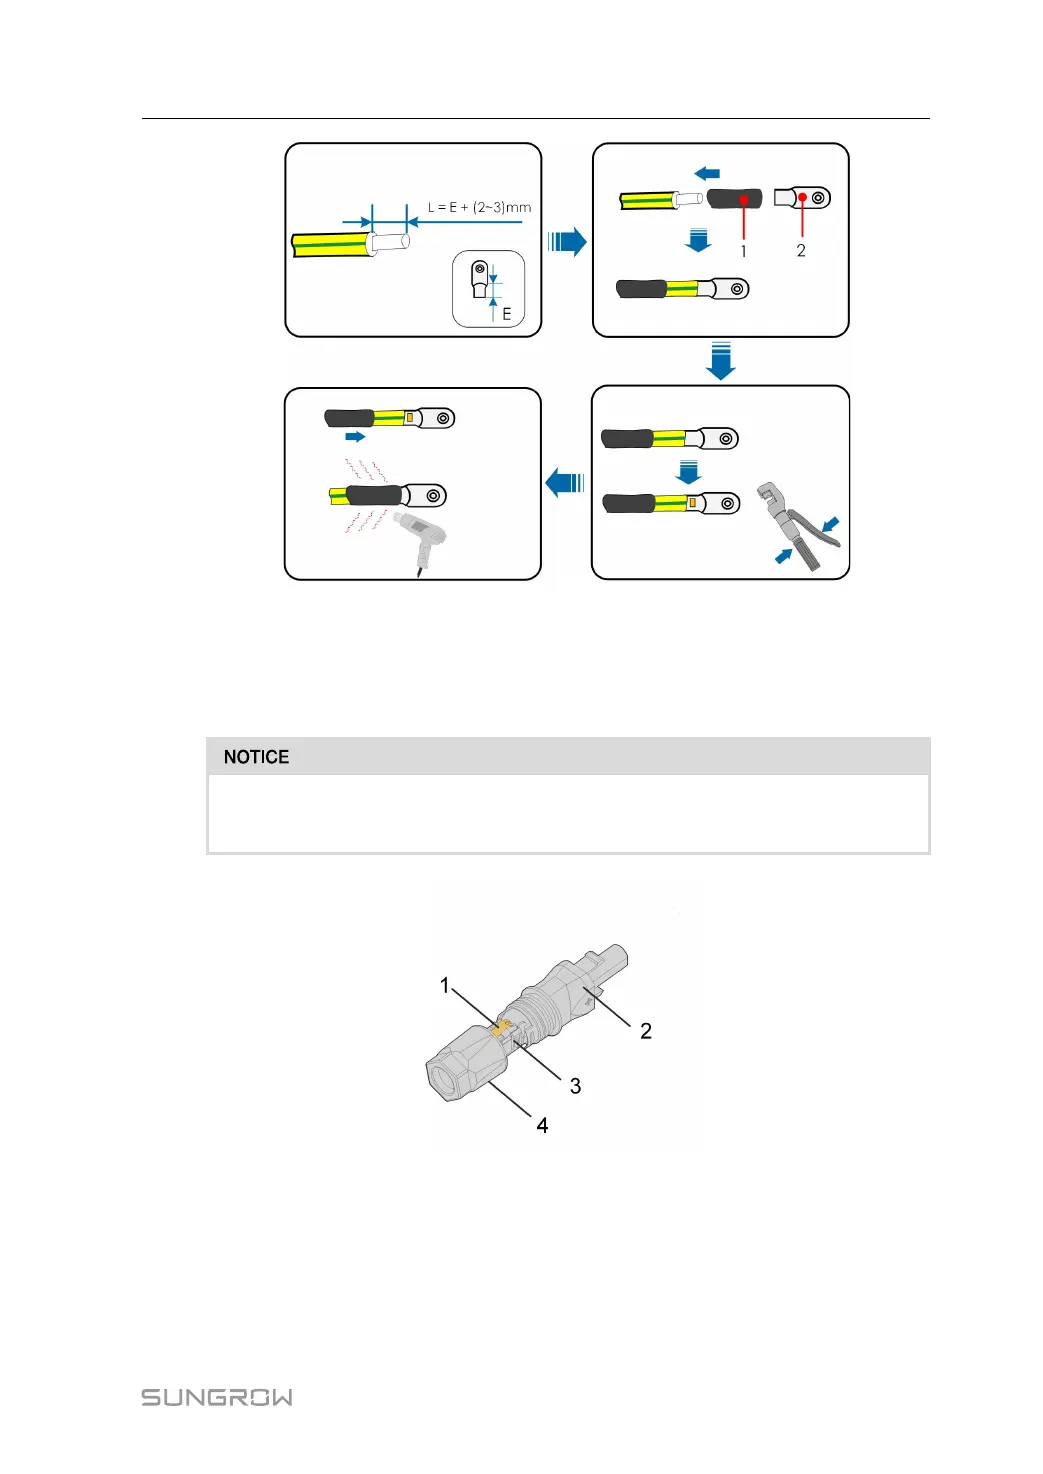
(1) Heat shrink tubing (2) OT/DT terminal
4.7 Assembling the SUNCLIX Connector
During assembly, be careful not to contaminate, pull out, or shift, the seal in the ca-
ble gland. A contaminated or shifted seal impairs strain relief and leak tightness.
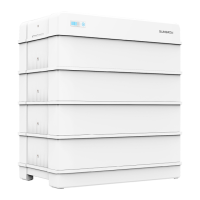
figure 4-1 SUNCLIX Connector Components
1: Spring 2: Sleeve 3: Insert 4: Cable gland
step 1 Strip the insulation from the cable by 10mm - 15 mm.
User Manual 4 Mounting