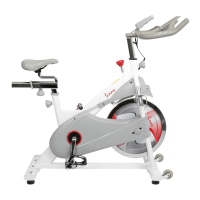
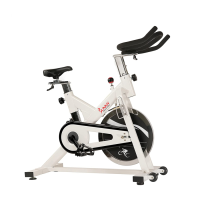
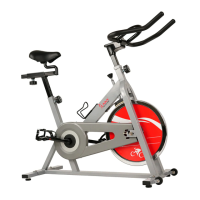
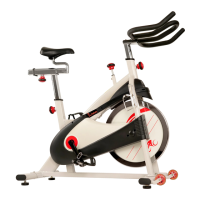
The device is a Magnetic Belt Drive Premium Indoor Cycling Bike, model SF-B1876, manufactured by Sunny Health & Fitness. It is designed for indoor and home use, not for commercial or therapeutic purposes.
Function Description:
The indoor cycling bike provides a cardiovascular workout through pedaling, simulating the experience of riding a bicycle. It features adjustable resistance, a customizable seat and handlebar, and a computer display to track workout metrics. The belt drive system ensures a smooth and quiet operation. An emergency brake function allows for immediate stopping for safety.
Important Technical Specifications:
- Model: SF-B1876
- Maximum Weight Capacity: 300 pounds (135 KG)
- Pedals: 9/16" (Left and Right)
- Flywheel: 1846080305542PK
- Belt: 5PK1320
- Computer: Uses 2 AAA batteries.
- Resistance System: Magnetic belt drive with a tension control knob.
- Stabilizers: Front and Rear Stabilizers with adjustable foot levelers.
- Handlebar Post: Adjustable height.
- Seat Post: Adjustable height.
- Seat Slider: Adjustable fore/aft position.
- Transportation Wheels: Included for easy movement.
- Sensor Wire: 350mm
- Handle Pulse Wire: 950mm
- Computer Link Wire: Included (81a/b)
Usage Features:
- Adjustable Resistance: The bike's resistance can be adjusted using the Tension Control Knob (No. 46). Turning it RIGHT (clockwise) increases resistance, while turning it LEFT (counter-clockwise) decreases it.
- Emergency Brake: Pushing down on the Tension Control Knob (No. 46) immediately stops the flywheel, providing an emergency stop function.
- Seat Adjustments: The seat is fully adjustable in height (Up/Down) via the Seat Post (No. 2) and fore/aft via the Seat Slider (No. 8). Adjustments are made by loosening and pulling the Adjustment Knob (No. 16) outward, positioning the seat, and then re-inserting and tightening the knob.
- Handlebar Adjustments: The handlebar height can be adjusted by loosening and pulling the Adjustment Knob (No. 16) outward, sliding the Handlebar Post (No. 4) to the desired height, and then re-inserting and tightening the knob.
- Pedal Strap Adjustment: The pedals are equipped with toe clips and straps to secure the user's feet. Users should place their feet as far forward as possible into the toe clips, then pull the pedal strap upward to tighten the cage and insert the strap back into the hoop.
- Balance Adjustment: For a stable ride, the bike's balance can be adjusted using the foot levelers located beneath the Front and Rear Stabilizers. Loosen the Nuts (No. 48) by turning clockwise with a Spanner (No. 80), rotate the Foot Leveler (No. 15) until the bike is level, and then re-tighten the nuts by turning counter-clockwise.
- Transportation: The bike can be easily moved using the transportation wheels on the front stabilizer. To do so, ensure the Handlebar (No. 3) is secured, grasp the handlebar, place one foot on the front stabilizer, and tilt the bike towards you until the wheels touch the ground.
- Computer Functions: The exercise computer displays various metrics:
- SPEED: Current speed (KPH or MPH).
- AVG SPEED: Average speed (in STOP mode).
- MAX SPEED: Maximum speed (in STOP mode).
- CADENCE (RPM): Revolutions per minute (0-999).
- AVG CADENCE (AVG RPM): Average cadence (in STOP mode).
- MAX CADENCE (MAX RPM): Maximum cadence (in STOP mode).
- DISTANCE (DIST): Accumulated total distance (0.0-999.9 KM or Miles). Can be preset.
- TARGET DISTANCE (TGT DIST): User-preset distance.
- CALORIES (CAL): Accumulated total calories (0.0-9999). Can be preset.
- RACE: Exercise in TARGET MODE.
- TIME: Accumulated total time (00:00-99:59). Can be preset.
- TARGET TIME: User-preset time.
- PULSE: Current pulse rate (measured via handle pulse sensors).
- Computer Modes:
- MODE Button: Selects functions, enters RACE MODE (hold for 2 seconds in stop mode).
- SET Button: Sets target values for TIME, DIST, CAL. Holds to speed up increment.
- RESET Button: Resets function values (in setting mode), resets all values to zero (hold for 2 seconds).
- Miles or Kilometers Setting: Default is miles. Hold SET and MODE together for 2 seconds to switch to kilometers.
- Target Value Setting: Press SET to select a target (CADENCE, TIME, DIST, CAL), hold SET to increase value, press MODE to enter.
- Target Cadence: Preset range 15-120 CADENCES (60 CADENCES default). Each bar on the display represents 10 CADENCES. Arrows indicate if current CADENCE is less than or more than target.
- Race Mode: Enter by holding MODE for 2 seconds. Only TIME and DIST can be set. Default values are 10 minutes / 4 (KM or Miles).
- Pulse Measurement: Press MODE until PULSE function is active, hold handle pulse sensors for at least 5 seconds. (Note: For reference only, not medical treatment).
- Battery Installation/Replacement: The computer uses 2 AAA batteries. Press the buckle on the battery cover, remove it, install/replace batteries (observing polarity), and reattach the cover. Always change both batteries simultaneously and do not mix battery types or old/new batteries.
Maintenance Features:
- Daily Maintenance:
- Wipe down all equipment (seat, frame, handlebars) after each session, especially seat post, handlebar post, and belt/chain guard, due to sweat's corrosive nature.
- Engage the drive train and check for vibrations through the pedals. If vibrations occur, tighten pedals, bottom bracket, or adjust drive belt/chain tension.
- Use a wrench to tighten pedals until secure.
- Weekly Maintenance:
- Inspect and tighten all moving parts and hardware.
- Inspect pull pin frame fittings for security; loose fittings can strip threads.
- Clean and lubricate pop pin assemblies by pulling the pin and spraying lubricant onto the shaft.
- Tighten seat hardware to ensure the seat is level and centered.
- Brush and treat resistance pads: Remove foreign material, spray with silicone lubricant to reduce noise from friction with the flywheel.
- Visually inspect bottom bracket, toe clips, and toe straps; attach or tighten if loose/disconnected.
- Monthly Maintenance:
- Check all hardware (water bottle holder, flywheel nuts, belt/chain guard bolts, brake caliper lock nuts, brake caliper tension rod nuts) for security.
- Inspect the brake tension rod for wear (e.g., missing threads); clean and lubricate it.
- Clean and lubricate the seat post, handlebar post, and seat slider; remove any foreign material buildup.
- Leather Brake Pad Care (If Applicable):
- Perform this maintenance upon initial installation and throughout the pad's life to extend its lifespan.
- Some pads are pre-lubricated (squeeze to check for lubricant release).
- If dry, coat the pad with 3-in-1 oil. Brush the leather with a clean wire bristle brush, apply oil, and allow it to soak. Repeat 4-5 times until saturated but not dripping.
- Inspect weekly and lubricate if needed. If the pad appears glazed, brush with a wire brush and apply lubricant.
- Replace the brake pad if sponge padding shows through the leather.