M
SET
M
SET
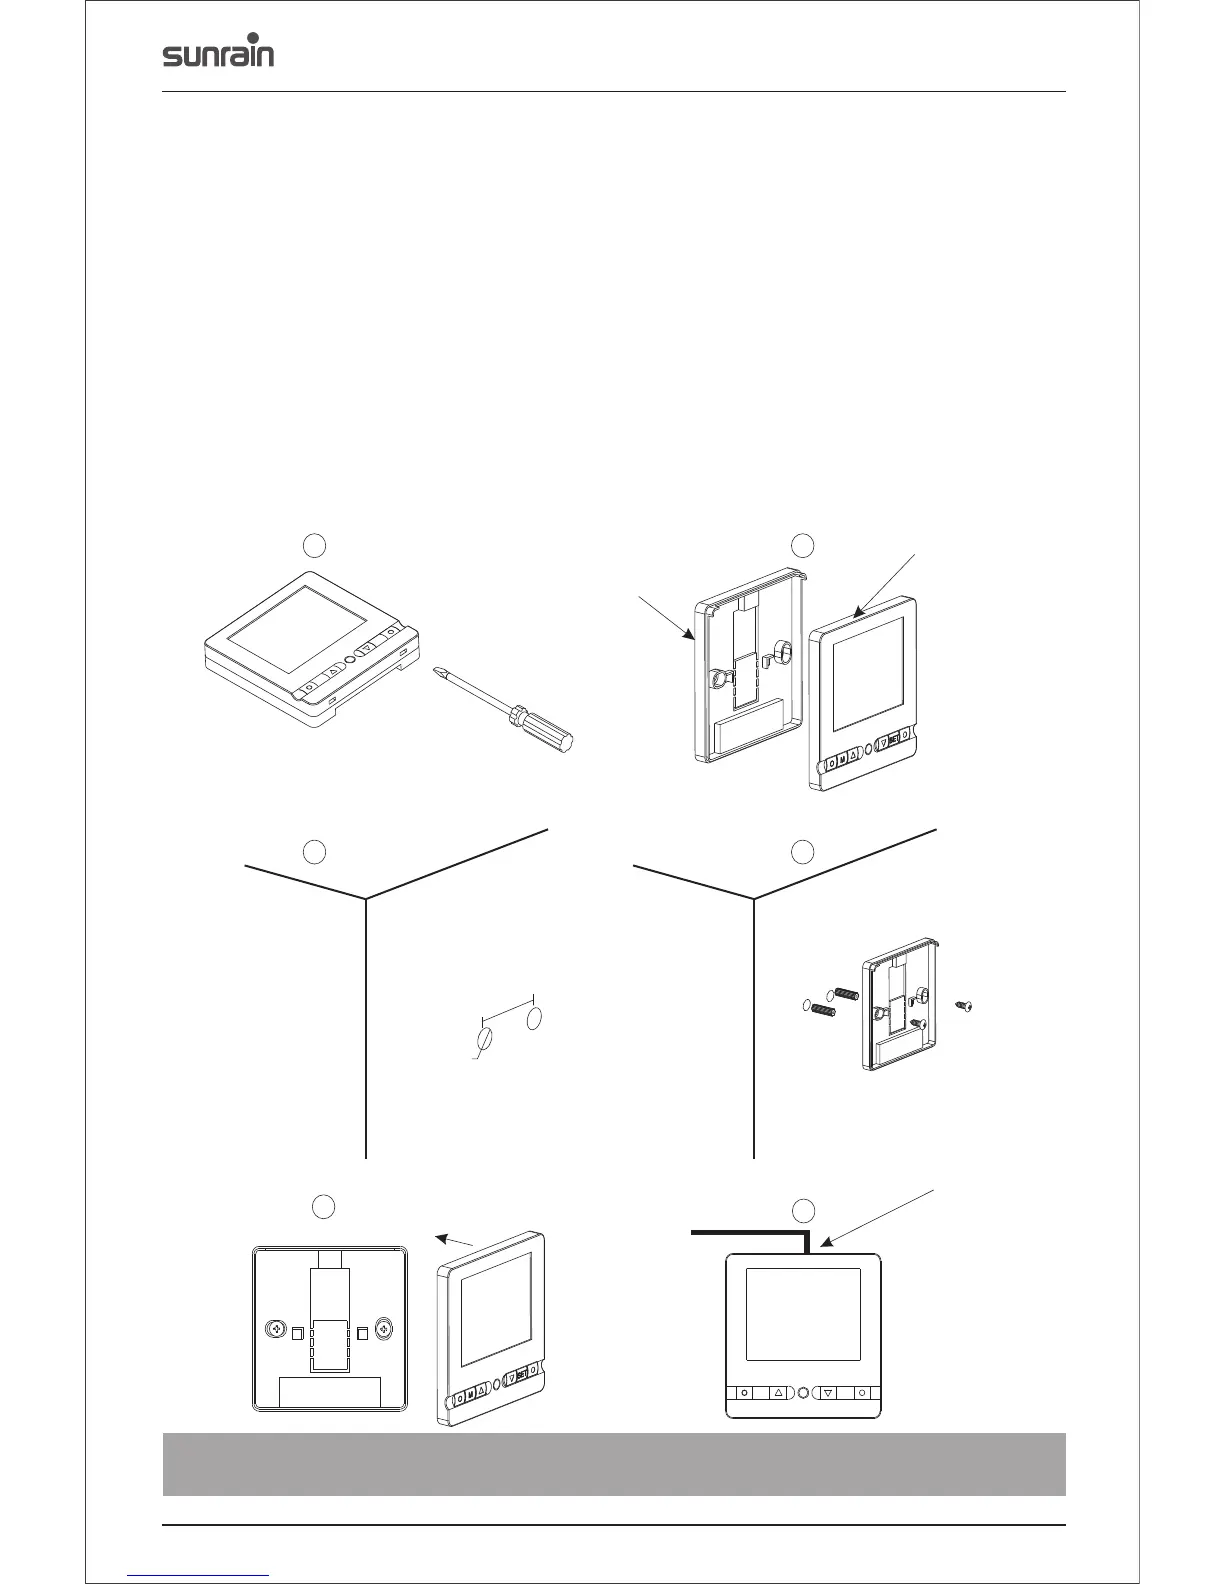
5.4. Wire Controller Installation
The wired controller is originally fixed on the maintenance door of the machine; please refer to the
to the steps below you want to install it on the wall:
?1.Take down the controller from the machine. The communication wire is connected with the circuit
board, separate them where they meet.
?2.Use a screwdriver to open the clip as picture 1, separate the controller as 2 parts, as picture 2.
?3.On the wall that you are going to install the controller, drill 2 holes at a level parallel to the sight line as
picture 3. The hole distance is 60mm, diameter is 8mm.
?4.Place the plastic screws of the enclosure into the hole, and use the tapping screw (ST4*16 D-1)
enclosed to fix the back cover of controller on the wall, as picture 4.
?5.Match the front and back covers perfectly, as picture 5, make sure that it is fixed firmly on the wall.
?6.Connect the communication wire firmly.
1 2
5
6
The front cover
60mm
Φ8
3 4
Outlet of the communication wire
ATTENTION:
When the controller is fitted on the wall, don't pull the communication wire, or it may become loose.
The back cover
13