2
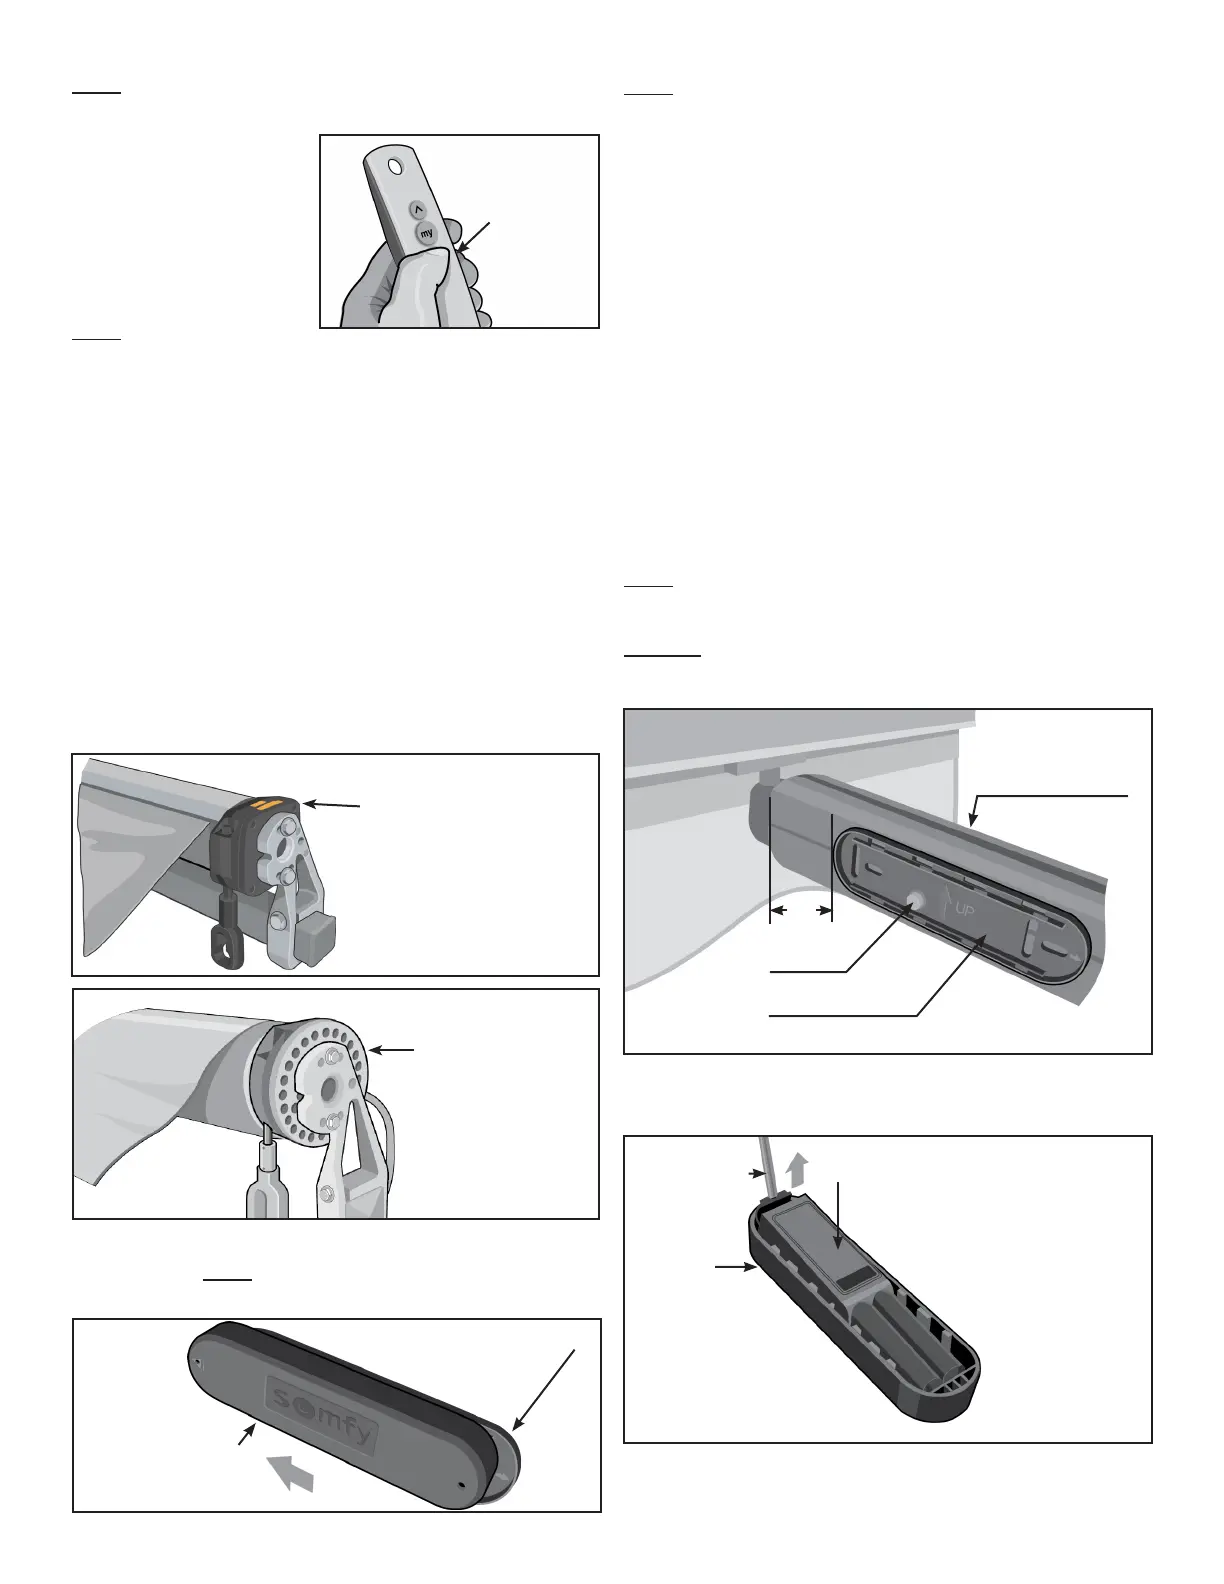
1. Make sure that the
Lower Buon on the
Remote Transmier
is the buon that
OPENS your Awning.
See Figure 2.
Note: If the Lower
Buon does not OPEN your Awning but, instead
CLOSES your Awning, you will need to complete the
steps for Changing the Direcon of Motor Rotaon.
2. Slide the Mounng Plate o of the Sensor Housing.
See Figure 3. Note: Verify that the Magnet is axed
to the inside of the Mounng Plate. See Figure 1.
Note: All le and right references are as you are
facing the house with the Awning fully opened.
3. With the Awning fully open, install the Mounng
Plate on the inside of the Lateral Arm, on the Motor
side of the Awning, as follows.
3a. Clean the Lateral Arm with a cloth and an
alcohol based solvent. (Preferred installaon
temperature of 70 degrees).
3b. Aach one side of the double-sided foam tape
to the base of the Mounng Plate.
3c. Aach the Mounng Plate to the Lateral Arm
approximately 4 inches from the end of the Lateral
Arm, where the Arm connects to the Front Bar.
Make sure the Arrow on the Mounng Plate is
facing UP. See Figure 4.
Note: The Mounng Plate when installed will face
toward the inside of the Awning.
CAUTION: Incorrect placement of the Mounng Plate
may damage the SENSOR when the Awning closes.
Front Bar
4”
Valance
Mounng Plate
Magnet
Lateral Arm
Closest to Motor
4. Remove the Sensor from the Housing using a small
at blade screwdriver. See Figure 5.
Figure 5
Figure 4
Figure 3
Mounng Plate
Sensor Housing
Sensor
Housing
Screwdriver
Figure 2
Lower Buon
must OPEN
the Awning
• If your Motor has a Square, Black Housing
(See Figure 2a), follow Appendix A on Page 6,
“Changing the Direcon of Motor Rotaon for the
RTS Motor Only.”
• If your Motor has a Round, Silver Housing
(See Figure 2b), follow Appendix B on Page 7,
“Changing the Direcon of Motor Rotaon for the
Sunea Motor Only”
Once you have veried that the lower buon on the
Remote OPENS your Awning, connue with Step 2.
For this type motor,
use Appendix A to
change direcon of
motor rotaon.
Figure 2a
RTS Motor
Figure 2b
For this type
motor, use
Appendix B to
change direcon
of motor rotaon.
Sunea Motor
Note: If you have a MulChannel Remote, ensure
the correct Channel is selected.