2 • Questions? Call or Text +1-801-658-0015
Orion
™
PJ User Manual
• Insert the RJ45 Darkening Lens cable (from
the back of the Darkening Lens System or
“ADL”) into the Shutter port (B) on the back of
the welder. If using a microscope, see page 5
for instructions. Note: Basic ADL is hard wired.
Upgraded ADL needs 2 connections: 1) Shutter
Port (B) 2) RJH5 Port on back of ADL.
• Connect the alligator clip to the Grounding port
on the front panel.
• Connect the stylus to the back of the welder
(C).
• Adjust the Darkening Lens Shade by turning the
Shade dial above the Darkening Lens Screen.
Turn clockwise for a lighter shade and count-
er-clockwise for darker shade.
Microscope Arm Mounting Options
If you purchased the Orion PJ with a microscope, care-
fully follow these instructions.
Mounting Option 1 - Clamp to Table
This option is best for tables with accessible edges and
for mounting without drilling holes in the table.
Note: If your table is thicker than 3-1/2” (9cm), follow
mounting option instructions 2 or 3 on the next page.
Hardware required from Box 2:
(1) Angled Bracket (C)
(1) Sunstone Microscope Arm Assembly (A)
(1) Clamp Mechanism (D)
(5) Flat Head Hex Screws (G)
•
• As shown in Figure 2.3, attach the Angled
Bracket (C) to the bottom of the Microscope
Arm Assembly using three (3) of the included
Allen wrench (L).
• Attach the Clamp Mechanism (D) to the Angled
Figure 2.3. Attach Angled
Bracket (C) to Microscope
Arm Assembly (A).
Figure 2.4. Attach Clamp
Mechanism (D) to Angled
Bracket (C).
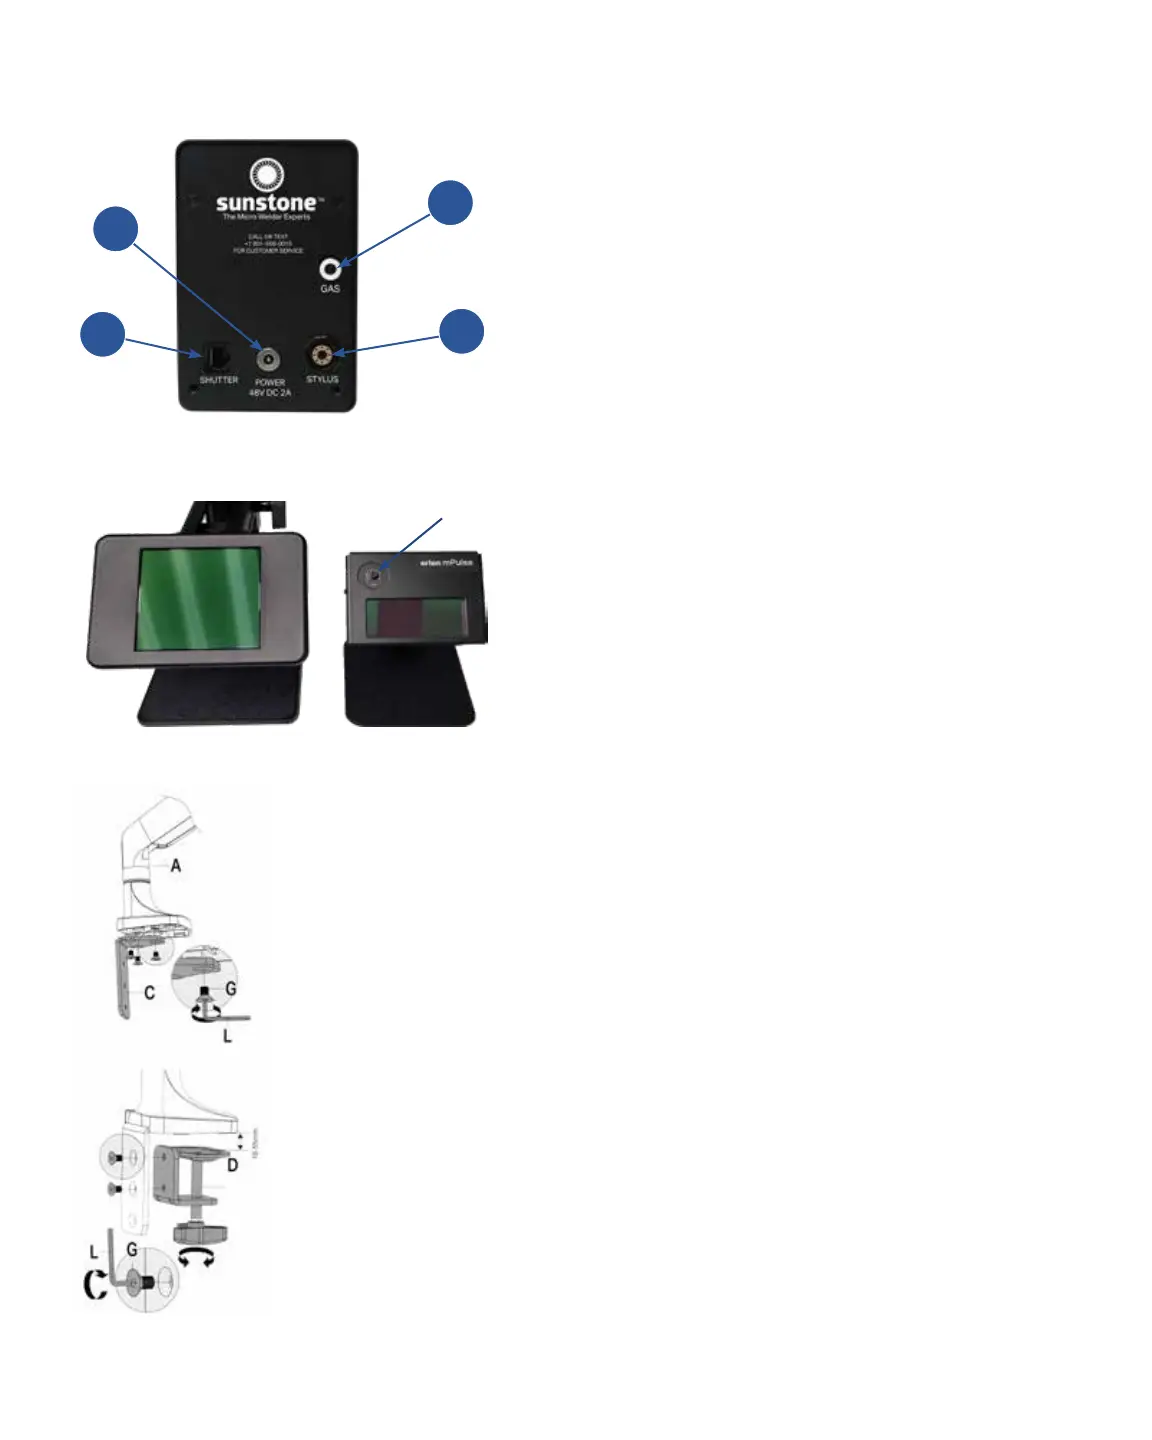
Figure 2.1. The back panel of the Orion mPJ. (A) Power Port.
(B) Shutter port. (C) Stylus Port. (D) Argon Gas Port.
Figure 2.2. Upgraded Auto Darkening Lens (Left) and Regular
Auto Darkening Lens (Right).
Shade Dial
B
A
C
D
 Loading...


