8
NOTE: DIAGRAMS & ILLUSTRATIONS NOT TO SCALE.
Figure 11
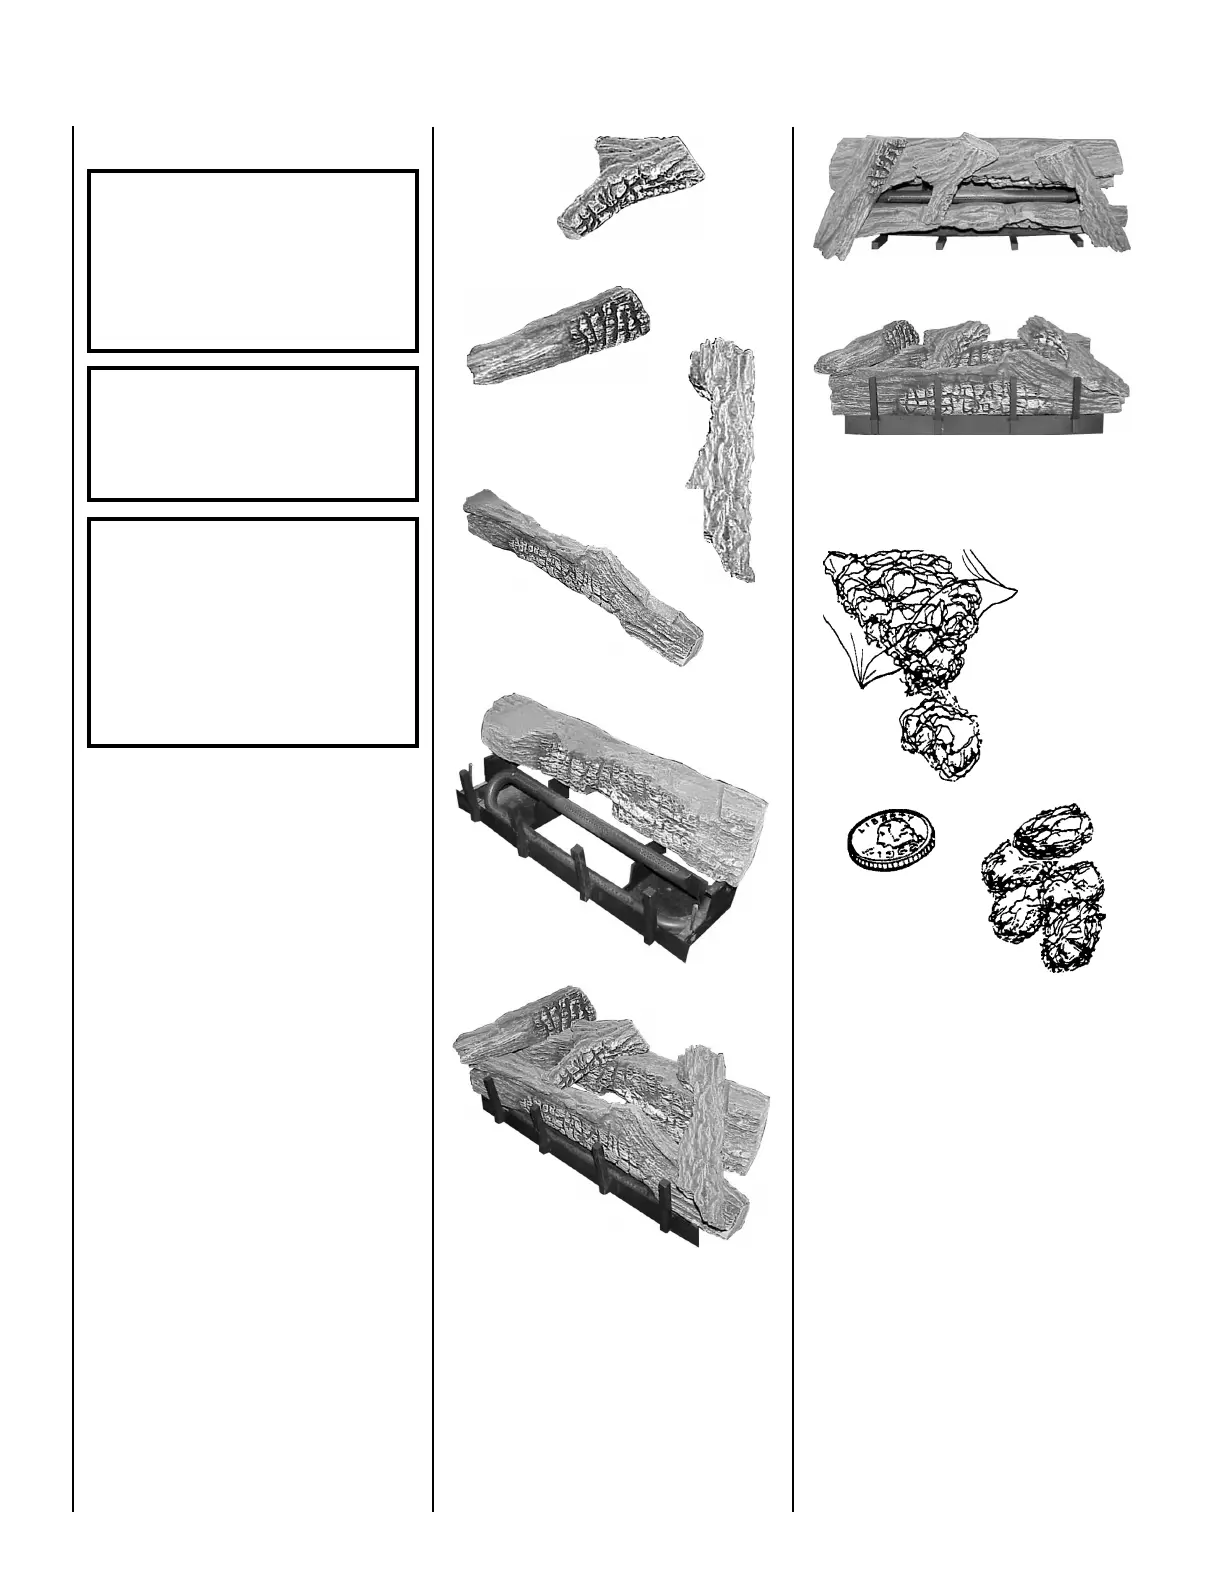
Step 1. Carefully position the ceramic fiber
logs and twigs over the burner as shown in
Figures 10 and 11.
Place the front log over
two pins located at either side of the front log
platform area, charred side forward. Position
the rear log over its pins in a similar fashion.
Figure 11
details the log set showing a front
view and top view of the single piece assembly.
Step 2. Proper twig placement is critical to
prevent sooting. Refer to
Figure 11
and place
the twigs as shown. Twigs should be placed in
the gaps between the flame peaks and should
be positioned so that at no time they impinge
the flames.
Step 3. Remove the rockwool from the pack-
aging and tear into nickle size pieces
(Figure
12 )
. Spread along the front edge of the front
burner. Do not use more than is necessary.
When properly positioned, the rockwool will
unevenly cover approximately 85% of the gap
between the front burner and the grate front
face with no appreciable openings.
Figure 12
WARNING: THE SIZE AND POSITION
ON THE LOG SET WAS ENGINEERED TO
GIVE YOUR APPLIANCE A SAFE, RELI-
ABLE AND ATTRACTIVE FLAME PAT-
TERN. ANY ATTEMPT TO USE A DIF-
FERENT LOG SET IN THE FIREPLACE
WILL VOID THE WARRANTY AND WILL
RESULT IN INCOMPLETE COMBUSTION,
SOOTING, AND POOR FLAME QUALITY.
WARNING: LOGS GET VERY HOT AND
WILL REMAIN HOT UP TO ONE HOUR
AFTER GAS SUPPLY IS TURNED OFF.
HANDLE ONLY WHEN LOGS ARE COOL.
TURN OFF ALL ELECTRICITY TO THE
APPLIANCE BEFORE YOU INSTALL
GRATE AND LOGS.
WARNING: THIS APPLIANCE IS NOT
MEANT TO BURN WOOD. ANY ATTEMPT
TO DO SO COULD CAUSE IRREPARABLE
DAMAGE TO YOUR APPLIANCE AND
PROVE HAZARDOUS TO YOUR SAFETY.
Logs and Rockwool Placement
TOP
FRONT
b.
Figure 10
d.
e.
c.
a.