Do you have a question about the Supermicro AS-8125GS-TNHR and is the answer not in the manual?
| Brand | Supermicro |
|---|---|
| Model | AS-8125GS-TNHR |
| Category | Server |
| Language | English |
Provides information for the installation and use of the A+ Server AS-8125GS-TNHR.
Provides links to download necessary drivers, utilities, and safety information for the server.
Information on finding a secure data deletion tool on the Supermicro website.
Highlights symbols used in the manual to indicate warnings for safety and damage prevention.
Provides a brief outline of the functions and features of the A+ Server AS-8125GS-TNHR.
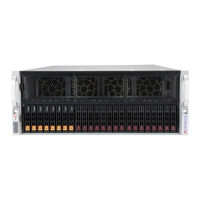
Displays main features of the system through front and rear views, referring to Appendix B for details.
Illustrates the system's architecture and component connections, showing data flow.
Details the internal connections and layout of the H13DSG-O-CPU-D-P motherboard.
Shows jumper, connector, and LED locations on the motherboard for reference.
Provides a brief overview of the server installation chapter, focusing on rack mounting.
Instructions for inspecting and unpacking the server system upon delivery.
Covers essential considerations and precautions before installing the server into a rack.
Safety precautions related to rack installation, stability, and leveling.
Safety precautions for handling and installing the server system, including weight considerations.
Factors to consider when mounting the server in a rack, such as temperature and airflow.
Step-by-step guide for installing the server rack rails, including template usage.
Procedure for securely mounting the server onto the installed rack rails.
Procedure to safely remove power from the system before maintenance or component replacement.
Instructions on how to remove chassis trays to access internal components.
Detailed steps for installing CPUs and heatsinks, including warnings and tool requirements.
Guidelines and procedures for installing DDR5 DIMM modules, including population sequences.
Procedures for removing and installing the motherboard's CMOS battery, including disposal.
Information on supported storage drives and detailed installation of hot-swap drives.
Procedures for replacing system fans and installing motherboard air shrouds and GPU air blockers.
Information on redundant power supplies, their auto-switching capability, and LED indicators.
Instructions for installing expansion cards into PCIe slots, including riser card configurations.
Defines pinouts for 12V power connectors for the motherboard, backplane, and GPUs.
Details fan headers, chassis intrusion header, and IPMB System Management Bus header pinouts.
Explains jumper functionality and provides a procedure for clearing CMOS settings.
Describes the function and status of various LEDs on the motherboard, including UID and BMC LEDs.
Step-by-step guide for installing the Windows operating system, including driver loading.
Instructions for downloading and installing system drivers from the Supermicro website.
Overview of SuperDoctor 5 for system monitoring, health information, and management.
Information on the Baseboard Management Controller (BMC) and default user password.
Lists storage protocols (SATA, SAS, NVMe) supported by the drive bays and requirements.
Information on the Trusted Platform Module (TPM) for system security and hard drive authentication.
Points to Supermicro website for specifications, support downloads, FAQs, and contact information.
Describes the Baseboard Management Controller (BMC) interface and dashboard functionalities.
Provides procedures for diagnosing and resolving system issues like no power, no video, or boot failure.
Guidelines for contacting technical support, including required system information.
Answers common questions regarding memory support, BIOS updates, and power button functionality.
Explains the process for obtaining RMA numbers and returning products for warranty service.
Details the system's innovative cooling procedure after shutdown and LED indicators.
Step-by-step guide for removing and installing the motherboard battery, including proper disposal.
Guidance on purchasing replacement parts from authorized distributors for professional service.
Procedures for reporting system issues and contacting Supermicro technical support.
Instructions for providing feedback on the manual to improve customer experience.
Provides contact information for Supermicro headquarters, Europe, and Asia-Pacific regions.
Introduces industry standard warnings provided to warn users of potential bodily injury.
Explains the meaning of the general warning symbol and its implications for safety.
Warns users to disconnect all power sources before servicing system components.
States that only authorized and qualified personnel should install or service the equipment.
Warns that the unit is intended for installation in restricted access areas.
Warns about the danger of explosion if the battery is replaced incorrectly.
Warns to disconnect all power supply connections to de-energize the unit when servicing.
Mandates compliance with local and national electrical codes during equipment installation.
Instructs to handle the ultimate disposal of the product according to all national laws and regulations.
Warns about hazardous moving parts in fans and advises keeping clear during removal.
Advises using provided or designated cables and adapters to prevent malfunctions or fire.
Details processors, BIOS, memory, storage, I/O, motherboard, chassis, cooling, security, and power supply.
Covers system weight, operating temperature, and humidity ranges for optimal performance.
Lists regulatory compliance, applied directives, standards, and specific warnings.