SuperServer 5019S-MT User's Manual
3332
Chapter 3: Maintenance and Component Installation
Figure 3-10. Installing the Onboard Battery
Warning: There is a danger of explosion if the onboard battery is installed upside down (which
reverses its polarities). This battery must be replaced only with the same or an equivalent type
recommended by the manufacturer (CR2032).
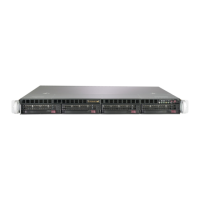
Figure 3-11. Removing a Drive Carrier
3.4 Chassis Components
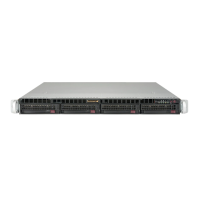
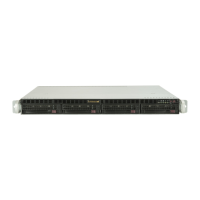
Hard Drives
Your server may or may not have come with hard drives installed. Up to four 3.5" hard drives
are supportd by the chassis.
The SATA drives are mounted in drive carriers to simplify their installation and removal from
the chassis. (Both procedures may be done without removing power from the system.)
Removing a Hot-Swap Drive Carrier
1. Push the release button on the carrier.
2. Swing the handle fully out.
3. Grasp the handle and use it to pull the drive carrier out of its bay.
Mounting a Drive in a Drive Carrier
1. To add a new drive, install it into the carrier with the printed circuit board side facing
down so that the mounting holes align with those in the carrier.
2. Secure the drive to the carrier with the screws provided, then push the carrier
completely into the drive bay. You should hear a *click* when the drive is fully inserted.
This indicates that the carrier has been fully seated and connected to the midplane,
which automatically makes the power and logic connections to the hard drive.
PCI Expansion Card Installation
The system includes a pre-installed riser card (p/n CSE-RR1U-E8) that positions a standard
size PCI-E x8 card at a 90 degree angle, allowing it to t inside the chassis.
Installing PCI Expansion Cards
The CSE-RR1U-E8 riser card has already been pre installed into the motherboard. Perform
the following steps to install an add-on card:
Begin by removing power from the system as described in section 3.1.
1. Remove the chassis cover to access the inside of the system.
2. Remove the PCI slot shield on the chassis by releasing the locking tab.
3. Insert the expansion (add-on) card into the riser card.
4. Secure the card with the locking tab.
Motherboard Battery
The motherboard uses non-volatile memory to retain system information when system power
is removed. This memory is powered by a lithium battery residing on the motherboard.
Replacing the Battery
Begin by removing power from the system as described in section 3.1.
1. Push aside the small clamp that covers the edge of the battery. When the battery is
released, lift it out of the holder.
2. To insert a new battery, slide one edge under the lip of the holder with the positive (+)
side facing up. Then push the other side down until the clamp snaps over it.
Note: Please handle used batteries carefully. Do not damage the battery in any way; a
damaged battery may release hazardous materials into the environment. Do not discard a
used battery in the garbage or a public landll. Please comply with the regulations set up by
your local hazardous waste management agency to dispose of your used battery properly.

 Loading...