2-10
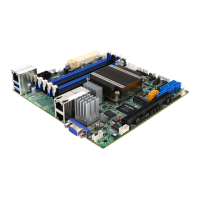
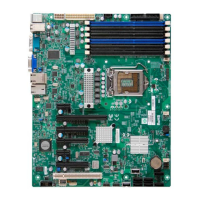
X8SIA/X8SIA-F User's Manual
2-3 System Memory
CAUTION
Exercise extreme care when installing or removing
DIMM modules to prevent any possible damage.
Platform DIMM Type Intel® Xeon® Series Processors
X8SIA/X8SIA-F Non-ECC UDIMM Only Not Supported
ECC UDIMM Only Supported (see Table 1)
RDIMM Only (with ECC) Supported (see Table 2)
Mixed ECC with non-ECC Not Supported
Mixed UDIMM/RDIMM Not Supported
Table 1 - DDR3 ECC/Unbuffered (UDIMM) Memory Support
ECC UDIMM 1Gb (x8 DRAM) 2Gb (x8 DRAM)
Single Rank Up to 4GB
(4 x 1GB DIMM Modules)*
Up to 8GB
(4 x 2GB DIMM Modules)*
Dual Rank Up to 8GB
(4 x 2GB DIMM Modules)*
Up to 16GB
(4 x 4GB DIMM Modules)*
Quad Rank Not Supported Not Supported
*Note: For ECC UDIMMs, only Slot 1 and Slot 2 may be populated per channel.
How to Install DIMMs
Insert the desired number of DIMMs into the memory slots, starting with 1.
DIMM1A (Slot 1, Channel A - see Figure A on the following page). Insert each
DIMM module vertically into its slot. Pay attention to the notch along the bot-
tom of the module to prevent incorrect DIMM module installation.
Gently press down on the DIMM module until it snaps into place in the slot. 2.
Repeat step 1 to install DIMM1B if needed. See Page 2-13 for details.
Memory Support
The X8SIA/X8SIA-F supports up to 16GB of DDR3 ECC UDIMM or up to 32GB
of ECC DDR3 RDIMM (1333/1066/800 MHz in 6 DIMM slots.) Populating these
DIMM modules with a pair of memory modules of the same type and same size
will result in interleaved memory, which will improve memory performance. Please
refer to the table below:
Note: Check the Supermicro website for a list of memory modules that
have been validated with the X8SIA/X8SIA-F motherboard.
 Loading...


