21
NOTE:
When performing the passcode input operation
again after the operation has been cancelled
due to passcode input failure or after having
interrupted the operation;
1) Install the emergency switch lock plate.
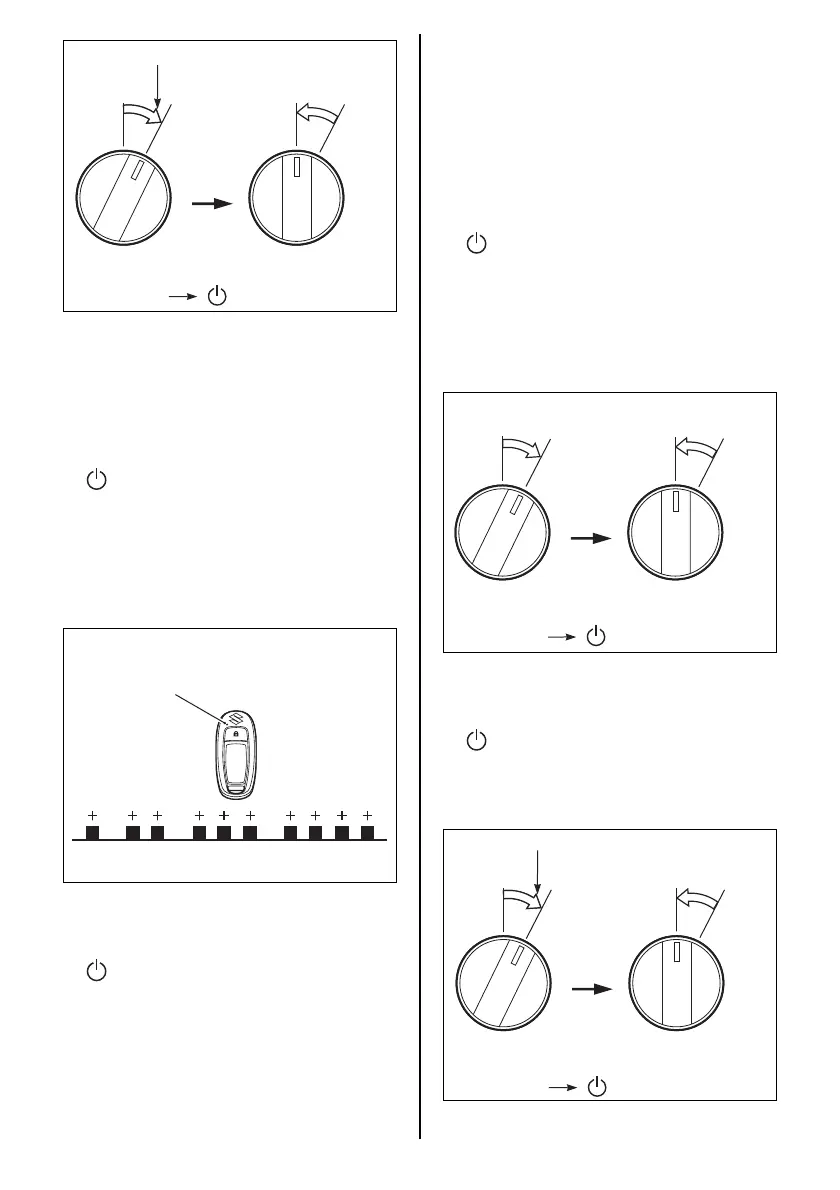
2) Turn the main switch to the “ON & OFF”
(“ ”) position and then release it to the
“PUSH START/STOP” position.
3) Perform the procedure described above
from Step 5.
(5)After the buzzer has sounded once, the key-
fob LED will blink the entered passcode.
(6)Install the lock plate on the emergency stop
switch.
(7)Turn the main switch to the “ON & OFF”
(“ ”) position and then release it to the
“PUSH START/STOP” position to turn the
Keyless Start System OFF.
After that, do not perform any operation for
at least 30 seconds, while the system per-
forms passcode update.
ON & OFF ON & OFFON & OFF
PUSH
START
STOP
PUSH
START
STOP
Hold it for five (5) seconds.
* If equipped with top mount type
remote control box: (Main switch panel)
“ON & OFF” “ ”
Example: In the case of passcode 1234
Number of key-fob blinks
LED
PASSCODE CONFIRMATION
1. Confirm that the engine is stopped.
2. Make sure the emergency switch lock plate
is in place.
3. Confirm the key-fob is within the communi-
cation range of the Keyless Start System.
4. Confirm the key-fob is in ON mode. (Refer to
“Switching the communication mode of the
key-fob” section.)
5. Turn the main switch to the “ON & OFF”
(“ ”) position and then release it. The main
switch automatically returns to the “PUSH
START/STOP” position.
The buzzer on the engine control side emits
one (1) long sound while the buzzer on the
keyless control unit side emits two (2) short
sounds simultaneously.
6. Within eight (8) seconds after performing
Step 5, start the following operation.
(1)Turn the main switch to the “ON & OFF”
(“ ”) position and hold it for five (5) sec-
onds or longer, then release it to the “PUSH
START/STOP” position.
Repeat this operation for two more times.
ON & OFF ON & OFF
PUSH
START
STOP
PUSH
START
STOP
* If equipped with top mount type
remote control box: (Main switch panel)
“ON & OFF” “ ”
ON & OFF ON & OFFON & OFF
PUSH
START
STOP
PUSH
START
STOP
Hold it for five (5) seconds.
* If equipped with top mount type
remote control box: (Main switch panel)
“ON & OFF” “ ”