Do you have a question about the Suzuki SP-67 and is the answer not in the manual?
Avoid conditions like direct sunlight, high temperatures, humidity, dust, and vibration to prevent damage.
Turn off power when not in use, unplug during storms, and avoid overloading outlets with high-power appliances.
Turn off all related devices before connecting or disconnecting MIDI cables to prevent damage.
Avoid excessive force, unplug cables by the plug, disconnect all cables before moving, and prevent physical shocks.
Clean with a soft cloth, use wax polish sparingly on the cabinet, avoid paint thinners, and wipe keys/buttons with a damp cloth.
Move the instrument away from radios/TVs if interference occurs; avoid rapid on/off switching.
Tampering can cause irreparable damage; contact a dealer or factory for service or modifications.
Connect the adaptor output cable to the DC 12V IN jack and the input to an AC outlet.
Requires eight 1.5V 'C' cell batteries. Replace when volume distorts or problems occur.
Open bottom panel, insert eight new batteries carefully, ensuring correct polarity.
Slides to ON for power, or STANDBY to turn off display illumination while piano operates.
Sliding control to adjust the overall volume of the keyboard.
Controller to adjust the volume of the auto accompaniment only.
Use TEMPO buttons or -/NO, +/YES buttons to change tempo from 40-240 bpm.
Divides keyboard into two sections; right hand has master voice, left hand can have a different voice.
Mixes an additional voice with the selected keyboard voice for layered sound.
Applies sustain to engaged keys; icon underlines on display. Has sustain pedal jack.
Built-in timing device ('ticks') for practice. Replaces percussion sound if auto-accompaniment plays.
Displays chord type played while auto accompaniment is engaged.
Auto accompaniment stops when you stop playing, entering sync start standby.
Auto accompaniment is on standby; rhythm starts when you play a chord.
Starts rhythm style and auto accompaniment with the first recognized chord.
Starts rhythm with an introduction or ends accompaniment with an ending pattern.
Inserts a short rhythm pattern (1-2 measures) into the accompaniment.
Selects a variation of the main rhythm style pattern for dynamic effect.
Adjusts parameters like transpose, tuning, touch, reverb, chorus, harmony, etc.
Used with SELECT to choose modes within features like touch, percussion, reverb, etc.
Accesses 138 GM voices; use numeric pad or +/- buttons to select.
Engages rhythm styles; use +/- buttons or numeric pad to select from 100 styles.
Activates the music training feature to learn songs.
Returns the keyboard to the default power-up settings.
Selects auto accompaniment mode and fingering types (single, fingered, piano).
Saves/recalls favorite settings (Registration) or applies ideal settings per rhythm (OTS).
Used with Registration/OTS to select saved settings or one-touch settings.
Selects banks of registration memory (4 banks, 6 registrations each).
Saves current keyboard settings into registration memory.
Allows direct input of numbers for voice, style, or select button settings.
Records performances using a 3-track sequencer; stores note events and accompaniment.
Selects the auto accompaniment track for recording or playback.
Two tracks (MEL 1, MEL 2) for recording melody performance.
Plays back recorded tracks separately, paired, or together.
Sets piano for left, right, or both hand exercises in the training feature.
Alternates between voice kits and style kits for quick selection.
Twelve buttons for rapid selection of voices and styles.
Plays demonstration songs; press again to stop.
Smoothly raises or lowers pitch by rolling the wheel up or down.
Shows features/functions currently being edited, reverting to default after five seconds.
Displayed when Reverb and/or Chorus effects are engaged.
Points to the currently engaged mode (voice, style, training).
Shows selected parameters like voice, style, tempo, registration, and page.
Graphically represent engaged features; an underline indicates the feature is active.
Points to available menu options as the SELECT button is pressed.
Graphically shows accompaniment track levels (volume, rhythm, chords, phrases) as they play.
Press DEMO button to play all ten demo songs repeatedly.
Use +/- buttons or numeric pad to change songs while demo plays.
Select voices quickly using twelve buttons assigned to voice/style kits.
Access 138 GM voices; use numeric pad or +/- buttons, entering three digits.
Assign favorite voices to USER buttons for quick selection.
Mixes an additional voice with the main voice for a layered sound.
Divides keyboard into sections; assigns different voices to left/right hands.
Select rhythm styles quickly using twelve buttons assigned to voice/style kits.
Choose from 100 styles using numeric pad or +/- buttons (enter two digits).
Assign favorite rhythm styles to USER buttons for quick selection.
Adjust tempo using +/- buttons; styles have preset tempos.
Methods include Straight Start, Intro, Synchronized Start, and Synchronized Stop.
Select rhythm variations or insert fill-in patterns for dynamic effect.
Use the built-in metronome for practice, it ticks with the rhythm style tempo.
Modes include Single, Fingered, and Piano for chord input and accompaniment.
Shows chord names on screen as played in auto accompaniment.
Simple chord production using minimum fingers for various chord types.
Ideal for those who know chords; allows playing chords in the auto accompaniment section.
Enter chords anywhere on the keyboard for styled arrangements.
Play in accompaniment section without starting auto accompaniment; layered bass/chord voice.
Adds harmonizing notes to right-hand melody when accompaniment is engaged.
Control start/stop via Straight Start, Intro, Synchronized Start, and Synchronized Stop.
Apply variations to rhythm patterns or insert fill-in patterns.
Shifts the keyboard pitch up or down in semitone intervals up to 12 semitones.
Adjusts pitch accurately over –16 to +16 semitone steps or cents.
Offers four settings: soft, normal, hard, and off (velocity curves).
Selects drum kits for keyboard percussion; ten kits available.
Simulates room/hall reverberation; can be switched on/off or level adjusted.
Adds depth and texture; engage effect and adjust level via the chorus icon.
Engages harmony with three types: Duet (H-1), Trio (H-2), Octave (H-3).
Engages sustain effect where volumes decay gradually after keys are played.
Used in music training to evaluate performance and provide vocal comments.
Choose a rhythm style using quick select buttons or the STYLE button.
Press REGISTER/OTS button so indicator light is off for one touch mode.
Press 1-6 to select desired one touch setting for the rhythm style.
Set parameters, then hold STORE and press a number button (1-6) to save.
Engage registration mode, select bank via PAGE, then press number button (1-6).
Set voice, style, tempo, effects, and other parameters before recording.
Select MEL 1, MEL 2 for melody, or ACCOMP for accompaniment track.
Record Melody Only, Auto Accompaniment Only, or both Melody and Accompaniment.
Press START/STOP or PLAY/STOP. Use INTRO/ENDING for accompaniment ending.
Hear recorded tracks by pressing track buttons and PLAY/STOP.
Press SONG button to engage training; select songs via +/- or numeric pad.
Press START/STOP to listen to song demonstration with chord changes shown.
Play right hand melody following accompaniment after metronome.
Play left hand accompaniment matching melody after metronome.
Play entire section with both hands following rhythm after metronome.
Hear vocal grading and see percentage correct; turn Vocal prompt off to disable grading.
Press the SONG button again to exit the training course.
MIDI IN receives data; MIDI OUT transmits note, velocity, voice changes, etc.
Unit has 16 channels; fixed assignments for master voice, layer, split, bass, chord, percussion.
Connect MIDI Out to external device's MIDI In to sound data on your piano.
Connect MIDI Out to external device to respond to your playing.
Transmit performance for recording/editing or play MIDI music from computer.
Allow communication with other MIDI-equipped products.
Connects for master volume control; minimum when heel up, maximum when heel down.
Engages gradual decay of played piano keys when the pedal is pressed.
For silent playing or output to external amplification; turns off main speakers.
Connect the AC power cord to utilize AC power instead of batteries.
| Brand | Suzuki |
|---|---|
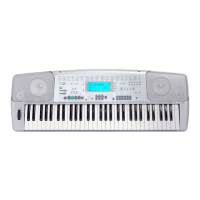
| Model | SP-67 |
| Category | Electronic Keyboard |
| Language | English |