Unbox It
Install the Amplifier
After unboxing the 3000 In-Wall Subwoofer System you will have the following items in
front of you. Please confirm all pieces are available before continuing.
Congratulations on choosing the SVS 3000 In-Wall Subwoofer, a groundbreaking achievement in architectural
subwoofer design. The following steps will guide you through the quick and easy installation process.
We strongly recommend reading the 3000 In-Wall Subwoofer Owner’s Manual to get the best possible
performance. You’ll find useful information about amplifier placement, connections, DSP functions and more.
The best location for your 3000 In-Wall Subwoofer Amplifier is close to the other
electronics in the playback system so line level and power can be connected easily.
It is also important that the Amplifier can easily connect to pre-installed in-wall rated
speaker wire connected to the 3000 In-Wall Subwoofer.
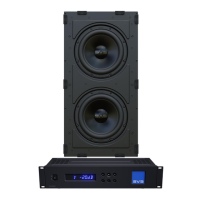
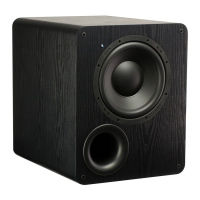
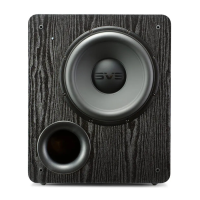
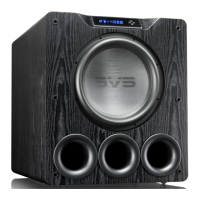
[3000 In-Wall Subwoofer]
x2 for Dual System
[Removable Magnetic Grille]
x2 for Dual System
[Subwoofer Cutout Template]
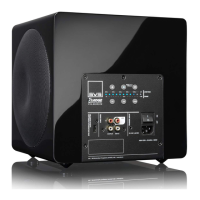
[3000 In-Wall Subwoofer Amplifier]
[Subwoofer Banana Plug Pair]
x2 for Dual System
[Detachable Power Cord]
[Amplifier Rack Mount Kit]
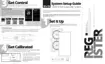
Installation Guide
3000 In-Wall Subwoofer System
3000 In-Wall
Subwoofer Cutout Template
On each side of the 3000 In-Wall Subwoofer
Amplifier, attach the rack mount kit by
inserting the 3 screws in each rack ear by
guiding each directly into the correlating
screw holes on the side of the amplifier.
Don’t overdo it, simple hand-tightening is
enough. Repeat for the second rack-mount
ear.
Once the rack-mount ears are secured, the amplifier
can be installed in a standard 19-inch electronics rack
where 2U rack space is available (mounting hardware
not included). Removing the feet from the bottom of
the amplifier will ensure plenty of clearance for
neighboring electronics.
The 3000 In-Wall Subwoofer Amplifier can be placed on a shelf or installed in a standard 19” equipment
rack. If installing the amplifier on a shelf, the included rack-mount ears are not required. If installing the
amplifier in a rack, attach the rack-mount ears before installation.
2U
RACK
HEIGHT
Amplifier Placement:
Notes for Optimal Performance:
Attaching the Rack Mount Kit:
Rack Mounting:
It is best to leave free air space on all sides if possible to provide optimal air
flow and ventilation.
Place the amplifier in a horizontal position, away from direct sunlight and heat
sources such as hot air ducts or radiators.
Do not place objects on top of the amplifier, place the amplifier on thick
carpet, or obstruct ventilation in any way.
•
•
•
A
B
C