English version
15
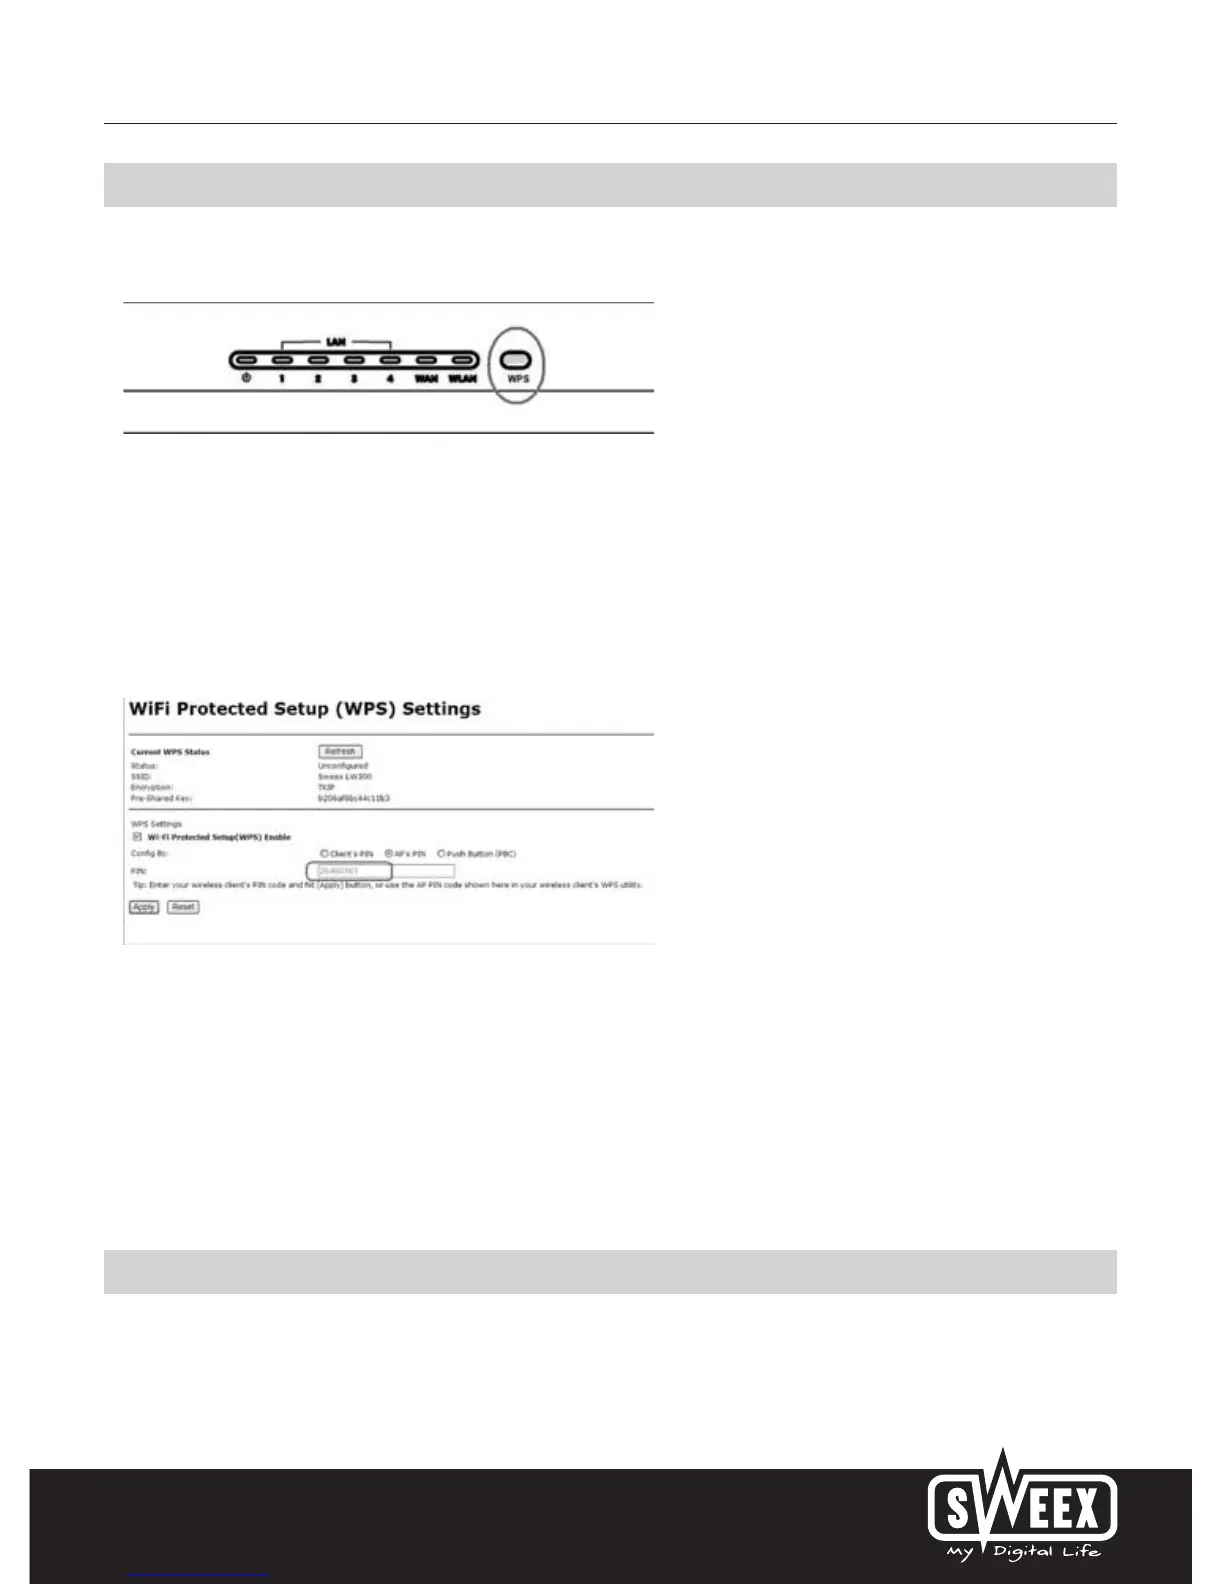
WPS (WiFi Protected Setup)
You can protect your wireless network in a quick and simple manner by means of WPS. This feature only works with computers that use a wireless
card or USB dongle that supports WPS.
1. The WPS feature is enabled by pressing the WPS button at the top of the router. The light will start to blink.
2. A wireless computer that supports WPS can use the automatically generated network key by scanning for the router. The network is now secure.
The same procedure applies to any future computers to be added to the network. You can also read out a PIN code in the router and enter it into the
computers the “old-fashioned” way.
Tick WiFi Protected Setup (WPS) Enable in order to activate WPS. By pressing the WPS button on the router, WPS switches on automatically.
• Select “Client’s IP” to enter a WPS PIN code which has already been entered into the computer. You can often read this from the WPS
configuration software on the computer.
• Select “AP’s PIN” in order to read the WPS PIN code. You should use this code on all your computers.
• Select “Push Button (PBC)” in order to automatically generate a network key by pressing the WPS button on the router.
• Click “Apply” to save the settings.
WPA and WPA2 protection
Left in the column, under “Wireless" click on “Security Settings”.
Complete the following steps for setting WPA security:
 Loading...