English version
16
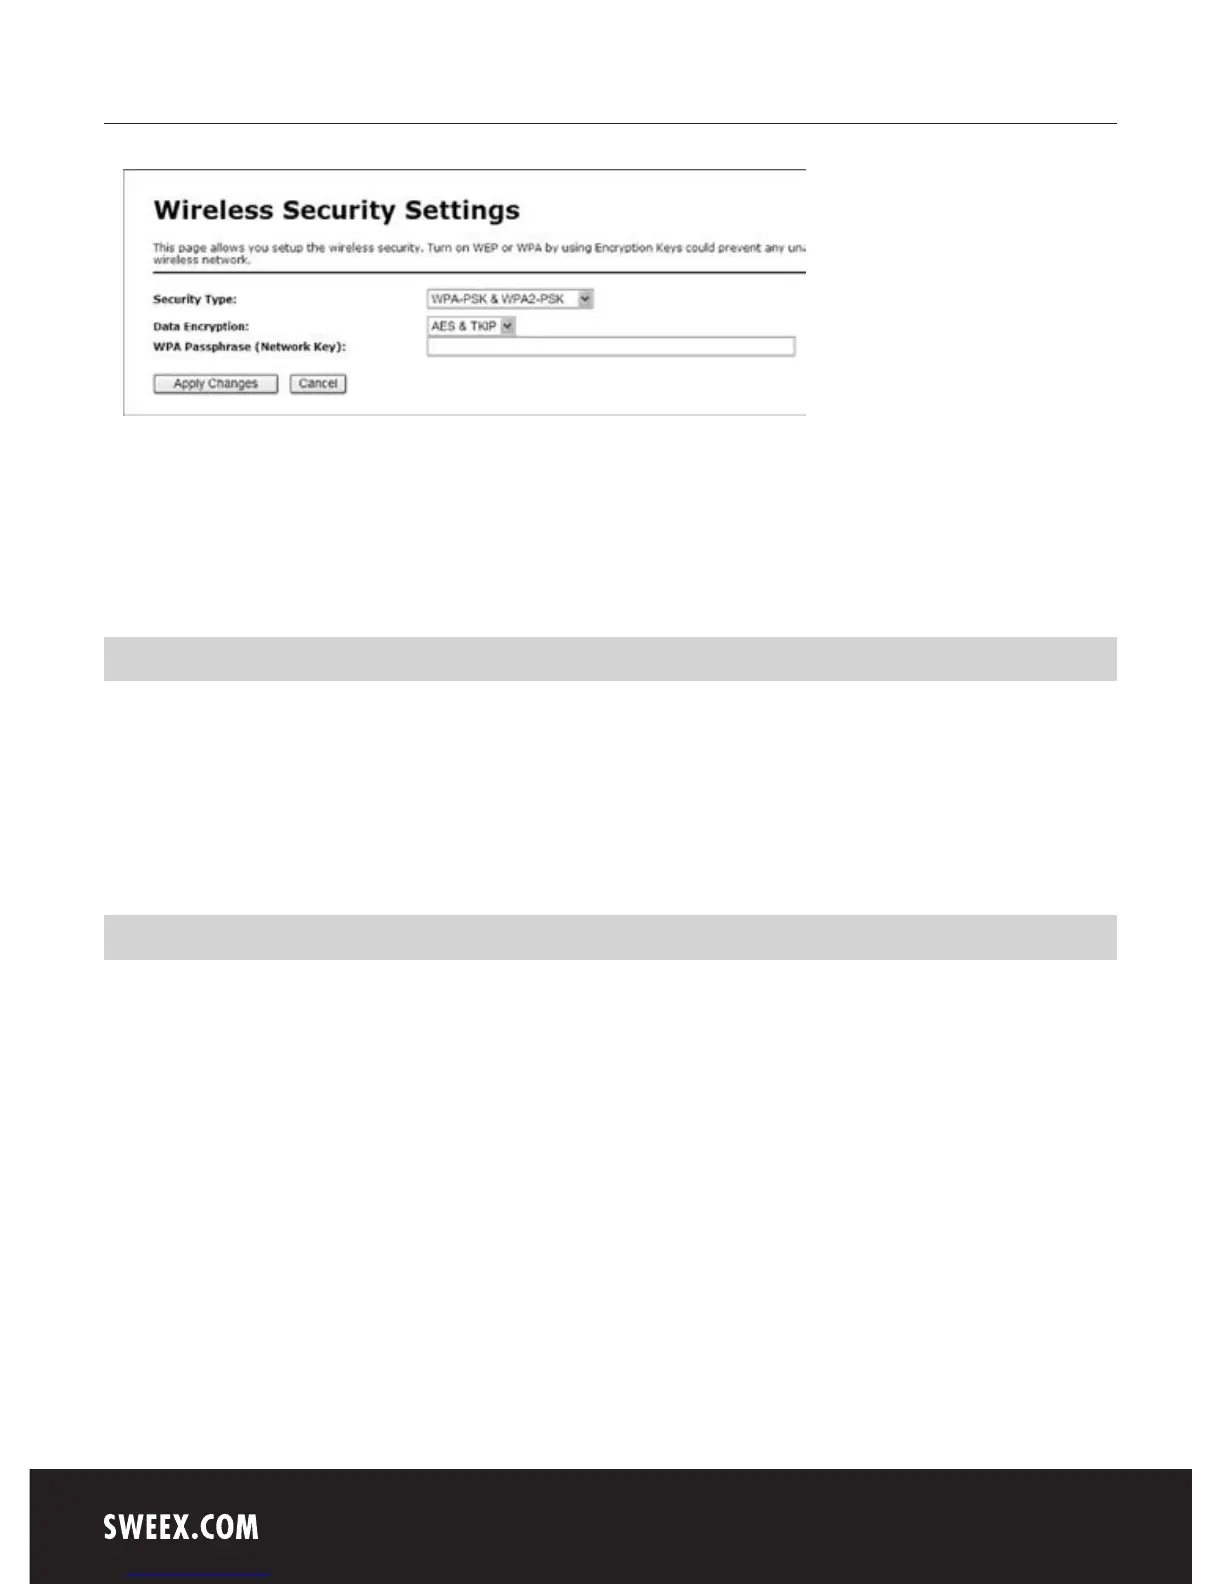
1. Under “Security Type” select “WPA-PSK/WPA2-PSK”.
2. Under “WPA Passphrase”, enter your network key. You can create your own and it may contain 8 to 63 numbers and letters.
3. Click “Apply Changes” to save the settings.
The router is now secured. Reconnect your wireless computer.
Opening ports in the router (Port Forwarding and DMZ)
The built-in firewall in this router cannot be disabled. However, ports can be opened for programmes, games servers or game consoles that require
this.
We recommend using a fixed IP address for computers or game consoles for which ports are opened. This is to ensure that these computers always
use the same IP address as registered in the router. The router may assign a different IP address to the computer so that the forwarding or DMZ
command no longer applies to that computer.
How to assign a fixed IP address to a computer
This is only required for computers for which you want to open ports by means of the Forwarding or DMZ feature. Complete the steps in chapter
“Configuring the computer to connect to the router”. Instead of selecting “Obtain an IP address automatically” (Obtain an IP address automatically)
you select “Use the following IP address” (Use the following IP address).
The IP address in our example is as follows (192.168.30.xxx). The final number you enter must be unique to your network. We recommend
using a number ranging from 150 to 200. Thus an IP address could be (192.168.30.150). A subsequent computer would then be assigned
(192.168.30.151) etc.
For “Subenetmaks” (Subnetmask) you enter: 255.255.255.0
Both under “Default Gateway” (Default gateway) and under “Preferred DNS-server” (Preferred DNS-server) you enter the IP address with which you
log into the router. In our example: 192.168.30.150
Under “Alternative-DNS-server” (Alternative-DNS-server), you can leave the field blank.
Click “OK” twice to save the settings and to close the window.
 Loading...