7-5
7-5) ADJUSTING UPPER THREAD
HOLDER
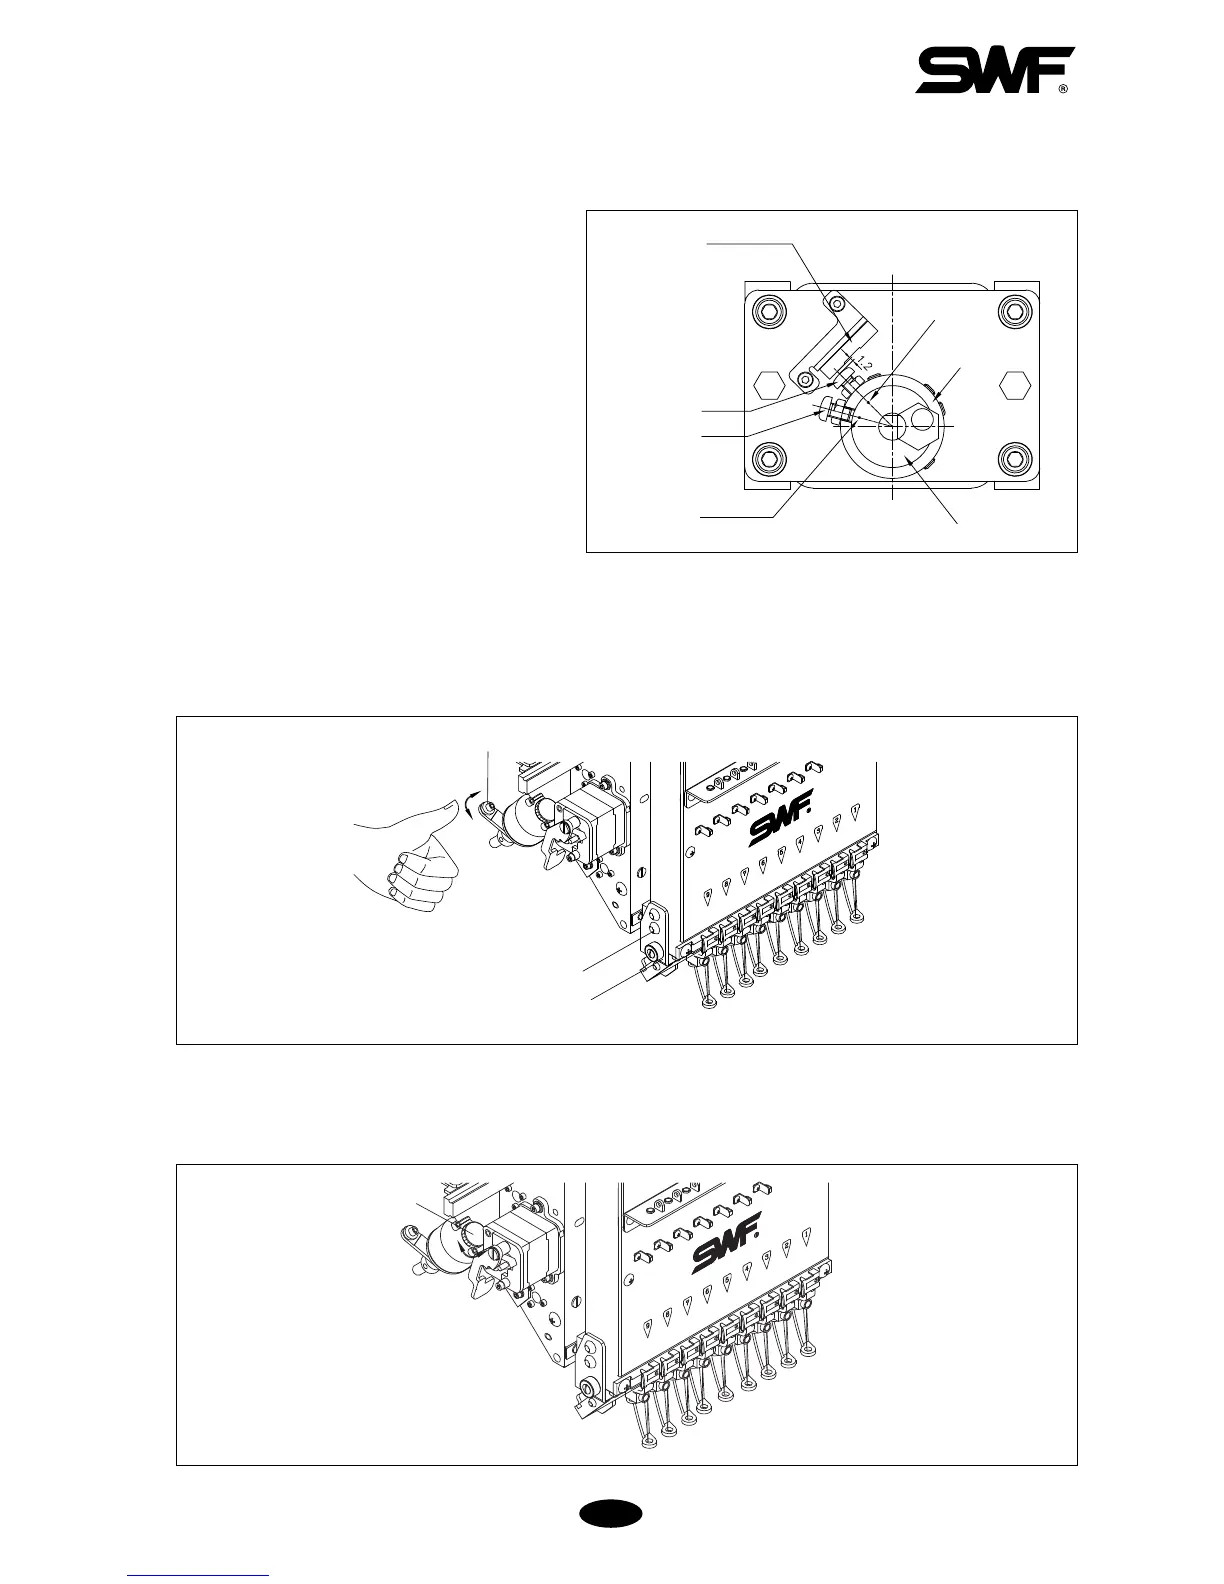
① Adjusting the sensor springs (when wiper
does not return)
Ⓐ Open the wiper motor cover. Of the two
sensor rings, align the center of the rear
sensor spring with #1 carve on the block
on the shaft. Align the center of the front
sensor spring with #2 carve on the block.
Ⓑ Adjust so that the head of the sensor
spring is 1-1.2 mm apart from the wiper
return sensor. Make sure to check if the
wiper return sensor blinks.
[Fig.7-9]
② If the wiper does not operate smoothly, unfasten the screws on the drive link. Move the wiper lever up and down
and unfasten the bracket screws so the wiper is not loaded by the upper thread holder bracket. Fasten the screws
back when the wiper moves smoothly.
③ After the adjustment, run the color change function to check if the wiper operates well at each needle bar.
④ If trimming error or jump error occurs on a certain head during the embroidery, run the wiper clutch to protect the
embroidery and the wiper.
• Press and turn the wiper clutch counterclockwise to run it. Turn it clockwise to stop.
[Fig.7-11]
Wiper return sensor
Rear sensor spring
Front sensor spring
#2 carve
#1 carve
Sensor
adjustment ring
Cam block
[Fig.7-10]
Upper thread holding bracket
Bracket screw
Driver ring crank
Wiper clutch
 Loading...