5
QUICKSTART
2.2. Stages of the levelling process
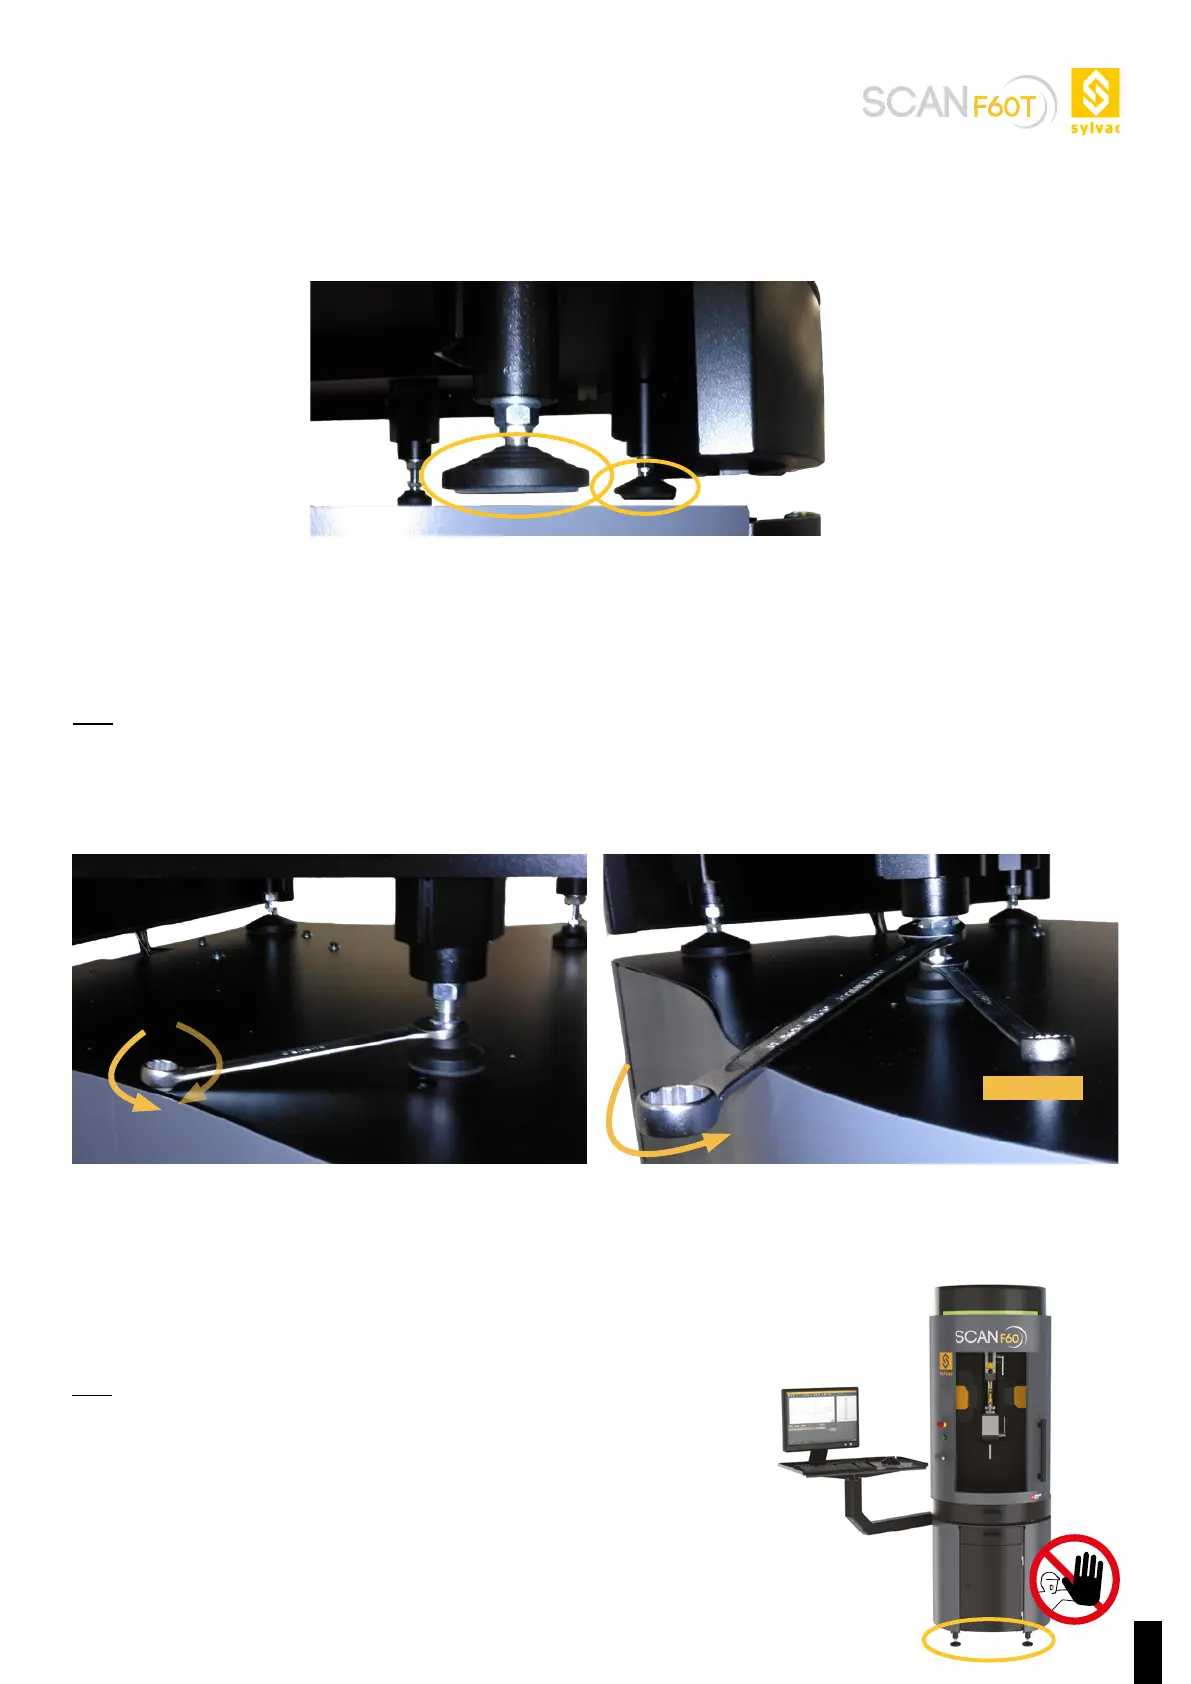
1) Raise the 2 anti-tilt stands (0) so that they are no longer in contact with the bench. (Figure 5)
2) Adjust the height of feet 1, 2 and 3 with a 13 mm spanner as much as is necessary in order to get the spirit level in a
centred position (the order of adjustment of the feet does not matter). (Figure 6)
Figure 5
Figure 6
3) Once the right configuration has been found, tighten foot 4, check that the spirit level is correct and lock all the other
feet in position (from 0 to 4) using a 13 mm spanner and a 19 mm spanner (Figure 7).
Figure 7
4) Then check the spirit level one last time. If it is in the correct position, you have finished.
Note : The levelling process can also be performed using any other 3 of the rear feet (e.g. 2, 3, 4 or 3, 4, 1 or 4, 1, 2)
depending on ease of access.
Note : Note: If installing the machine on a Sylvac bench, first level the bench
using an external spirit level (not integrated) and then adjust the machine
using its own feet. (Figure 8)
Do not adjust the level of the machine using the 4 legs of the bench!
Bloquer
Figure 8

 Loading...