Do you have a question about the SYMA X8HG and is the answer not in the manual?
Details functions of buttons and controls on the remote.
Guides on how to install the HD camera onto the drone.
Guides on how to remove the HD camera from the drone.
Instructions for using the drone's aerial photography capabilities.
General overview of directional controls for the aircraft.
How to control the drone's vertical movement using the left joystick.
How to control the drone's forward/backward movement using the right joystick.
How to turn the drone left or right using the left joystick.
How to fly the drone sideways left or right using the right joystick.
Adjustments for fine-tuning flight stability and direction.
How to correct forward/backward drift while hovering.
General overview of directional controls in Mode 2.
How to control vertical movement using the left joystick in Mode 2.
How to control forward/backward movement using the right joystick in Mode 2.
How to turn the drone left or right using the right joystick in Mode 2.
How to fly the drone sideways left or right using the left joystick in Mode 2.
Adjustments for fine-tuning flight stability and direction in Mode 2.
How to correct forward/backward drift while hovering in Mode 2.
How to correct sideways drift while hovering in Mode 2.
How to correct turning drift while hovering in Mode 2.
Steps for preparing the drone for flight, including power and battery connection.
Methods for starting the drone's motors and preparing for takeoff.
Procedures for safely shutting down the drone after flight.
Describes the drone's behavior when the battery power is low.
Explains the drone's protection mechanism against motor overcurrent.
How to calibrate the drone's balance for stable flight.
Instructions for performing aerial flips and stunts.
How the drone maintains a set altitude automatically.
Operation and benefits of the headless flight mode.
Steps to set the forward direction in headless mode.
How to switch between headless and normal flight modes.
Detailed instructions for replacing the drone's battery.
Procedures for charging the drone's battery.
Guides on how to remove the fan blades from the aircraft.
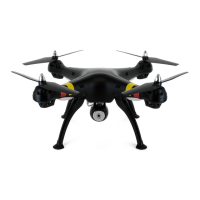
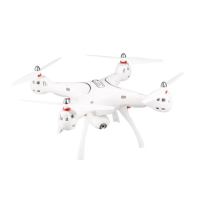
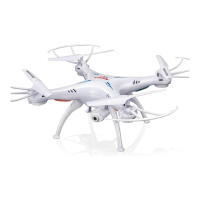
The Syma X8HG is a 4-channel remote-controlled flycopter featuring pressure hovering height adjustment and a 6-axis gyro direction stabilizer. Designed for users aged 14 and above, this aircraft offers a blend of flexibility, speed, and wind resistance, making it suitable for both indoor and outdoor flight environments. Its modular design simplifies installation, repair, and maintenance.
Flight Capabilities: The X8HG utilizes a 4-axis structure, contributing to its agile and responsive flight characteristics. The built-in 6-axis gyro direction stabilizer ensures precise positioning in the air, enhancing stability during flight. A key feature is the pressure hovering height-adjustment function, which allows the aircraft to maintain a specific altitude after the left joystick (accelerator) is released, providing a more stable and controlled flight experience.
The aircraft is capable of 360° 3D overturning, allowing for exciting aerial maneuvers. It also supports a "fling-flying" function, though specific details on its operation are not provided in the main features.
Headless Function: The headless function is a user-friendly feature that simplifies control by eliminating the need to differentiate the aircraft's head position. In this mode, the operator controls the aircraft based on the joystick's direction relative to themselves, making it easier to summon the aircraft back. To define the forward direction for headless mode, the user opens the remote control's power supply, connects the aircraft to power, pushes the switch to "NO," adjusts the aircraft's head to the desired new forward direction, and then pushes the accelerator joystick to its highest and lowest points. A long beep from the remote control confirms the completion of frequency matching and forward direction definition. Toggling between headless and normal modes is achieved by pressing and holding the left upper corner headless function toggle button for 2 seconds, indicated by distinct sound cues and light patterns on the aircraft. If the aircraft deviates from its defined direction in headless mode due to impact, a rectification procedure involving simultaneous pushing of the accelerator and direction joystick to the left bottom corners can be performed.
Aerial Photography and Video Recording: The X8HG supports aerial photography and video recording with a high-definition camera. To use this function, the cable plug of the high-definition camera must be inserted into the specified socket of the aircraft. After powering on the aircraft, the camera's red lamp will blink and then turn green, indicating normal operation. If the red light is off and the green light is not bright, it means the memory card (SD card) is not connected. A blinking red light on the memory card indicates it is full and needs data emptied.
To take a photograph, press the "photograph/video" button once on the remote control, and a single ring sound will be heard, accompanied by a flash of the red indicating light on the camera. For video recording, press the "photograph/video" button twice; the red indicating light will blink continuously. Pressing it again will turn the red light green, signaling the end of the video. The camera offers two modes: high definition (1080P) and smooth (720P). Users are advised to ensure the lens surface is clean before aerial photography and to use a player that supports MOV format for video playback.
Safety Features: The aircraft incorporates several safety features:
Operating Modes: The remote control offers two operating modes, Mode 1 and Mode 2, to accommodate different user preferences. The default upon startup is Mode 1. To toggle to Mode 2, press Button B to the right and switch on the power supply simultaneously. The manual provides detailed controlling diagrams for both modes, illustrating ascending/descending, forward/backward, left/right turning, and left/right side flying controls.
Fine-Tuning Operation: Fine-tuning controls are available for forward/backward, left/right side flying, and left/right turning. If the aircraft automatically drifts in any direction while hovering, the corresponding fine-tuning buttons on the remote control can be used to rectify its position.
Fast-Slow Gear: The aircraft features a fast-slow gear toggle. Pressing Button A on the remote control switches between fast (H) and slow (L) gears, allowing for different flight speeds.
Battery Installation and Charging: For the remote control, open the battery cover at the back and insert 4 x AA alkaline batteries, ensuring correct polarity. It is crucial not to mix new and old batteries or different types of batteries. For the aircraft battery, connect the battery connector with the dash receiver, enclose the battery into the fuselage, close the cover, and turn on the switch at the bottom of the aircraft.
Charging the aircraft battery requires inserting the adapter's DC outlet into the balanced charger's input socket. The red light on the charger will illuminate. Then, insert the three-position balanced plug of the power battery into the charger's output end. A green light indicates charging, and its extinguishment signifies full charge. The charging time is less than 200 minutes, providing over 9 minutes of hover flight. Important charging cautions include placing the product in a dry, ventilated area away from heat, removing batteries from the quadcopter during charging (supervised by an adult), avoiding charging hot batteries, using the original USB charging cable, and replacing swollen or old batteries.
Aircraft Startup and Shutdown: To prepare for flight, first switch on the remote control. Then, open the battery cover of the aircraft, connect the battery to the dash receiver, enclose the battery, and turn on the switch at the bottom. Push the left lever (accelerator) to its highest point and then reset it to the lowest point. The aircraft's indicator lights will change from quick flashing to continuous lighting, indicating flight standby mode.
To start the aircraft, either push the left lever (accelerator) to the highest point and then reset it to the center (ventilation blades start rotating slowly), or move both left and right joysticks inwards in an internal loop of "8" for 1 second (ventilation blades start rotating slowly).
To switch off the aircraft, push the left joystick (accelerator) to the lowest level and hold for 2-3 seconds, or move both left and right joysticks inwards in an internal loop of "8" for 1 second.
Level Calibration: To calibrate the aircraft's level, place it on a flat surface. Simultaneously push both left and right joysticks to the lower right corners and hold for 2-3 seconds. The normal light indicator on the aircraft will blink rapidly and then return to its normal status after 2-3 seconds, confirming successful calibration.
General Care: Always use a dry and soft cloth to clean the product. Avoid exposing the aircraft to direct sunlight or heat. Do not immerse the toy in water, as this can damage the electronic components.
Regular Inspection: Regularly check and inspect the plug and other accessories. If any damage is found, immediately stop using the aircraft until it has been completely repaired and is in good working condition.
Modular Design: The aircraft's structure employs modular designs, which simplifies the process of installation, repair, and maintenance, making it easier for users to replace parts or perform necessary upkeep.
Fan Blade Installation/Disassembly: Detailed steps are provided for disassembling and installing the fan blades. Disassembly involves rotating and backing out the fan blade cover anti-clockwise, rotating the blade lockstitch anti-clockwise until the iron shaft points to the opening, pulling out the iron shaft, and then pulling out the fan blade. Installation is the reverse process: inserting the fan blade into the principal axis pipe, installing the blade lockstitch inside the quill ensuring alignment, installing the iron shaft and rotating the blade lockstitch clockwise, and finally rotating and twisting the fan blade cover clockwise.
Troubleshooting: The manual includes a rectification procedures section to address common issues:
| Manufacturer | SYMA |
|---|---|
| Model | X8HG |
| Category | Drones |
| Type | Quadcopter |
| Camera | Yes |
| Charging Time | 120 minutes |
| Frequency | 2.4GHz |
| Gyro | 6-axis |
| Battery | 2000mAh LiPo |
| Features | Altitude Hold |