9
Chapter 2: Hardware Setup
4
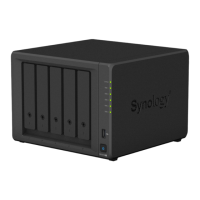
Hold the memory module by its notches and remove it from the slot.
5
Insert a new memory module into the empty slot:
a
Align the notch on the gold contacts of the memory module with the notch on the empty slot. Insert the
memory module into the slot. Make sure the module is properly inserted.
b
Push down on the memory module with moderate pressure until you hear a click. If you encounter difculty
when pushing down the module, push the levers outward with your ngers as shown below.
Important:
1. Hold the memory module by its edge, and do not touch the gold contacts.
2. Synology will not provide complete product warranty or technical support if a non-Synology memory module is
used for memory replacement.
6
Insert the ve drive trays back into the drive bays.
7
Reconnect the cables you removed in step 1, and then press the power button to turn on your DiskStation.
To make sure DiskStation recognizes the new memory capacity:
1
Install DiskStation Manager (DSM). Please see the next chapter for more information.
2
Log in to DSM as
admin
or a user belonging to the
administrators
group.
3
Check
Total Physical Memory
in
Control Panel
>
Info Center
.
If your DiskStation does not recognize the memory or does not start up successfully, please make sure that the
memory module is installed correctly.
Add a M.2 NVMe SSD to DiskStation
You may install up to two M.2 NVMe 2280 SSDs to your DiskStation for creating SSD cache volume. Follow the
steps below for SSD module installation / removal.
To install a M.2 NVMe SSD module:
1
Shut down your DiskStation. Disconnect all the cables connected to your DiskStation to prevent any possible
damages.
2
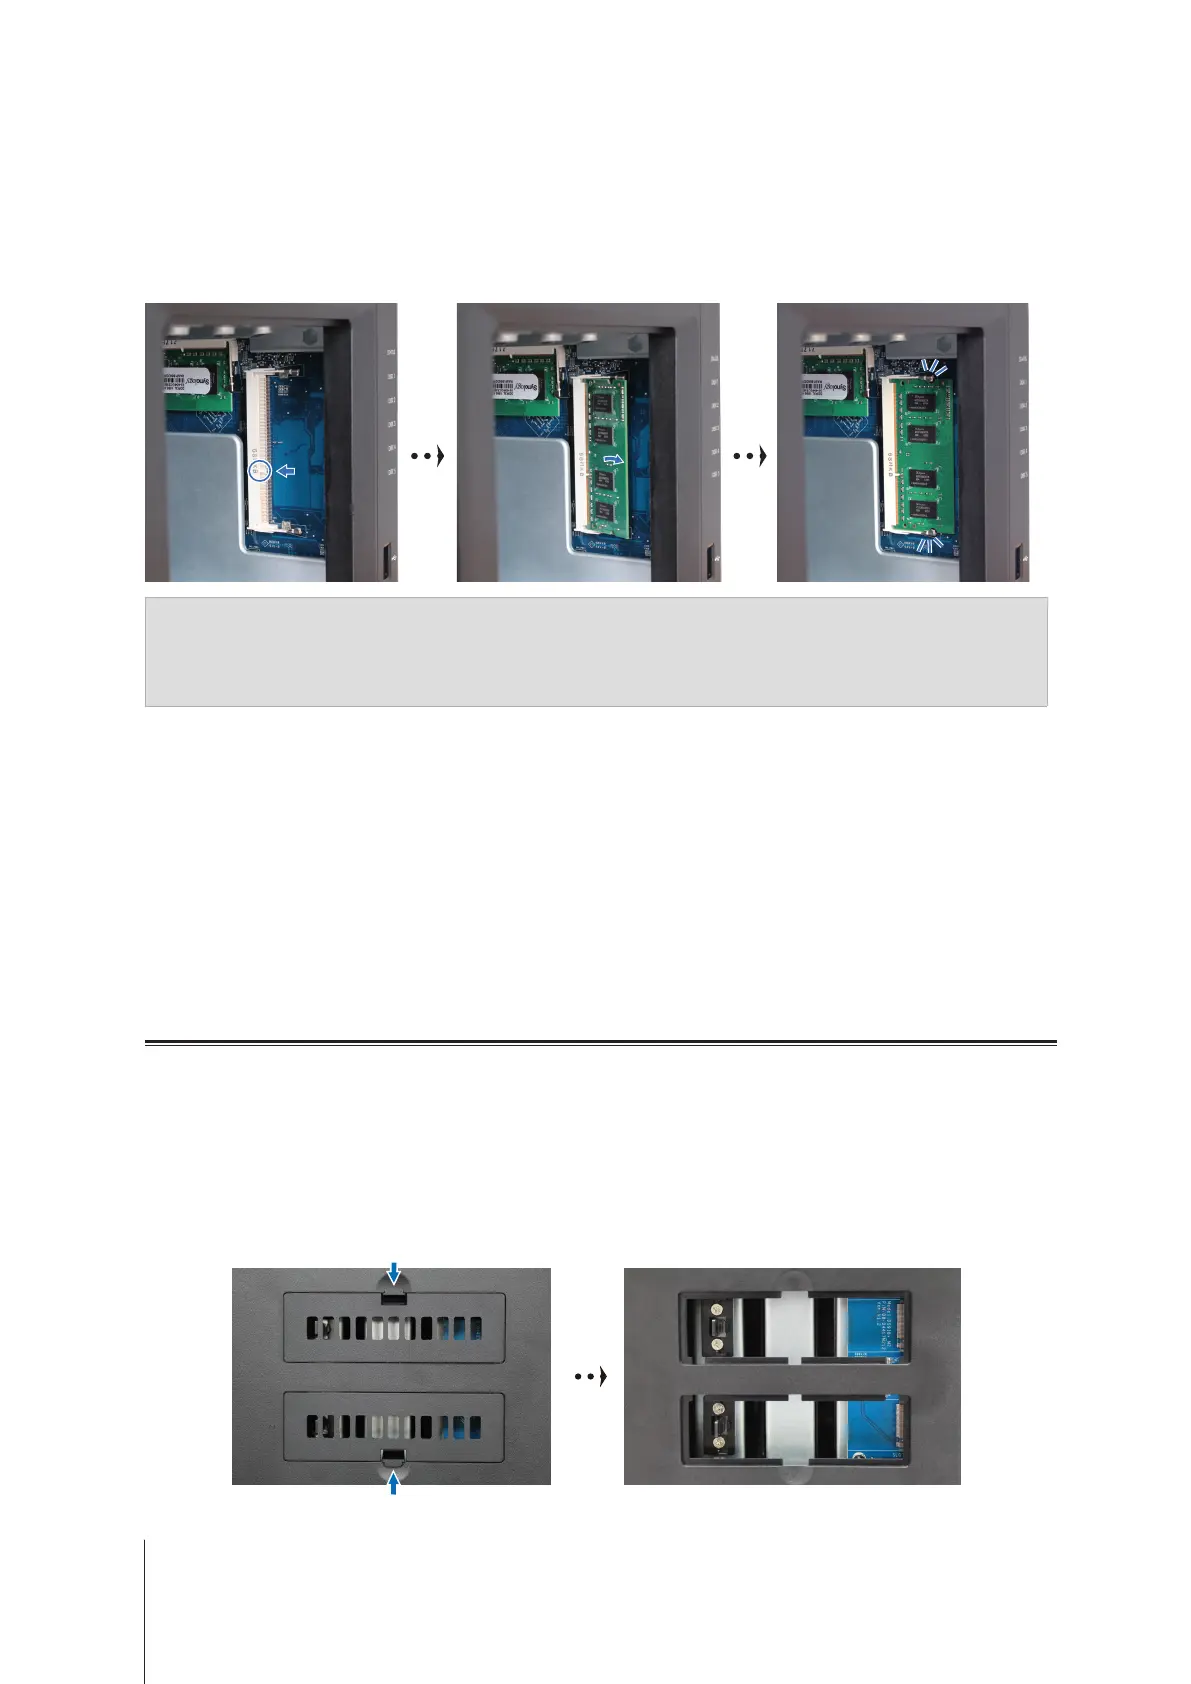
The SSD slots are located at the bottom of your DiskStation.
3
Remove the two lids protecting the modules. You will see two empty slots, numbered as below.
1
2