Do you have a question about the Synology NVR1218 and is the answer not in the manual?
Lists and illustrates all items included in the NVR package for user verification.
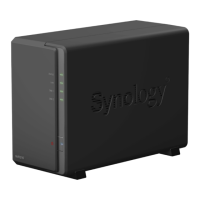
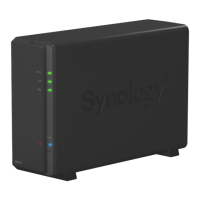
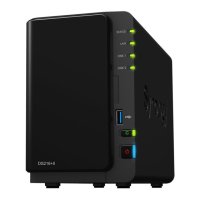
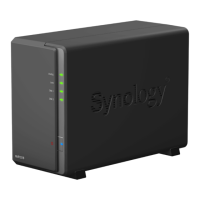
Offers a detailed visual identification of the NVR's front and back panel components.
Outlines critical safety precautions to ensure safe operation and prevent damage.
Lists necessary tools and drive components for installing storage drives.
Step-by-step guide for securely mounting hard drives within the NVR bays.
Instructions for powering on the NVR and connecting it to the network.
Guides firmware installation using the provided USB dongle for offline setup.
Explains firmware installation via the Web Assistant tool over the network.
Directs users to additional resources and online information for the NVR.
The Synology Network Video Recorder NVR1218 is a versatile device that combines network-attached storage (NAS) capabilities with a PC-less configuration for video recording and surveillance. It's designed for users who need a dedicated solution for managing and displaying network video recordings, particularly with Synology's Surveillance Station package.
The NVR1218 serves as a central hub for your surveillance system, allowing you to record, store, and manage video footage from connected IP cameras without the need for a separate computer. Its core function is to provide reliable storage for video data and to run the Surveillance Station software, which offers a comprehensive suite of tools for monitoring, playback, and event management. The device supports local display via an HDMI output, enabling PC-less configuration and live view directly on a monitor. This feature is particularly useful for environments where a dedicated surveillance workstation is not practical or desired. The NVR also includes audio input and output ports, allowing for two-way audio communication with cameras that support it, or for connecting external speakers and microphones for local audio monitoring. Network connectivity is provided via an RJ-45 LAN port, ensuring seamless integration into your existing network infrastructure. For expanding storage capacity, the NVR1218 includes an eSATA port, which can be used to connect a Synology Expansion Unit, significantly increasing the total raw capacity for video archives. Additionally, USB 3.0 and USB 2.0 ports are available for connecting external drives, a mouse, keyboard, or an uninterruptible power supply (UPS) for enhanced system reliability during power outages. A COM port is also included for connecting POS (Point of Sale) devices, suggesting potential integration with retail surveillance scenarios. The device is cooled by an internal fan, which helps dissipate excess heat and maintain optimal operating temperatures, with an audible alert if the fan malfunctions.
Setting up and using the NVR1218 is designed to be straightforward. The hardware installation involves opening the upper case, installing 3.5" drives into the hard drive bays, and securing them with screws. The device supports both 3-screw and 2-screw drive mounting configurations, offering flexibility for different drive types. Once drives are installed, the upper case is replaced and secured. Powering on the NVR involves connecting the AC power adapter and an RJ-45 LAN cable to your network. The NVR can then be turned on by pressing the power button.
For initial firmware installation, the NVR1218 offers two primary methods. For offline or PC-less setups, a Synology USB installation dongle can be used. This involves plugging the dongle into a USB port, connecting an HDMI monitor and a USB mouse, and then following the on-screen instructions to select a language and initiate the firmware installation. This method is ideal when internet access is unavailable or when a direct local setup is preferred. After installation, users can set up their administrator account and begin using Surveillance Station via the HDMI display. If the Surveillance Station installation isn't completed automatically, it can be manually installed via Package Center in DSM (DiskStation Manager) from a PC.
Alternatively, firmware can be installed using Web Assistant, which requires an internet connection. After powering on the NVR and connecting it to the network, users can access Web Assistant from a web browser on a computer connected to the same network by entering find.synology.com or nvr:5000 in the address bar. Web Assistant will detect the NVR and guide the user through the setup process, downloading the latest operating system and Surveillance Station from the internet. This method ensures the NVR is running the most up-to-date software.
The NVR1218 provides clear LED indicators on the front panel to communicate its status. The Status indicator shows the system's overall health, including whether it's powered on, booting up, or if there are volume issues (normal, degraded, crashed, not created, DSM not installed, or HDD hibernation). The LAN indicator shows the network connection status (connected, active, or no network). The Disk indicator displays the status of installed drives (ready and idle, accessing, error, or no internal drive/deep sleep). These indicators allow for quick visual assessment of the device's operational state.
The device also includes a RESET button on the back panel with two functions: a short press and hold restores the default IP address, DNS server, and admin account password; a longer press and hold, followed by another press and hold, returns the NVR to a "Not Installed" status, allowing for DSM reinstallation. This provides options for troubleshooting or reconfiguring the device.
Maintenance of the NVR1218 primarily involves ensuring proper drive health and system updates. The system is designed to be user-serviceable for drive installation, allowing users to easily add or replace 3.5" drives. When installing drives, it's recommended to use drives of the same size if creating a RAID volume to maximize capacity utilization. The device's fan helps with heat dissipation, and a beeping sound alerts users if the fan malfunctions, prompting attention to prevent overheating.
For software maintenance, the NVR firmware, which includes the operating system and Surveillance Station, can be updated. When using Web Assistant for initial setup, the latest version is downloaded, ensuring the system starts with current software. For ongoing updates, Synology typically provides updates through its DiskStation Manager (DSM) interface, which users can access via a web browser. Regular updates are crucial for security, performance enhancements, and new features.
In case of drive errors, the Disk LED indicator will turn orange. The manual suggests restarting the NVR or re-inserting the drive(s) and running the HDD/SSD manufacturer's diagnostic tool to check drive health. If DSM is accessible, users can run the built-in S.M.A.R.T. test to scan the drives. If problems persist, contacting Synology Technical Support is recommended.
The Kensington security slot provides a physical security measure, allowing users to attach a security lock to prevent theft of the device. This is a practical feature for deployments in less secure physical environments.
Overall, the NVR1218 is designed for ease of use and maintenance, with clear indicators, flexible installation options, and built-in tools for both initial setup and ongoing management of a surveillance system.
| Processor cores | 2 |
|---|---|
| Built-in processor | Yes |
| Processor frequency | 1 GHz |
| Video codecs | MJPEG, MPEG-4, H.264, H.265, MxPEG |
| Number of fans | 1 fan(s) |
| Internal memory | 1024 MB |
| Number of users | 1024 user(s) |
| Languages support | CHI (SIMPL), CHI (TR), CZE, DAN, DEU, DUT, ENG, ESP, FRE, HUN, ITA, NOR, POL, POR, RUS, TUR |
| Maximum frame rate | 360 fps |
| Maximum resolution | 2591 x 1944 pixels |
| Internal memory type | DDR3 |
| Video input channels | 12 channels |
| Supported resolutions | 1280x720, 1920×1080, 2048x1536, 2591x1944 |
| HDD size | 3.5 \ |
| RAID levels | 0, 1, 5, 6, JBOD |
| HDD capacity | 0 GB |
| HDD interface | Serial ATA |
| Maximum storage capacity | 20 TB |
| Number of HDDs installed | 0 |
| USB 2.0 ports quantity | USB 2.0 ports have a data transmission speed of 480 Mbps, and are backwards compatible with USB 1.1 ports. You can connect all kinds of peripheral devices to them. |
| USB 3.2 Gen 1 (3.1 Gen 1) Type-A ports quantity | 1 |
| Certification | FCC B, CE B, BSMI B |
| Product color | Black |
| LED indicators | HDD, LAN, Power, Status |
| AC input voltage | 100 - 240 V |
| AC input frequency | 50 - 60 Hz |
| Power consumption (typical) | 13.64 W |
| Storage temperature (T-T) | -20 - 60 °C |
| Operating temperature (T-T) | 5 - 45 °C |
| Operating relative humidity (H-H) | 5 - 95 % |
| Sustainability certificates | RoHS |
| Cables included | AC, LAN (RJ-45) |
| Browser supported | Internet Explorer11, Safari 10 |
| Mac operating systems supported | Mac OS X 10.11 El Capitan, Mac OS X 10.12 Sierra |
| Mobile operating systems supported | Android, iOS |
| Windows operating systems supported | Windows 10, Windows 7 |
| Harmonized System (HS) code | 85219000 |
| Depth | 225.5 mm |
|---|---|
| Width | 100 mm |
| Height | 165 mm |
| Weight | 900 g |