24
Freshman Series - Owner's Manual - Installation, Operation, and Service Instruction - Version 1.1 EN
Louver Side Unit Side
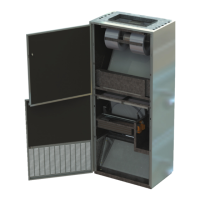
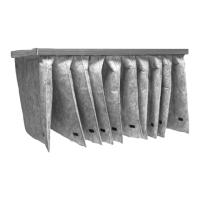
6.8 Relief Damper
Changeair recommends the use of a relief damper assembly be
used in conjunction with all units installations unless balanced
powered exhaust is made available within the ventilated
space. Improper static pressure control of a ventilated space
will affect the ventilation capacities and unit performance.
A counter balanced, gravity relief damper assembly is available
through your Changeair representative. This includes the relief
damper, an 8” depth wall sleeve, and an aluminum exterior
louver.
A minimum nished wall depth of 9.75" is required when the
relief assembly is used in conjunction with the interior grille in
order for the damper to operate freely.
Finished wall depths greater than 8” may require a eld
fabricated wall sleeve extension.
1. Cut or construct an opening through the wall adherent to
the appropriate size.
2. On the exterior, run a bead of weatherproof caulking
around the perimeter of the wall opening.
3. Insert the relief damper assembly into the wall opening
from the outside, with the louver blades pointing down
and to the outside. Securely fasten it to the wall through
the standard 2” ange.
4. On the interior, seal or caulk between the wall sleeve and
the interior nished wall.
5. Once the air handler is operating in an Occupied mode
and using proper balancing procedures, adjust the counter
balance control of the relief assembly by adding or
removing weights as necessary to relieve the required
static pressure for that room.
6. Using screws and anchors, the melamine relief damper
cover or interior grille can now be installed to conceal the
wall opening.
6.9 Figure 12 | Installing the Relief Damper
NOTE:
Locate the relief damper assembly as far
away from the classroom unit as possible
within the same ventilated space. Refer to
minimum clearances when locating opening.
Installation Guide
 Loading...