Discovery DSC™ Getting Started Guide Page 45
Instruments Service Representative for details on re-dressing the flange.
3 Position the LN Pump in close proximity and to the left of the DSC.
CAUTION: Take extreme care not to damage the silver block shown in Figure 28
. The silver
surfaces on the cell are soft and, if damaged, must be replaced by a TA Instruments Service
Representative.
MISE EN GARDE: Soyez extrêmement prudent pour ne pas endommager le bloc en argent illustré
sur la Figure 27. Les surfaces en argent de la cellule sont douces; si elles sont endommagées, faites les
remplacer un représentant du service d'entretien de TA Instruments.
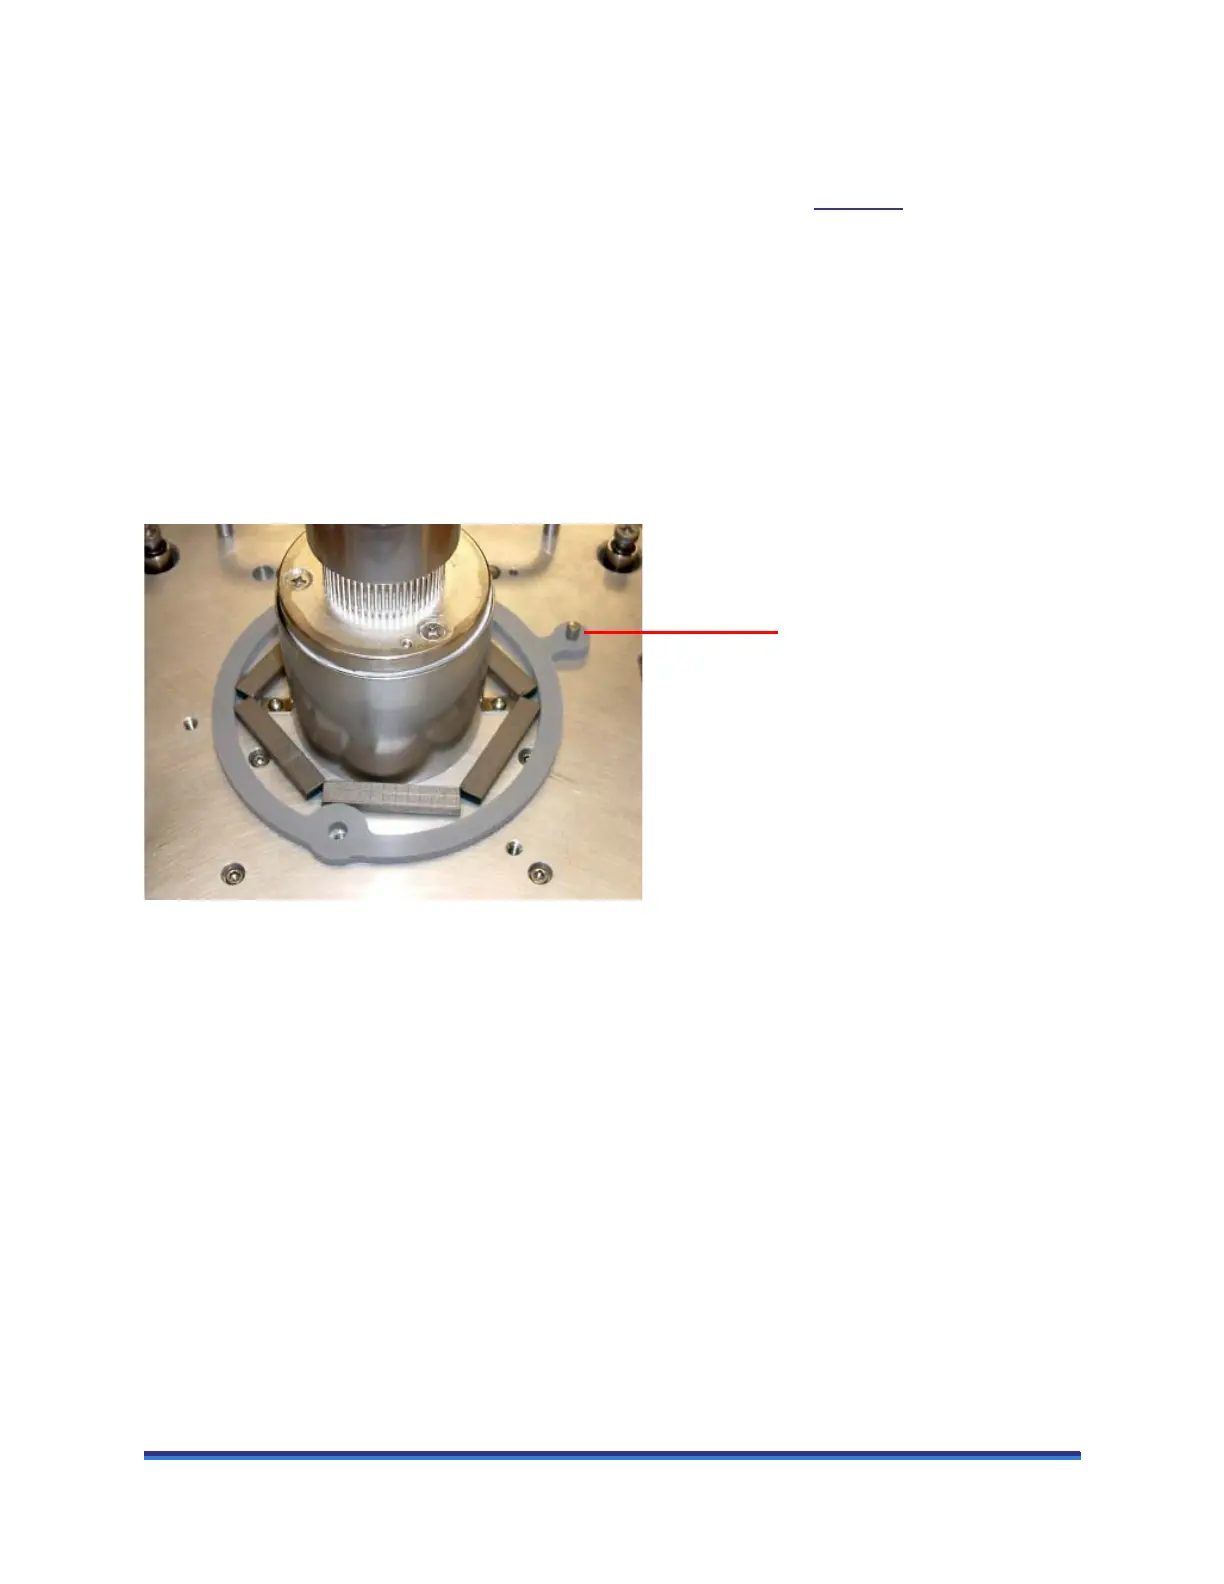
4 Align the pin on the cell base (shown in the figure below) with the corresponding slot in the LN Pump
cooling head and carefully lower the cooling head over the cell. Be particularly careful to avoid bumping
the top surface of the cell with the cooling head, as any damage to the cell surface could adversely affect
subsequent performances.
Figure 29 Exposed DSC cell with alignment pin (facing instrument).
5 Make sure that the bottom of the cooling head fully seats on the cell base plate.
6 Obtain a long 5/32-inch hexagonal (Allen) wrench from the accessory kit.
Alignment pin
on cell base