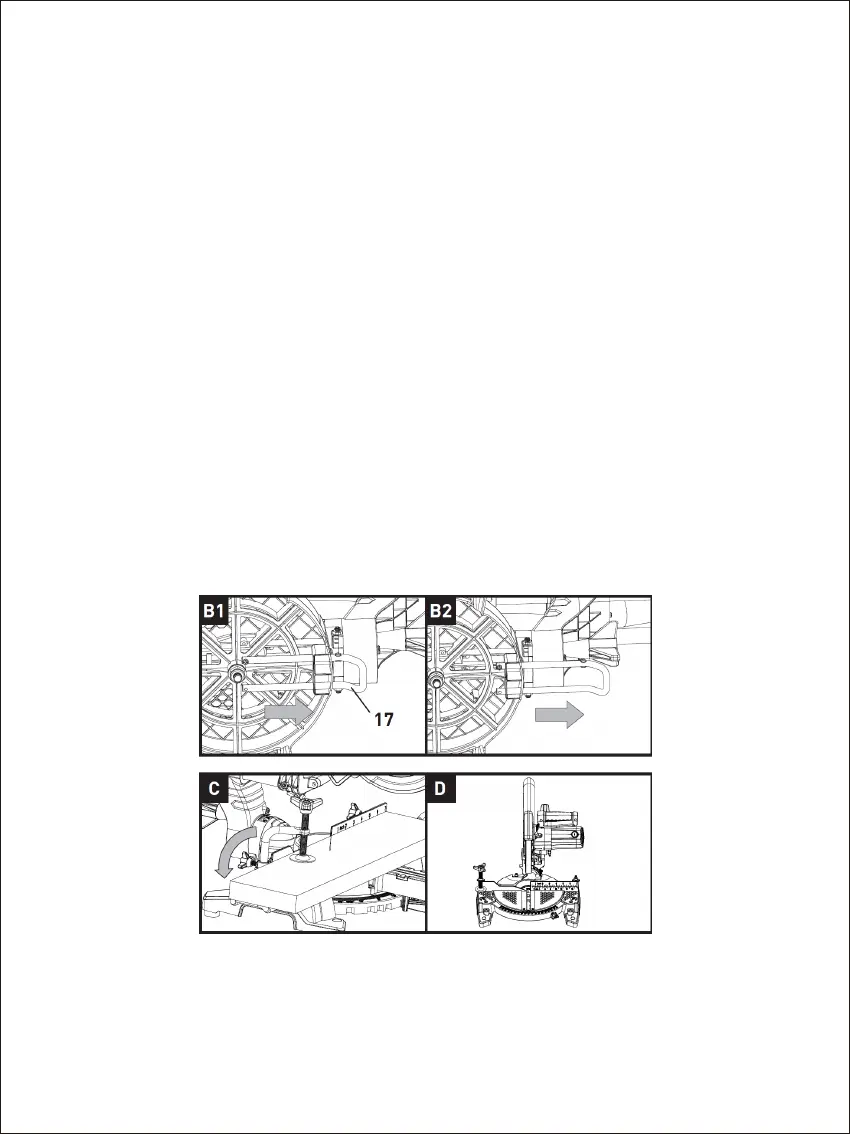
2. THE SUPPORT STAND (SEE FIG B1, B2)
Pull the support stand to its extreme, as shown in Fig B1, B2.
WARNING: Always keep the support stand at its extreme out position when using the product.
3. WORK CLAMP (SEE FIG C)
1) The work clamp can be fitted on either side of the saw and is fully adjustable to suit thesize of the workpiece.
2) Do not operate the saw without clamping the workpiece.
3) Make sure that the work clamp securing screws are tightened.
4. MOUNTING HOLES (SEE FIG D)
Before use, the saw can be fixed to a firm, level surface with the 4 mounting bolts (not supplied).
Four holes are provided in the base of the saw to enable it to be fixed to a bench, or other supporting
surface.
To mount the saw, proceed as follows:
1) Locate and mark where the saw is to be mounted.
2) Drill 4 holes through the surface.
3) Place the sliding mitre saw on the surface aligning holes in base with holes drilled in the surface.
Install bolts, washers and hex nuts.
07