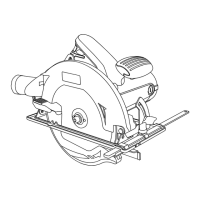
This document describes the TACKLIFE Mini Circular Saw, Model TCS115E, a versatile power tool designed for various cutting applications.
Function Description
The TACKLIFE Mini Circular Saw is a handheld power tool primarily used for cutting different materials. It features a laser guidance system for more precise cutting and a speed control dial to adjust the cutting speed based on the material's hardness. The saw is equipped with a blade guard for safety and an adjustable sole plate that allows for both straight (90°) and bevel (up to 45°) cuts. An edge guide can be installed for accurate ripping, and a vacuum adapter is included for dust extraction.
Important Technical Specifications
Product Specifications:
- Rating: 120 V 60 Hz (US), 220-240V 50Hz (UK) AC
- Amperes: 6.2 A (US) / 750W (UK)
- Speed: 3,500 RPM (no load) Max.
- Blade: 5" (125 mm) 24TCT
- Arbor: 3/8" (9.5 mm)
- Depth of cut @ 90°: 1-7/8" (47.6 mm)
- Depth of cut @ 45°: 1-1/4" (31.8 mm)
Materials You Can Cut:
The saw is suitable for cutting various materials, including:
- Wood products (lumber, hardwood, plywood, composition board, paneling)
- Masonite
- Plastic
Blade Information:
- Carbide-tipped teeth blades are recommended for better cutting and longer sharpness.
- Tooth count and configuration are important; high tooth counts cut slower and are suitable for smooth cuts on thinner materials.
- Replacement blades should be 3-3/8" in diameter and rated for at least 3,500 RPM.
Laser Guidance System:
- Equipped with a laser ON/OFF switch.
- Powered by two 1.5V LR 44 batteries.
Usage Features
Assembly and Operation:
- Blade Installation/Removal:
- Always remove the plug from the power source before handling the blade.
- Press the shaft locking button and use a 5mm hex key to loosen/tighten the blade screw (which has a left-hand thread).
- Rotate the blade guard lever counter-clockwise to access the blade.
- Ensure blade teeth point forward at the bottom and the outer flange nut fits correctly over the spindle flats.
- After installation, rotate the blade to check for wobbling.
- Setting Cutting Depth:
- Rotate the cutting depth locking lever counter-clockwise.
- Lower the sole plate to the desired depth, aligning the depth control scale with the alignment mark on the saw housing.
- The cutting depth should be approximately 1/8" (3 mm) greater than the material thickness.
- Setting Bevel Cutting Angle:
- Rotate the bevel angle locking lever counter-clockwise.
- Rotate the sole plate to the desired angle (up to 45°), aligning the bevel scale with the alignment mark.
- Always make a test cut on scrap material to verify the angle.
- Setting "Zero" Bevel Angle (for 90° cuts):
- Loosen the bevel locking lever and rotate the sole plate to the 0° mark.
- Make a test cut and adjust the zero bevel adjusting screw (using a #2 screwdriver and 7mm wrench for the lock nut) until the saw cuts at 90°.
- Installing the Edge Guide:
- Loosen the edge guide locking screw (using a 5mm hex key).
- Slide the edge guide mounting rod into the slots in the sole plate.
- Align the desired cutting width on the scale with the 0° cutting mark.
- Tighten the locking screw.
- The edge guide can be installed on either side, but the rod must engage both slots.
- Speed Selection:
- The machine has 6 speed control discs (1 to 6).
- Select speed based on material hardness; harder materials generally require lower cutting speeds to protect the machine and blade.
- Warning: The machine must be stopped when setting the speed.
- Installing the Vacuum Adapter:
- Place the small end of the adapter over the vacuum port on the blade housing, rotating slightly while pushing.
- Attach a standard workshop vacuum to the large end of the adapter for dust collection.
- Starting and Stopping the Saw:
- Lock-off Button and Trigger Switch: Depress the lock-off button with your thumb, then squeeze the trigger switch to start. Release the lock-off button once the saw starts. Release the trigger switch to turn off.
- Laser ON/OFF Switch: Press the left side to turn ON, the right side to turn OFF.
- General Cutting:
- Ensure the workpiece is adequately clamped and supported. Never hold it in your hand.
- Check for nails, screws, or foreign objects in the cutting path.
- Turn the laser ON.
- Place the front edge of the sole plate on the workpiece.
- Start the saw (blade not in contact with the surface) and allow it to reach full speed before gradually bringing the blade into contact with the workpiece.
- Use the guide marks (0° and 45° marks, and laser line) on the sole plate for alignment.
- Do not force the saw; use enough force to maintain full speed.
- Plunge Cutting:
- Mark the cutting line.
- Set depth and bevel angle to 0°.
- Place the saw on the workpiece with the sole plate flat.
- Open the blade guard by rotating the lever forward.
- Align the blade with the cutting line (ensure it's inside the cut-out area).
- Start the saw and slowly lower the blade into the workpiece while holding the blade guard lever forward.
- Continue lowering until full depth is achieved, then complete the cut.
Safety Precautions:
- Always wear eye protection (safety goggles conforming to CSA requirements or ANSI Z87.1).
- Use hearing protection during extended or noisy operations.
- Wear a dust mask in dusty environments.
- Be aware of chemicals in dust from sanding/sawing and take precautions (ventilation, approved safety equipment).
- Ensure proper circuit protection (120V AC, 15 AMP circuit with time-delayed fuse or circuit breaker).
- Replace worn/damaged power cords immediately.
- Use appropriate extension cords for outdoor use (marked "W-A" or "W") and ensure correct gauge (refer to the provided chart).
- Keep extension cords clear of the working area.
- Store idle power tools out of reach of children.
- Maintain proper footing and balance.
- Dress properly (no loose clothing, jewelry, or long hair near moving parts).
- Ensure the switch is in the OFF position before connecting to power or handling the tool.
- Remove adjusting keys/wrenches before turning on.
- Use dust extraction facilities if provided.
- Do not force the power tool; use the correct tool for the application.
- Do not use if the switch doesn't turn it on/off.
- Disconnect power before making adjustments or changing accessories.
- Keep cutting tools sharp and clean.
- Use clamps to secure workpieces.
- Have the tool serviced by a qualified person using identical replacement parts.
- Keep hands out of the blade's path and away from the cutting area.
- Do not reach underneath the workpiece.
- Adjust cutting depth so less than a full tooth is visible below the workpiece.
- Never hold the workpiece in your hands or across your leg.
- Hold the power tool by insulated gripping surfaces if cutting near hidden wiring.
- Use a rip fence or straight edge guide for ripping.
- Use blades with correct arbor hole size/shape.
- Never use damaged or incorrect blade washers/bolt.
- Never use abrasive blades.
- Kickback Prevention: Maintain a firm grip, position your body to the side of the blade (not in line), release the trigger if the blade binds, ensure saw teeth are not engaged when restarting in a workpiece, support large panels, use sharp/properly set blades, ensure blade depth/bevel locking levers are tight, and use caution with plunge cuts into blind areas.
- Check the lower guard for proper closing before each use; never clamp it open.
- Ensure the lower guard spring operates properly.
- The lower guard should operate automatically for most sawing; retract manually only for special cuts.
- Ensure the lower guard covers the blade before placing the saw down.
- Never operate the saw while carrying it.
- Do not use the side of the blade for cutting.
- Do not lay the workpiece on hard surfaces.
- Do not touch the blade during or immediately after use.
- Never allow the laser beam to shine into a person's eyes.
Maintenance Features
- General Maintenance:
- Keep the work area clean and well lit.
- Maintain power tools; check for misalignment, binding, or breakage of parts.
- Keep cutting tools sharp and clean.
- Cleaning:
- DO NOT use solvents when cleaning plastic parts; use a clean cloth to remove dirt, dust, oil, grease, etc.
- DO NOT allow brake fluids, gasoline, petroleum-based products, penetrating oils, etc., to contact plastic parts.
- If used on fiberglass, wallboard, spackling compounds, or plaster, clean the tool frequently by blowing it out with an air jet to prevent accelerated wear.
- Lubrication:
- All bearings are lubricated with a sufficient amount of high-grade lubricant for the life of the unit under normal conditions.
- No further lubrication is required.
- Battery Replacement (Laser):
- Turn the laser switch OFF.
- Remove the laser cover screw (using a #2 screwdriver) and lift the cover.
- Remove the two old 1.5V LR 44 batteries.
- Insert two new batteries with the "+" side facing the rear of the tool.
- Re-install the laser cover and screw.
- Repairs:
- Have your power tool serviced by a qualified repair person using only identical replacement parts.
- If the switch fails to turn the saw ON or OFF properly, stop using it immediately and have it repaired.
- Warnings:
- DO NOT abuse power tools.
- DO NOT attempt to modify tools or create accessories; this voids the warranty and can lead to serious injury.