ASSEMBLY AND OPERATING
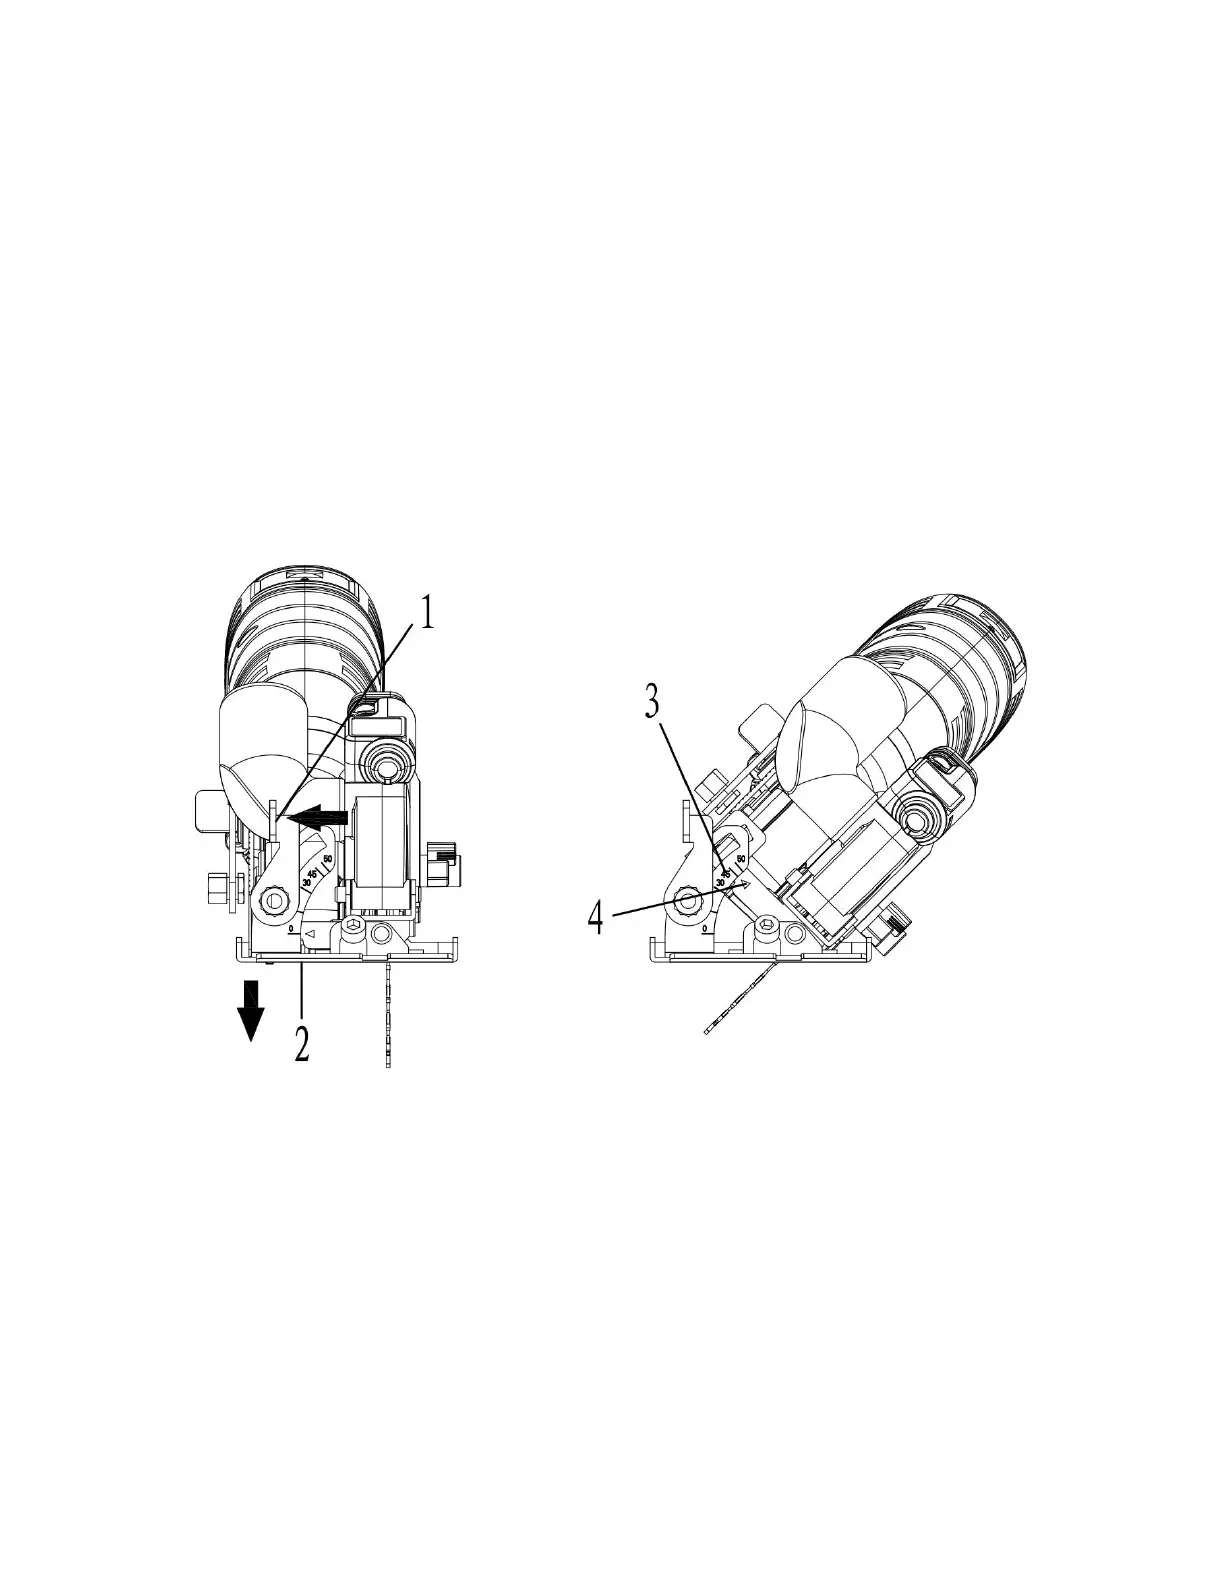
SETTING THE BEVEL CUTTING ANGLE
The sole plate can be set to perform bevel cuts up to 45°. 1. Rotate the bevel angle
locking lever (1) counter clockwise (Fig. 3). 2. Rotate the sole plate (2) to the desired
angle.
NOTES:
a)Align the desired angle on the bevel scale
(3)with the alignment mark (4) on the sole plate housing.
b)Always make a test cut on a scrap workpiece and check to make sure the bevel cut
is correct.
Fig,3
SETTING THE "ZERO" BEVEL ANGLE FOR ACCURATE 90° CUTTING Before making
any cuts, it is important to make a test cut on a scrap workpiece and adjust the bevel
angle stop if necessary to ensure that the "Zero" bevel
adjustment provides accurate 90° cuts.
1. Loosen the bevel locking lever (1) and rotate the sole plate toward the 0° mark as
far as it will go and tighten the bevel angle locking lever (Fig 4).
2. Make a test cut on a scrap workpiece and check the cut with a carpenters’ square
to verify that the saw is cutting at 90°.
 Loading...