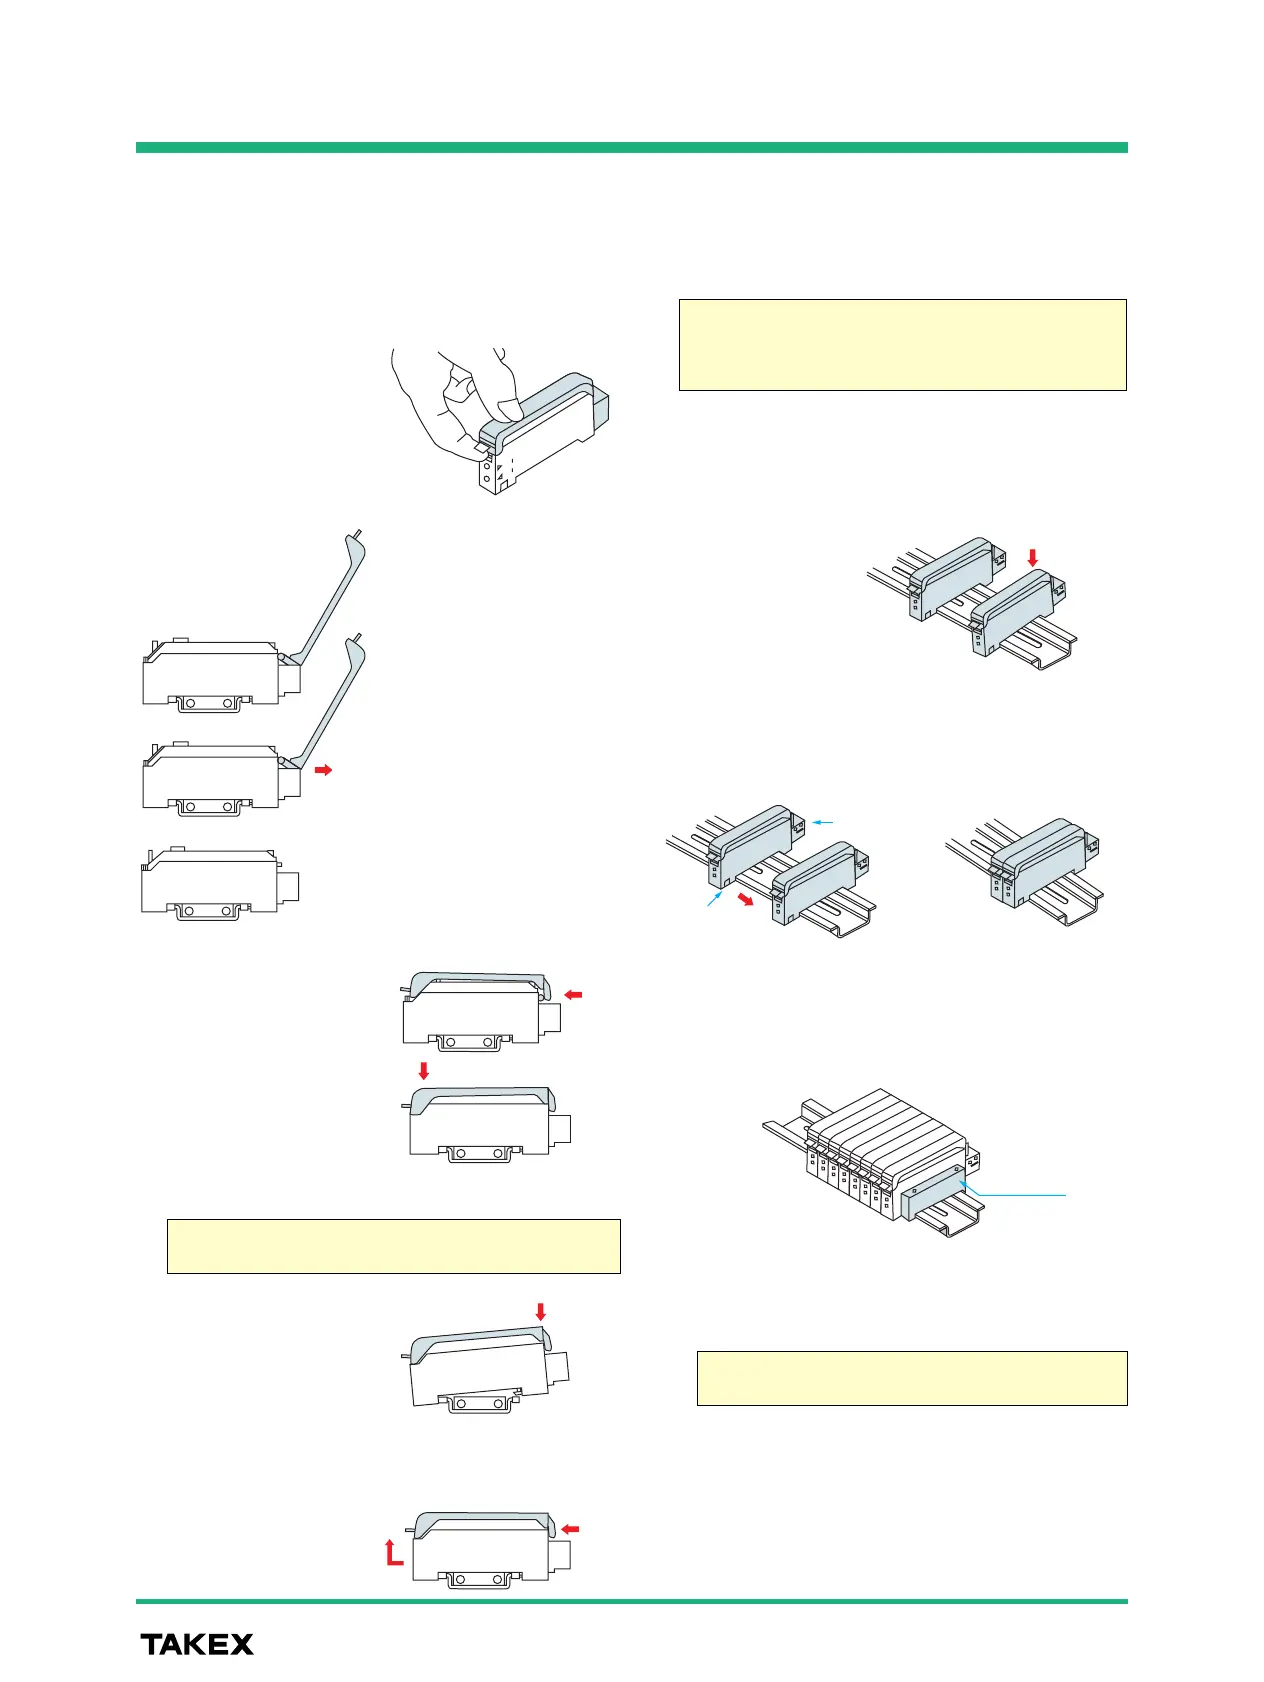
④To detach the amplifiers, follow the steps in reverse
order and remove one amplifier at a time.
③To prevent the connections from coming loose due
to vibration, etc., attach end units (optional) on the
ends of the group of amplifiers to secure them.
①
Opening the case cover
While pressing down the
front part of the case
cover, lift the cover by
pulling up the tab.
Just roughly pulling the
case cover tab for opening
may damage the cover.
Be sure to press the front
part of the cover when
pulling the tab.
● Handling of amplifier case cover
●
Attaching amplifier on DIN rail or mounting bracket
● Attachment of amplifiers for joined use
②Attaching the cover
Put the case cover on the
amplifier as shown on the
figure on the right and
push in at the hinge.
①Attachment
Put the front hook of the
amplifier on the rail (or
mounting bracket) and
press down the back of
the amplifier.
②Detachment
While pressing the amplifier
forward, lift the front part
and detach the front hook.
The cover opens up to the
connector on the back and stays
at the half-opened position.
Pulling at the hinge with the cover
half open allows removal of the
cover.
Cover removed
Press down the front part
of the cover until it clicks
and make sure that the
tab is hooked.
②Slide the amplifiers so that the tabs on the front and
the connector pins on the back are respectively
joined together.
①Mount one amplifier at a time on the DIN rail while
keeping a certain space between amplifiers.
When using two or more amplifiers by joining them together, be
sure to use a DIN rail for mounting.
Up to 16 units can be joined for use.
Be sure to cut the power supply before attempting to join or
separate units.
The mounting bracket is optional.
The amplifier cannot be side-mounted with a mounting bracket
used.
Removing the amplifiers as they are joined together without
sliding may damage the amplifiers.