1) Open the lid completely with a slight upward pressure to reduce friction.
2) Before first use, and regularly thereafter (see the CLEANING section below),
wash the meat barrel, the underside of the lid, and the nozzle that will be used
with a sponge dipped in hot water.
3) Reduce the hydraulic pressure by turning counter-clockwise the red
speed/pressure knob that controls filling speed.
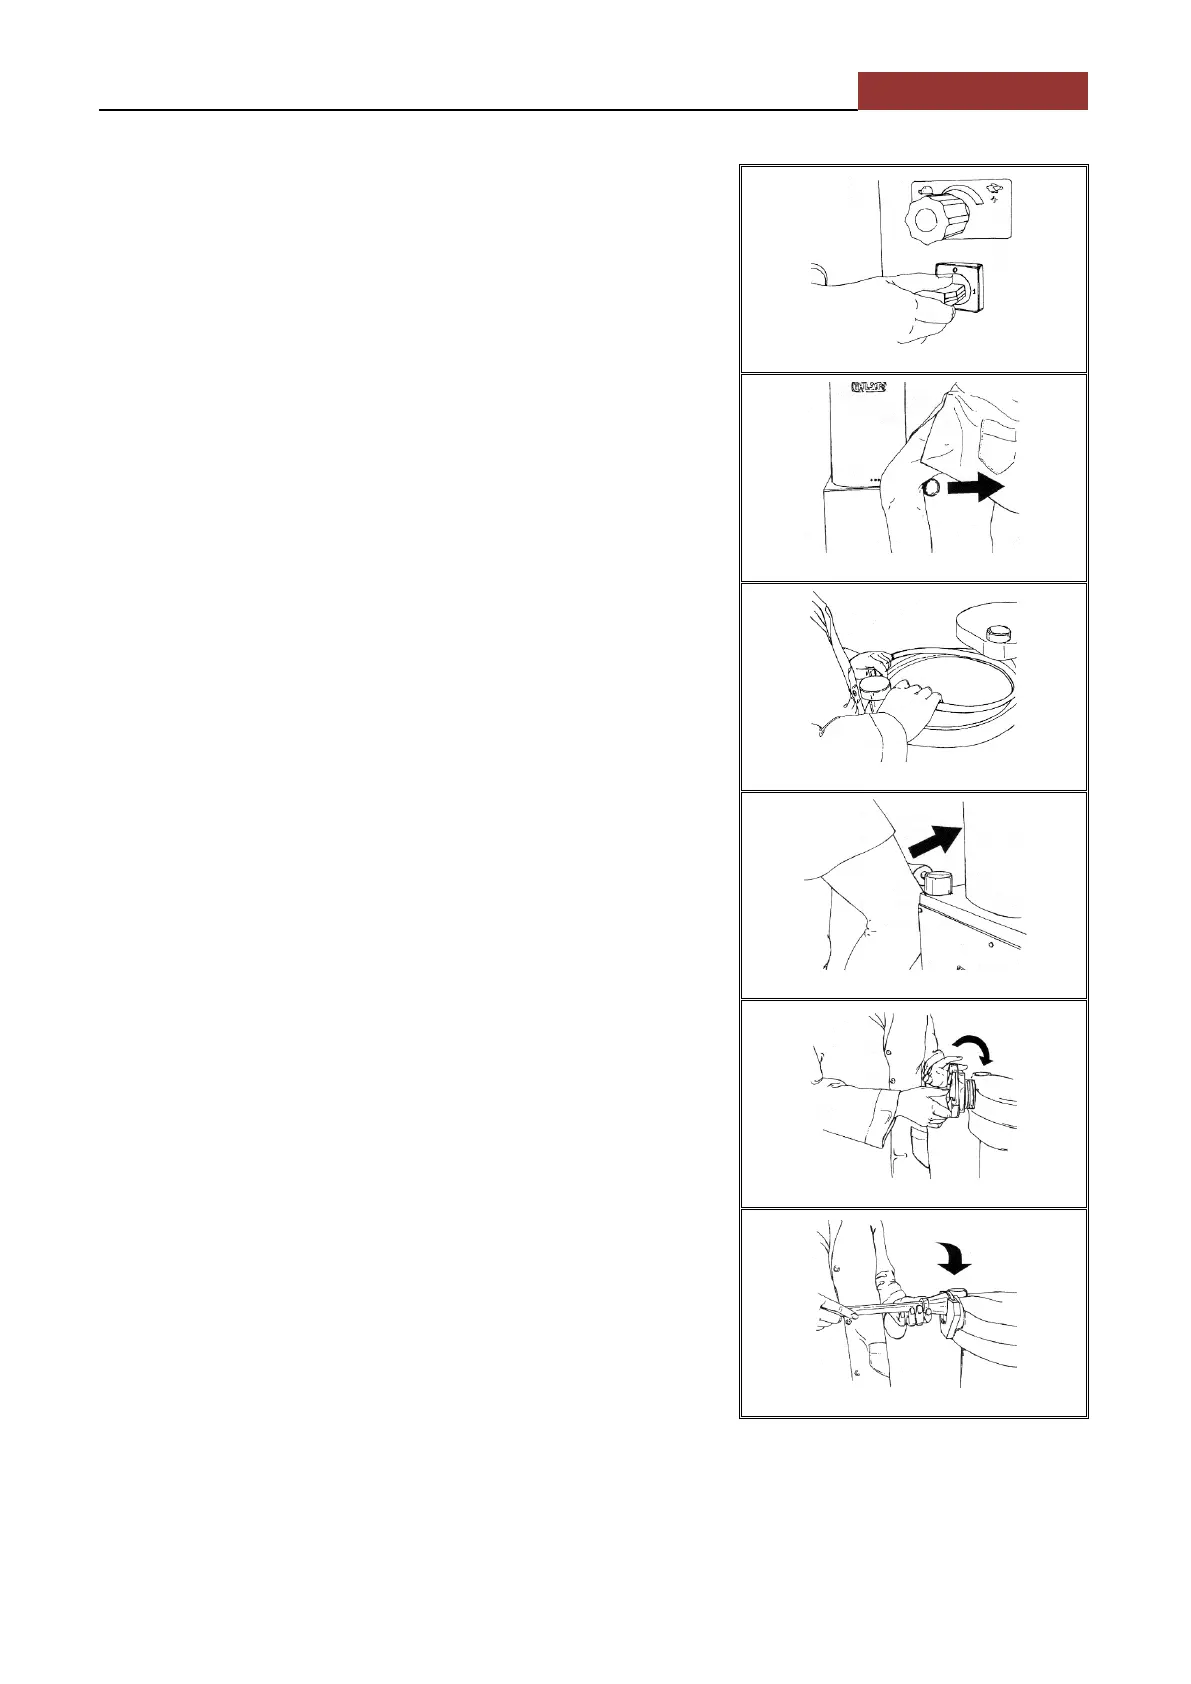
4) Plug the machine to the electrical outlet.
5) FOR “i” MODELS ONLY: turn the manual power switch located on the right side
of the machine to the 1-START position (IMG 10). This step isn’t required for the
“A” models since these are turned on automatically by use of the knee lever.
6) Pull the knee lever completely back to lower the piston (IMG. 11) and make
enough space in the barrel for the desired amount of dough.
7) Place the dough in the meat barrel, pressing down on each new load of dough to
eliminate air pockets, which could break the casing during the filling process.
8) Put the green lid gasket in place (IMG. 12).
Remember: DO NOT close the lid without the green gasket in place since this
could lead to scratches on the lid and barrel clamp.
9) Push the knee lever forward TO RAISE THE PISTON (IMG. 13) until the dough
reaches the top of the barrel.
10) Grease the upper part of the lid gasket and the lid’s bottom edge using food fat
or another USDA approved shortening.
11) Carefully close the lid with a light upward pressure to avoid friction, taking care
not to pinch or crimp the cover gasket in the process. Be careful not to crush or
pinch your hands, fingers etc., on the barrel while closing the lid
Important: NEVER use the nozzle to open and close the lid since this may break
the rim. ALWAYS use the lid’s incorporated lever to open & close the lid.
12) Mount the optimum-sized nozzle on the lid and lock it in place by turning the
triangular nozzle nut (IMG. 14 and IMG. 15). The best nozzle is the one with the
largest diameter and shortest length for the particular application.
13) Prepare the proper amount of casing.
14) Push the knee lever all the way forward to raise the piston. Always push the knee
lever firmly; do not use it to control the speed at which the dough is pushed out.
15) Slowly turn the pressure control knob clockwise to adjust the speed at which the
dough is forced through the nozzle. Do not raise the pressure suddenly as this
could cause the dough to shoot out of the nozzle too quickly
16) Once dough begins to flow out of the nozzle, release the knee lever to stop any
more dough from being forced out, place the casing on the nozzle and turn the
red pressure/speed control knob clockwise until you’ve selected the optimum
speed (IMG. 16).
Remember: Air trapped between the dough and lid will first be expelled through
the nozzle before the food dough begins to flow.
17) Upon completion, pull the knee lever back to lower the piston to the bottom of the
barrel. To stop the hydraulic unit, leave the knee lever in the center position. FOR
“i” MODELS ONLY: turn the manual power switch to the 0-STOP position.