6 7
ENGLISH ENGLISH
Preparation and Insertion
Read all instructions carefully before using
Auto Soft 30. Consult your pump manufacturer’s
instructions for use before connecting Auto-
Soft 30 to your pump. Follow proper hygiene
procedures. Please see the corresponding
illustrations on pages 80-82.
CONTENTS
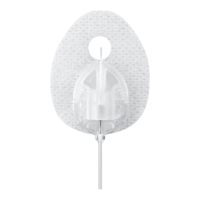
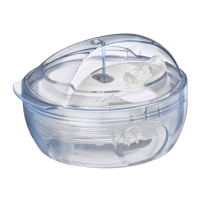
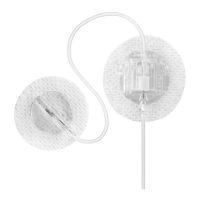
A. Lid
B. Needle protector
C. Soft cannula
D. Adhesive
E. Cannula housing
F. Connector
G. Tubing
H. Introducer needle
I. Insertion device
J. Sterile paper
K. Lined indentations – hold here when loading
AutoSoft 30 (see gure 7)
L. Release buttons – press here when
releasing AutoSoft 30 (see gure 9)
M. Disconnect cover
N. Circular protective cap
INSTRUCTIONS
1. Wash your hands before inserting
AutoSoft 30.
2. Recommended insertion areas. Do not use
an area right next to your previous place of
insertion. Please refer to your healthcare
provider for infusion site rotation.
3. Clean the area of insertion with a disinfectant
as directed by your healthcare provider. Be sure
the area is dry before inserting AutoSoft 30.
CAUTION: Check the tamper-proof seal and
sterile paper. Do not use if the seal or paper
has been broken.
4. Pull the red tape to remove the seal.
5. Pull o the sterile paper. Do not touch the
spring at this stage.
6. Hold on the lined indentations with one
hand and pull the lid o with the other.
CAUTION: Be careful not to bend or touch
the AutoSoft 30 introducer needle.
IMPORTANT NOTE: If the infusion set is not
securely placed in the insertion device with
the needle pointing straight ahead, pain or
minor injury may occur during insertion.
7. Place your ngers on the lined indentations
on each side. Pull back the spring softly
until you hear a “click”. The needle protector
will lift up or peel o. Do not touch or bend
the needle.
8. Immediately before insertion, carefully
remove the needle protector. Be sure the
tape is not stuck on the introducer needle.
9. Insertion: Place your index nger on the
top release button and your thumb on the
bottom release button. Position AutoSoft
30 with its legs level (at) on the skin to
ensure an insertion angle of 30°. Make sure
to maintain a 30° angle while inserting and
gently squeeze once to insert AutoSoft 30.
10. Make sure that the cannula stays in place:
Put your nger gently on the clear window
while removing the insertion device and in-
troducer needle. Pull it gently straight back.
11. Secure the cannula with one nger on the
clear window. Carefully remove the backing
paper under the cannula housing as shown.
12. Remove the backing paper under the front
end. Massage the adhesive thoroughly onto
the skin.
IMPORTANT: Do not attempt to straighten
the adhesive if curled.
13. Put the lid back on for disposal.
14. Remove the circular protective cap. Prime
the infusion set until medication dispenses
from the tip. Ensure there are no air bubbles
in the tubing or AutoSoft 30. Consult your
pump manufacturer’s instructions for use for
proper priming procedures.
15. Place a nger in front of the cannula housing
and insert the connector needle. Make
sure the connector locks with a “click”. Fill
the empty space in the cannula with the
following prime:
U-100 INSULIN:
0.7 units (0.007 ml)
DISCONNECT
i. AutoSoft 30 allows you to temporarily dis-
connect from your pump. Place a nger just
in front of the cannula housing and gently
squeeze the sides of AutoSoft 30. Pull the
connector needle straight out.
ii. Insert the circular protective cap into the
connector needle until you hear a “click”.
iii. Insert the disconnect cover into the cannula
housing until you hear a “click”.
RECONNECT
iv. Remove the circular protective cap. Prime
the infusion set until medication dispenses
from the needle.
CAUTION: When priming, hold AutoSoft 30
with the needle pointing down.
v. Remove the disconnect cover from the
cannula housing.
vi. Place a nger in front of the cannula hous-
ing. Push the connector needle straight in
until you hear a “click”.
AW-1000220_B_IFU_Infusion_Set_AutoSoft30_PROOF_20180516_Content.indd 6-7 7/6/18 6:50 PM
 Loading...