7
Fitting the valves to the existing plumbing
Note: If you need to remove the valve cover for ease of installation,
remove salt lid, then simply release the two catches behind the valve
cover and tilt top end towards you slowly, taking care not to pull off
the wire connections. Please note that the valve cover is connected
to the valve motor, so cannot be removed fully.
PLUMBING
Turn off the water supply at the incoming main.
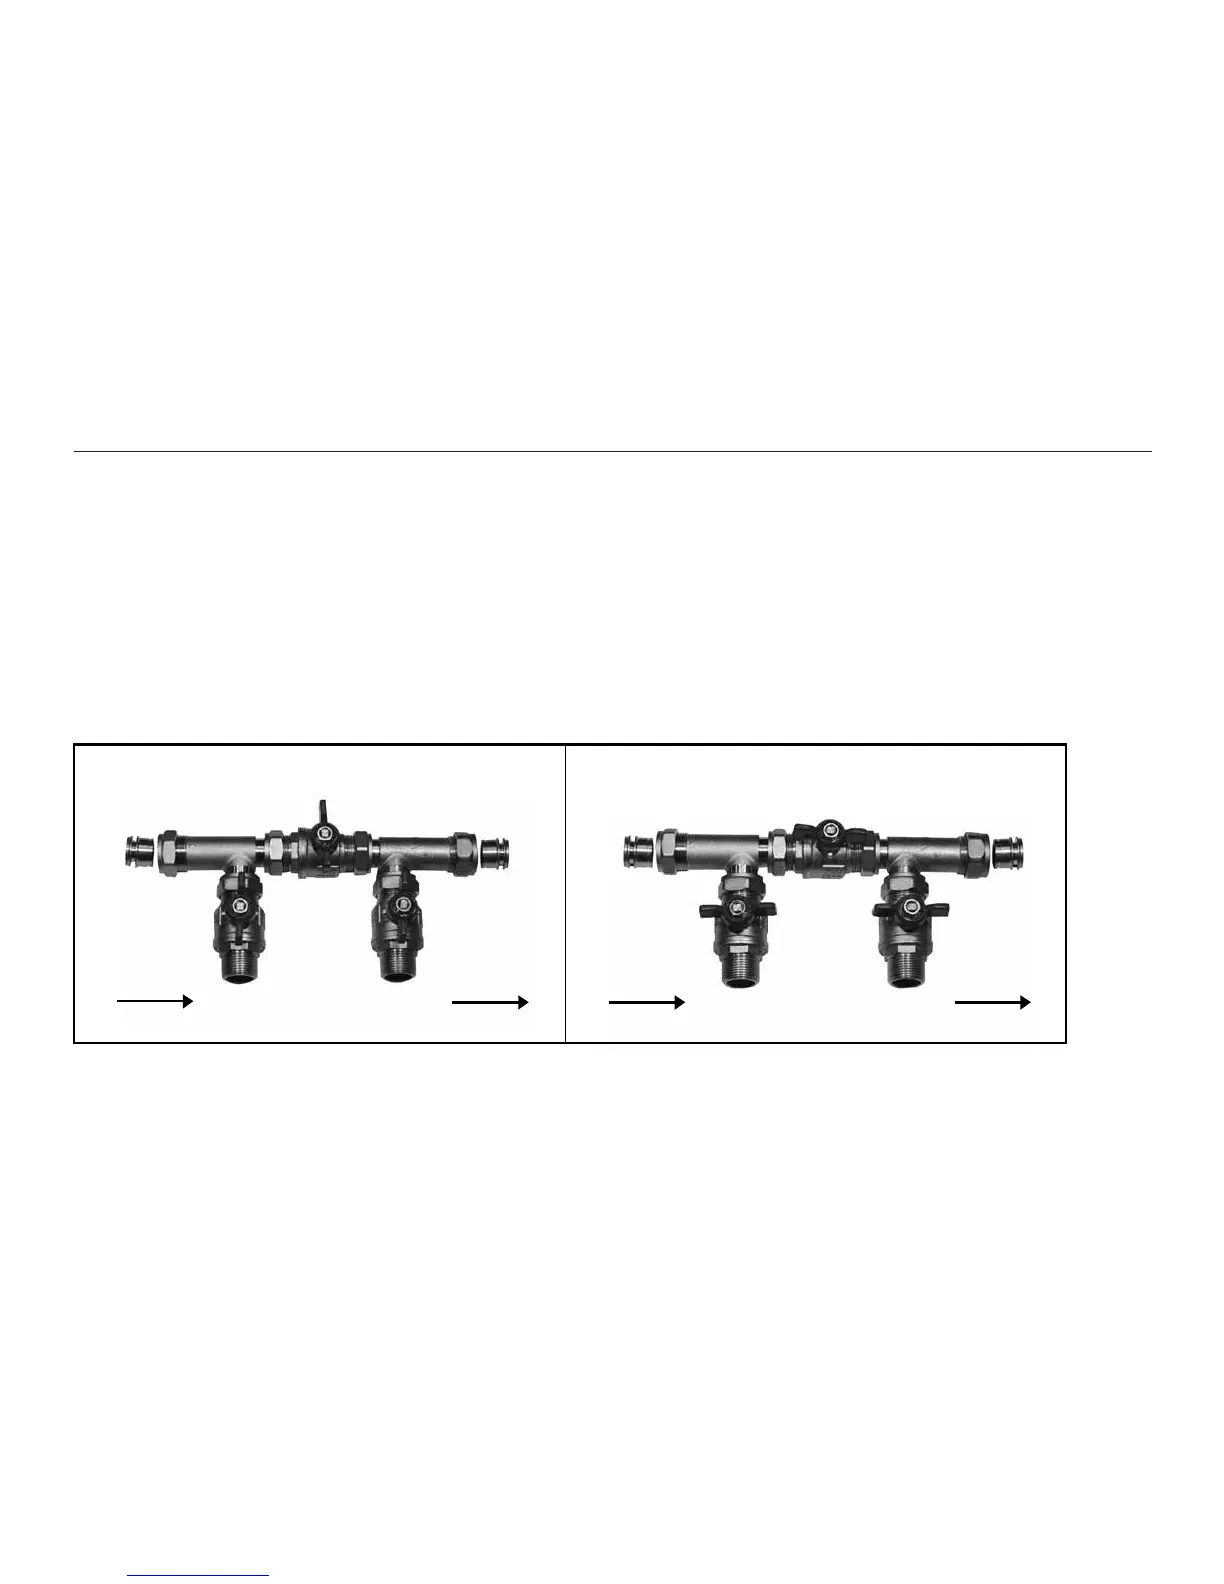
FIT THE BYPASS KIT
Cut off the rising main and install the inlet tee with check valve using
15mm reducer if required. Next, connect the bypass, inlet and outlet
valves and outlet tee, using 15mm reducer if required. Use the
threaded valves for the inlet and outlet and the compression valve for
the bypass. Before turning the water back on, make sure the bypass is
open and the inlet and outlet valves are closed. This will allow water to
pass directly to the household system without it diverting to the water
softener. See Valve Hard Water Bypass position diagram below.
(The use of the plastic plumbing fittings with copper pipe may affect the electrical
earth bonding of the pipework. If in doubt, we advise that you contact a qualified
electrician for advice).
7
Please Remember – Only use tablet or pellet salt in your softener!
6
Fitting the valves to the existing plumbing
Note: If you need to remove the valve cover for ease of installation,
remove salt lid, then simply release the two catches behind the valve
cover and tilt top end towards you slowly, taking care not to pull off
the wire connections. P
lease note that the valve cover is connected to
the valve motor, so cannot be removed fully.
PLUMBING
Turn off the water supply at the incoming main.
FIT THE BYPASS KIT
Cut off the rising main and install the inlet tee with check valve using
15mm reducer if required. Next, connect the bypass, inlet and outlet
valves and outlet tee, using 15mm reducer if required. Use the
threaded valves for the inlet and outlet and the compression valve for the
bypass. Before turning the water back on, make sure the bypass is
open and the inlet and outlet valves are closed. This will allow water to
pass directly to the household system without it diverting to the water
softener. See Valve Hard Water Bypass position diagram below.
(The use of the plastic plumbing fittings with copper pipe may affect the electrical earth
bonding of the pipework. If in doubt, we advise that you contact a qualified electrician for
advice).
Hard Water Bypass Position
Inlet tee
incorporating
check valve
Inlet closed
Bypass open
Outlet closed
15mm reducer
(if required)
To system
From mains
To water
softener inlet
From water
softener outlet
15mm reducer
(if required)
Valve Service Position
15mm reducer
incorporating
check valve
To water
softener inlet
15mm reducer
(if required)
Please Remember – Only use tablet or pellet salt in your softener!
Inlet open Bypass closed Outlet open
From water
softener outlet
To systemFrom mains
(if required)
Inlet tee
 Loading...