1.
Make sure
that
any
"mix"
or
"balance"
controls
on
the
effect
unit
are
set
to
"full
effect"
or
"wet",
so
that
no
"dry"
(unprocessed) signal comes
to
the
effect
re-
turns.
2.
Set
the
STEREO
EFFECT
RETURN
controls
of
the
MM-1
to
the
"2
o'clock"
position.
3. While playing
the
instruments, slowly increase
the
output
control
of
the
effect
device until
you
hear
the
"wettest"
mix
you're
likely
to
use. This
is
a
matter
of
taste.
If
the
effect
unit
has an
output
switch (for example
"+4/-
20"),
set
it
to
the
+4
dB
(loudest) position. Change
it
to
-20
(lower level) only if
you
have
to
turn
the
STEREO
EFFECT
RETURN
control
down
to
a very
low level
("9
o'clock")
to
get
the
effect
mix
you
want.
In
most
cases,
you
don't
have
to
worry
about
distorting
the
effect
return
circuit
of
the
MM-1. It's more
important
to
set
the
output
level
of
the
effects device so
that
you
can use
the
whole
range
of
the
RETURN controls.
If
you
tend
to
have
trouble
getting
the
mix
you
want
be-
cause
you
can
only
use
the
lower
quarter
of
the
RE-
TU
RN
pots,
reduce
the
output
level
of
your
effect
unit
so
that
you
can get
the
level
you
want
at
the
"12
o'clock"
position
of
the
STEREO
EFFECT
RETURNS.
You'll have
to
experiment
to
find
the
correct
balance
between
input
and
output
level setting
for
your
particular
unit,
but
keep
in
mind
the
principle
of
"hot
send, at-
tenuated
return".
Noise
is
present in
almost
every signal
processor;
the
trick
is
not
to
amplify it.
Stereo
returns
without
the
TRS
cable: If
you
don't
have
access
to
the
stereo
TRS
splitter cable for ste'reo returns,
you
may use
two
mono
cables,
with
the
left side going
to
Return
1 (or 3) and
the
right side going
to
Return 2
(or
4).
This gives you
only
2 stereo returns, however.
Stereo
returns
with
the
TRS
cable
but
the
next
jack
empty:
If
you
are using
stereo
effect
returns,
and
the
other
jack
of
a pair (1-2
or
3-4)
is
empty,
make
sure
that the "empty" return level is turned all the way
down,
or
it
will
tend
to
pull
the
mix
to
one
side,
and
make
it
more
monophonic
(diagram, p. 8).
For
more
information
on
stereo
cables,
etc.,
see pp. 22-23,
"Stereo
Effect
Return
Jacks".
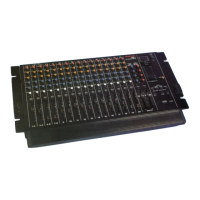
MUTES AND SCENE MEMORIES
The
MM-1
has a featu
re
usually
found
only
on
much
more expensive consoles: Mute
Automation.
This allows
you
to
turn
many
different
channels on
and
off simul-
taneously
at
the
touch
of
one
button.
For
example,
you
may have a rack
of
synthesizers
that
isn't
used
on
one particular song,
just
an acoustic piano.
You can
set
up
a SCENE, a "snapshot" setting which
mutes
all
the
synthesizers, leaving only
the
piano
mic on.
This way,
the
hiss
and
output
noise
of
the
synthesizers
doesn't
get in
the
way,
but
you leave
the
volume settings
alone. What's more,
you
can go from scene
to
scene
by
external MIDI Program Change
commands.
There are
99
scenes in
the
MM-1, each
of
wh ich can hold
a
"snapshot"
of
the
mute switches.
Other
settings
(volu me, effects send, EQ) are
not
automated,
and
aren't
reset
when
you change scenes.
Storing
a
Scene
in Memory
1. First, find an
"empty"
scene, one
that
has
no
mutes
stored
in it. An easy
way
is
to
hold RECALL
and
press
SCENE, which
will
bring
you
to
the
"highest
scene
number"
currently
stored
in
memory.
Then
press
UP
and
RECALL.
2.
Press
the
MUTE
buttons
you
want.
The
scene
number
will
start
to
flash, showing
that
the
front
panel settings
are
different
from
what's
in
the
original scene.
3. Press
STORE.
The
MEMORY LED will light
under
the
meter, showing
that
the
current
mutes
have been
put
into
a
"memory
buffer".
You
can't
press any more
mutes w.hile this LED
is
on. If
for
some reason
the
scene
number
chosen
in
step
1
isn't
right for
you,
you can
press
UP
or
DOWN
to
go
to
another
scene for final
storage.
4. Hold
STORE
and
press SCENE.
The
MEMORY LED
disappears,
and
you
have
now
written
the
mute
settings
into
the
MM-1's
permanent
memory.
See p. 20, "Scene/MIDI
Ch"
and
p. 21,
"Store/Copy",
for
more details
on
features
of
these keys.
Recalling Scenes:
Using
the
front
panel controls:
1. Press
UP
or
DOWN.
The
scene
number
will flash,
showing
you
that
the
scene
hasn't
been recalled yet.
2. When you find
the
number
you
want, press RECALL.
The
mutes
will
instantly change
to
the
settings
of
that
scene.
Using
the
REMOTE UP/DOWN footpedal:
The
optional RC-60P pedal can be
connected
to
the
REMOTE UP/DOWN jack
on
the
front
panel. When
pressed,
it
has
the
same
effect
as pressing
UP
or
DOWN
and
then
RECALL.
MIDI Features:
Any
method
of
recalling a scene
memory
will also send a
MIDI Program Change
command
to
the
MM-1's MIDI
OUT
jack, if
the
MIDI
TRANSMIT
CH
number
is
not
set
to
"off".
For
more
information,
see p. 13,
"Controlling
Mutes with Note Messages".
To
Clear a Scene: If
you
want
to
clear
al
i
mute
settings
from
a scene, hold CLEAR and press SCENE.
To
Copy
a
Scene
from
One
Number
to
Another:
Especially if
you
are using
MIDI
patch
change com-
mands,
you
may
want
to
have a series
of
scenes
that
have
the
same settings.
1. Go
to
the
scene
you
want
to
copy,
and press
RECALL.
-11-
 Loading...