Setup
2.4 Computer Hardware Installation
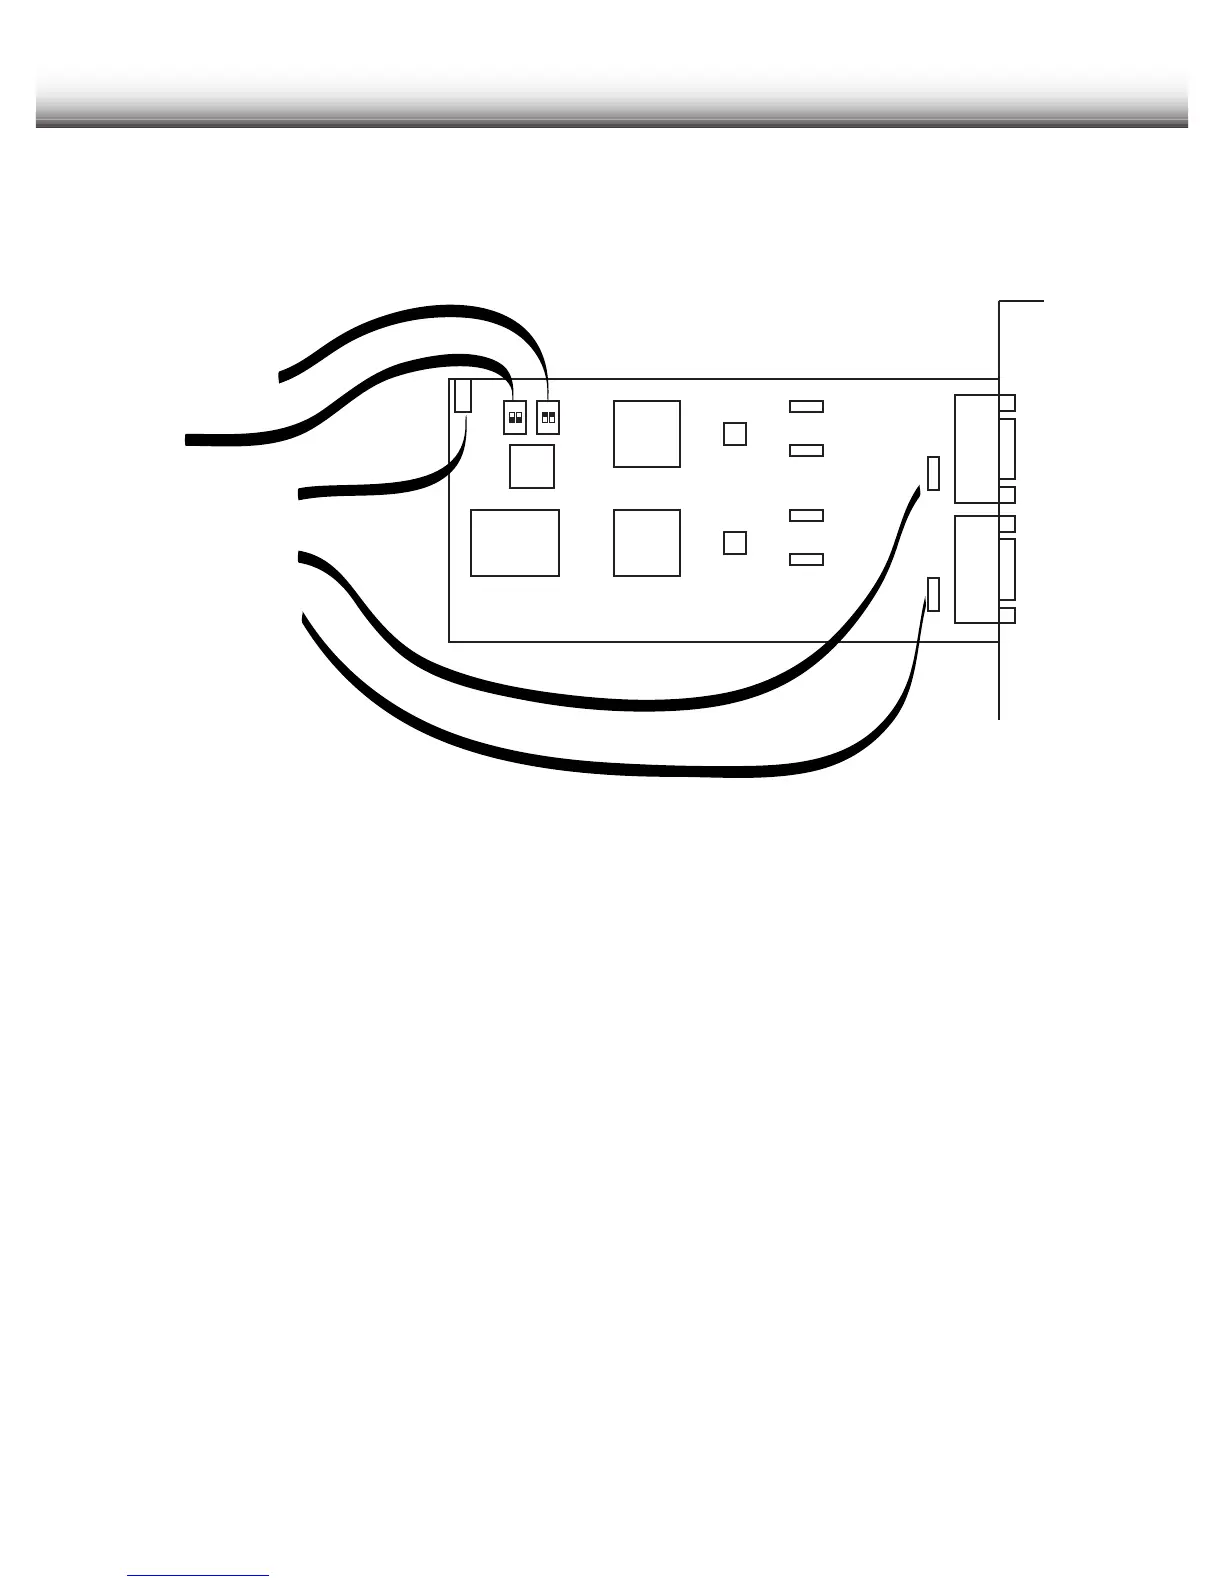
Before installation of the Moxa CI-132 card into a PC, set switches and jumpers as
shown in the diagram below.
JP1
ON
1 2
ON
1 2
MOXA
SW1: ON (default)
SW2: OFF
JP1: OPEN (default)
JP3: OPEN (default)
JP4: OPEN (default)
1.
Install the
Moxa
CI-132 card that was supplied with the TM-D4000 into an open ISA
slot in your computer. Be sure the computer’s power is turned off when you install the
card!
2.
Turn on the computer’s power. Insert the Device Driver diskette that was included
with the
Moxa
card. Make a folder labeled “MOXA” in the Program Files folder of
your computer and copy the contents of the diskette into the MOXA folder you just
created.
3.
Remove the diskette from the computer and store it in a safe place.
4.
Inside the MOXA folder on your computer double click the file “IO-IRQ.exe”. The IO-
IRQ screen will be displayed. Select “Smartio/Industio ISA Family” (it should already
be selected with the other option being grayed out) and press Enter on the
computer keyboard.
5.
At the bottom of the screen you will be prompted to {Enter the “Configuration
Access Port” in HEX:}. Type in 180 and press Enter.
6.
The “CI-132 series” box should be displayed. Use the cursor keys on your computer to
navigate through the parameters and set them as shown below. It is possible that
nothing will need to be changed.
Port index 1 2
I/O address (HEX) 180 188
IRQ 10 10
Speed High High
INT vector (HEX) 1c0 1c0
7.
Press the F10 key to save the settings and finish the hardware installation.
3
 Loading...