6 PERFORM-VE User Manual
4. Front Panel
Now that your Perform-VE is set up and connected to the devices of your
choosing, we’re going to take a quick tour of the front panel, explaining
what each of the buttons do without getting too deep in any details just yet.
Don’t worry – we’ll go feature diving soon enough!
One Knob To Rule Them All
By default, Perform-VE’s Control Knob edits the mix between the MIDI Voices and
your Lead Voice. It applies to all three presets and is not stored when Perform-VE
is turned o.
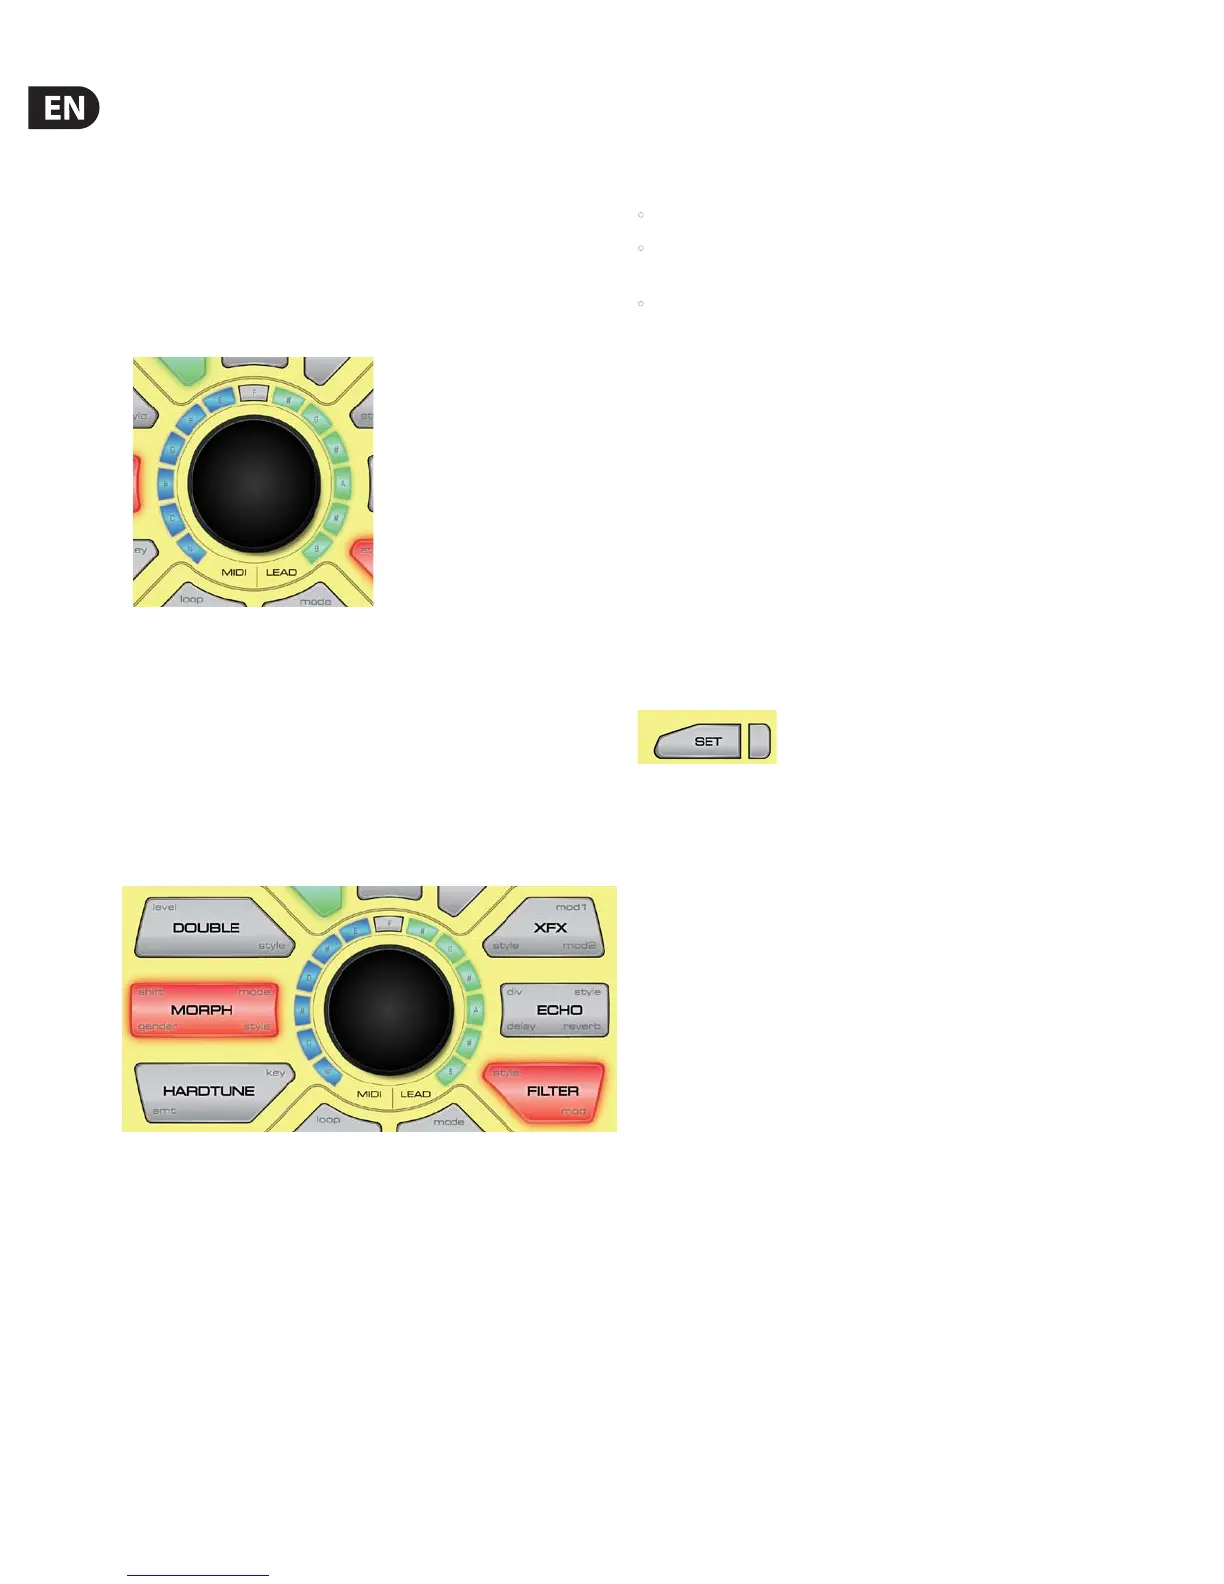
The graphic above shows equal levels of MIDI and LEAD as displayed on the
LED Ring. From here you can dial down the blue MIDI level by turning the knob
counter-clockwise, or dial down the green LEAD level by turning the knob
clockwise. Whichever level you turn down, the other one will stay at max volume.
Eects
Perform-VE makes some of the wildest and most complex sounds that TC-Helicon
has ever made possible. There’s a lot to discover by simply pushing buttons and
combining sounds, but we’ll give you an overview of the basics here, starting
with the six eects buttons, as shown below:
Toggling the Eects
Quickly pressing and releasing any one of the FX buttons will toggle the
associated eect on and o. The LED ring will switch to an alternate display mode
while the button is down. There’s a reason for this momentary ash, and we’ll
explain it now.
Real-time Control of Eect Parameters
Perform-VE was designed to allow instant access to 21 dierent eect
parameters without navigating through menus.
Each eect button is labeled with light gray text in one or more corners of the
button. For example, if you press “Level” in the top left corner of the Double
button, and turn the Control Knob while it’s pressed, you’ll adjust the amount of
doubling. Alternatively, if you hold Style in the bottom right corner of the Double
button, once that button pulses, you’ll be able to change the doubling style when
you turn the Control Knob.
When a parameter edit is underway…
• The LED ring will display the currently selected parameter value,
• The Control Knob will edit this parameter, ranging (clockwise) from min to
max, and
• The pressed FX button will pulse on and o. At this point you won’t need to
keep holding it down to continue editing.
Pressing any button (including the button that is pulsing) will quit the edit mode.
Styles and Mods
In addition to parameters like Level, Shift, Gender, Mode, Key, Div, Delay and
Reverb, you’ll see that four of the eects have a Style parameter. Styles are
essentially mini-presets for the eect in question. Changing any style will
instantly update a number of deeper eect parameters that are not available
for direct Control Knob editing. Style selections appear on the LED Ring as single
color-coded LEDs.
Mods are related to the currently selected Style. They appear as levels on the LED
Ring, colored to match the Style. You can think of each mod as custom ‘Tweak’
parameter matched to the Style in question.
4.1 The Set Button
Once a microphone and a MIDI keyboard are connected to your Perform-VE,
it’s time to ensure that the audio and MIDI settings are correct. You achieve this
with the SET button.
The SET button performs many functions in your Perform-VE. By itself, the SET
button congures the mic input level and sets the MIDI channel and split-point
used to control the notes, vocoder and sample features of your unit.
Mic Gain Setting
The actual signal level coming from your microphone can vary depending on
what type of microphone you have connected and how loudly you vocalize
(speak/sing/shout/shriek) into it. The Auto-Gain procedure is the easiest way
to ensure the microphone preamplier level set within your Perform-VE is
calibrated to match your mic and vocal technique, but you have the freedom to
set the Mic Gain level manually if you prefer.
Auto-Gain
Press and Hold the SET button to activate the Auto-Gain procedure and vocalize
into the microphone at your typical loudest volume. After several seconds the SET
button will ash red, indicating that the procedure is complete.
You will see that the LED to the right of the SET button changes color when you
vocalize into the microphone.
LEAD Voice: Your voice. Enhanced
and extremely altered, just how you
want it!
MIDI Voices: Up to 8 MIDI Note
controlled voices
generated by Perform-VE to
accompany your LEAD Voice.
MIDI Voices are Harmony, Vocoder or
VS Synthesis Voices.
Congures: Microphone Input Level,
MIDI Channel Select,
MIDI Split Point Select,
& More…

 Loading...