Introduction
VoiceLive 3 – Reference manual (2014-03-29) 15
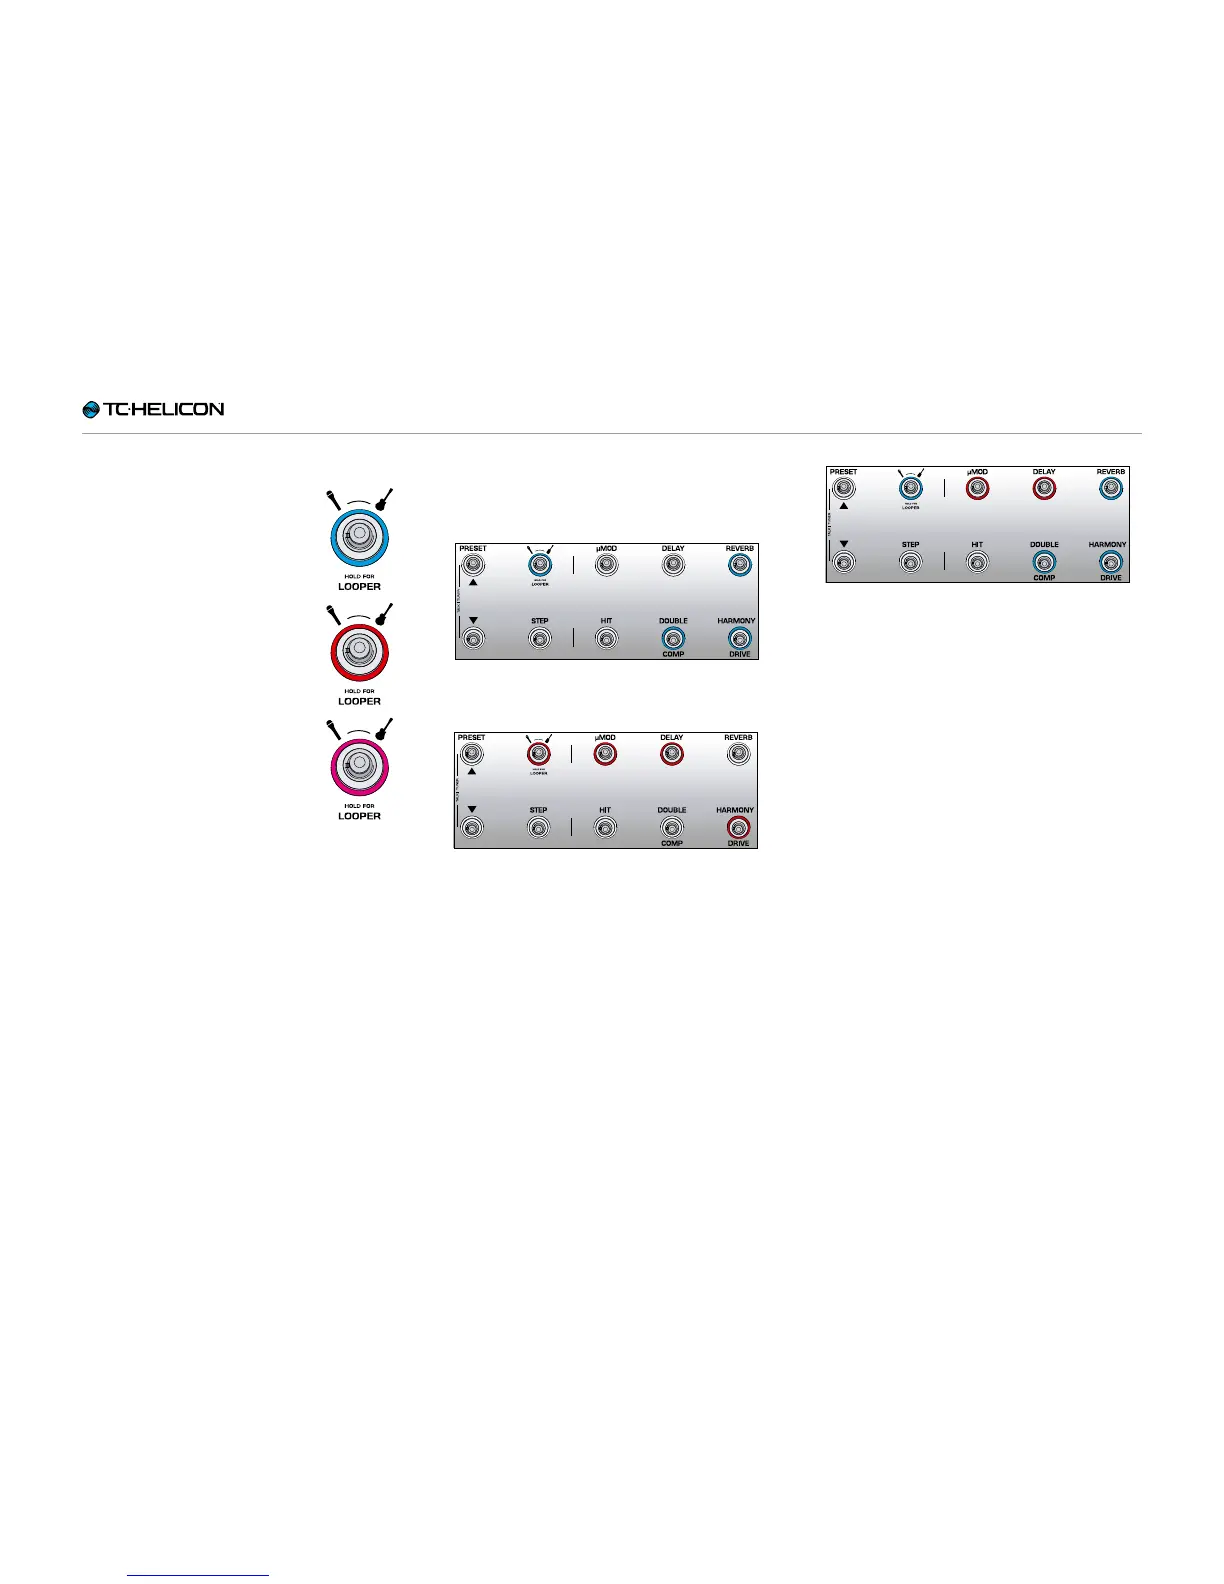
2. Layer footswitch
– Tap the Layer footswitch to
swap between the Vocal and
Guitar effects layers.
– Vocal layer active: Layer
footswitch LED lights blue.
– Guitar layer active: Layer
footswitch LED lights red.
– Hold the Layer footswitch to
access the Loop layer.
– Loop layer active: Layer
footswitch LED lights purple.
– To return from the Loop lay-
er to previously active layer
(Vocal or Guitar), hold.
Here are a couple of examples showing how the
effects footswitches might look when each layer
is active:
Vocal Layer with Reverb, Double and Harmony
activated.
Guitar Layer with µMod (let’s say it’s Flanger for
this example), Delay and Drive activated. If you
were previously on the Vocal Layer, you would
tap the Layer footswitch to move to the Guitar
Layer, changing the footswitch LED color from
blue to red.
Vocal Layer with some guitar effects remapped
to vocal effect footswitches. You may find that
you would like to “hang out” on a particular layer
(Vocal or Guitar) and have access to a key effect
or effects from another layer. Remapping foot-
switches allows you do to just that. This is best
referred to as a “mixed layer”. This is a more ad-
vanced operational mode that we will cover later.
 Loading...