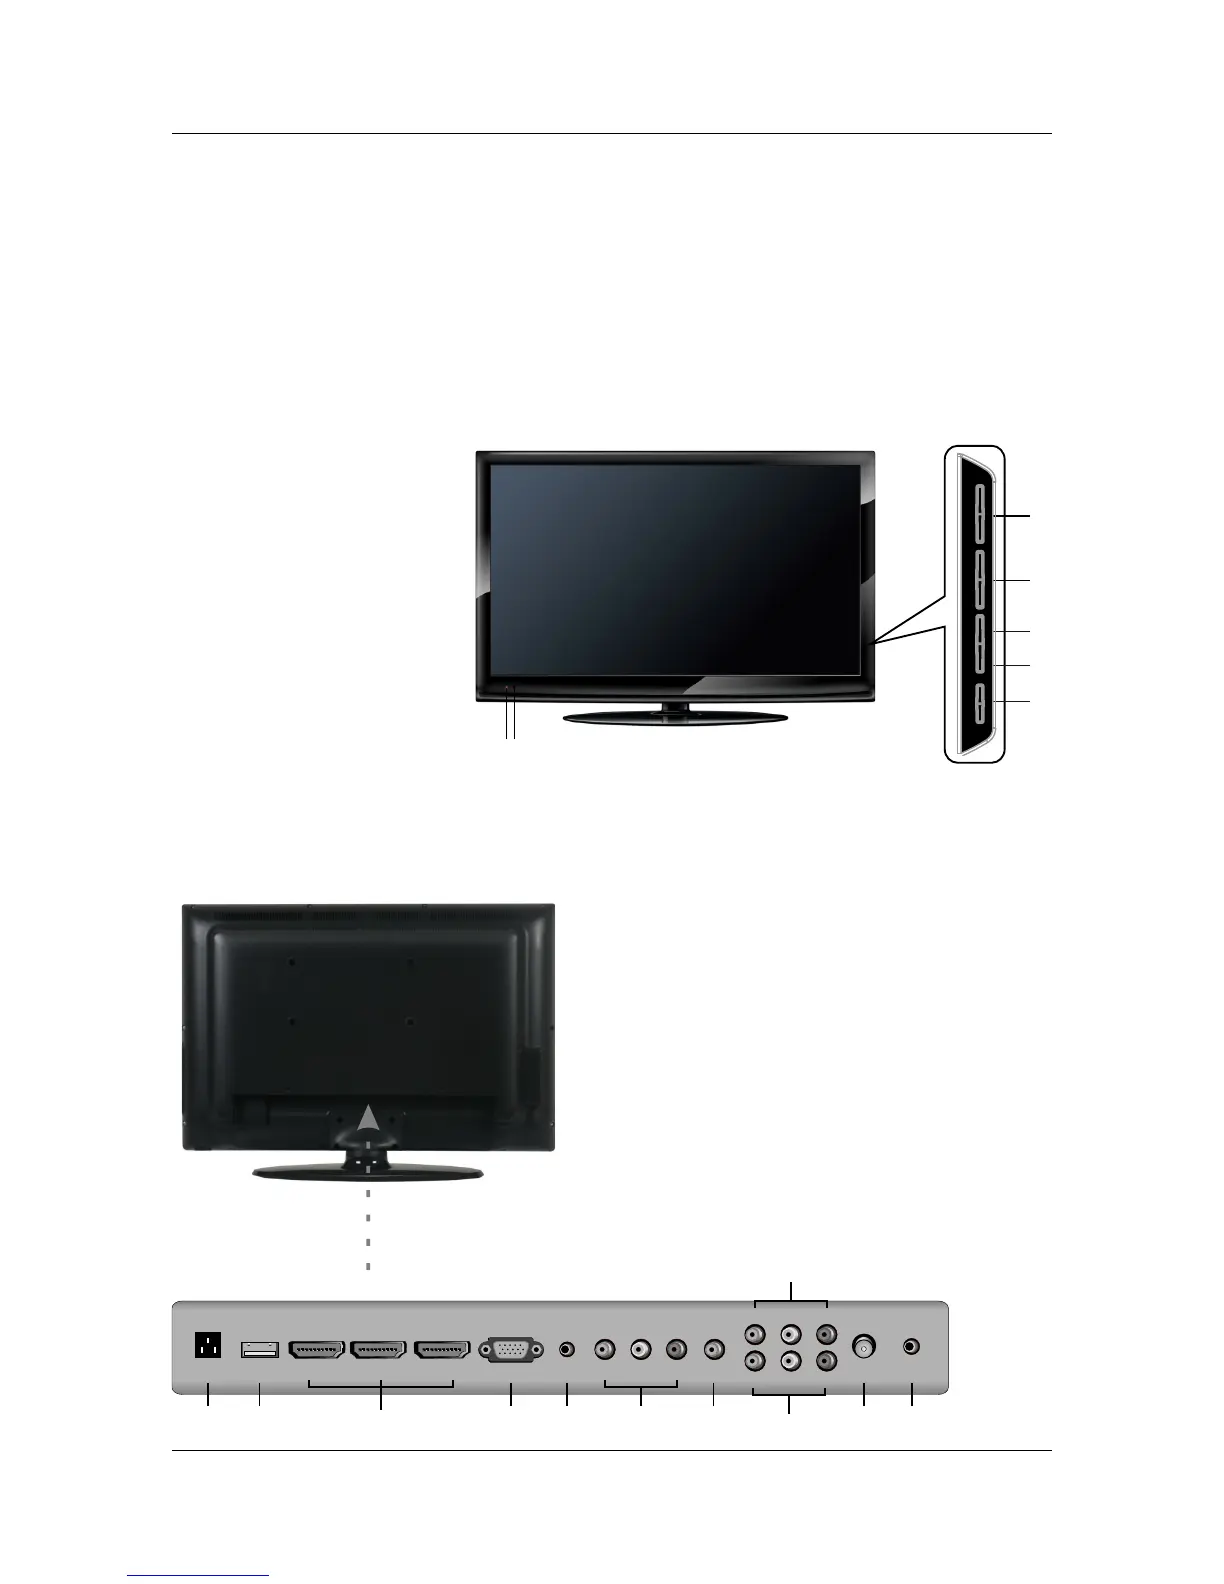
4 FRONT, BACK, CONNECTIONS OF L D. C 4. FRONT, BACK, CONNECTIONS OF LCD
Front View
Back View and Control Connections
5
2
1
4
3
VOL + VOL - CH+ C H-
MENU
INPUT POWER
6
7
5
1. Press“VOL+/VOL-”to increase or decrease the sound level.
2. Press“CH+/CH-”to scan through channels.
3. Press “MENU”to bring up the main menu on the screen.
4. Press“INPUT”to select the input source.
5. POWER on or off.
6. POWER INDICATOR: show red in standby mode, show green or blue when your TV is switched on.
7. REMOTE SENSOR: infrared sensor for the remote control.
Press“ ” button to turn the TV
1. AC IN: Main power input.
2. USB : Connect to the External drive.
3. HDMI1 HDMI2 HDMI3: Connect to the HDMI output jack
.
4. VGA(PC): Connect to the PC-RGB output jack of PC.
5. PC AUDIO : Connect the Audio output jack of PC.
6. YPbPr1/YPbPr2: Connect the YPbPr output jack of DVD
or VCR.
7. COAX: Connect the SPDIF receiver.
8. VIDEO Audio L R : Connect to the Video output jack
of DVD or VCR.
9. RF IN: Connect the antenna.
10. PHONE: Connect the headphone.
PORT
/ /
of DVD
/ ( / ) /Audio
2
3
VGA( PC)VGA( PC)
USBUSB
HDMI1HDMI1 HDMI2HDMI2
HDMI3HDMI3
PC
AUDIO
PC
AUDIO
CO XA
CO XA
PHONEPHONE
RF IN RF IN
4
5
8 9
Pb1Pb1
Pr1Pr1
Y1Y1
Pb2Pb2
Pr2Pr2
Y2Y2
LL RR
VIDEOVIDEO
AC INAC IN
1
6
7
6
10