Do you have a question about the Teac LP-R660USB and is the answer not in the manual?
Steps to record audio from a cassette tape onto a CD-R or CD-RW disc.
Steps to record audio from a vinyl record onto a CD-R or CD-RW disc.
Steps to record cassette audio to a computer using Audacity software.
Steps to record vinyl audio to a computer using Audacity software.
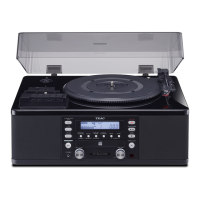
The TEAC LP-R660USB is a versatile audio recording device designed to convert analog audio from cassettes and vinyl records into digital formats, specifically CD-R/CD-RW discs or computer-based audio files using Audacity. This guide outlines its functions, usage features, and some implicit maintenance aspects.
The primary function of the TEAC LP-R660USB is to enable the recording of audio from two main analog sources: cassette tapes and vinyl records. It offers two distinct methods for recording: directly to a recordable CD-R or CD-RW disc, or to a computer via a USB connection using Audacity software. This dual functionality makes it a comprehensive solution for archiving older audio formats into more modern, accessible digital formats.
When recording to a CD-R/CD-RW, the device acts as a standalone recorder, managing the entire digitization process internally. It handles the creation of tracks and the finalization of the disc, which is crucial for making the recorded CD playable on standard CD players. The ability to record directly to CD without a computer simplifies the archiving process for users who prefer a physical digital medium.
For computer-based recording, the device serves as an analog-to-digital converter, sending the audio signal to Audacity software. This method provides greater flexibility for editing, processing, and saving audio in various digital file formats (e.g., MP3, WAV, OGG) on a computer. It leverages the robust features of Audacity for more advanced audio manipulation and storage.
The process begins by powering on the device and selecting "TAPE" as the recording source. Users then load a recordable CD-R or CD-RW disc into the tray. A key feature here is the device's ability to check the disc's recordability; if "NO TOC" and "CD-R" (or "CD-RW") do not appear, the disc is either unrecordable or already used. This prevents wasted recording attempts.
Before recording, users must select the correct tape type (Type I, II, or IV) by flipping a "Tape" switch to "Normal" or "High," ensuring optimal audio quality based on the cassette's specifications. After loading the cassette, the "Record" button is pressed to enter recording mode. To prevent the beginning of the recording from being cut off, a specific sequence of pressing "Play" and then "Pause" is recommended. Recording commences by pressing "Play/Pause" and then "Pause" for the cassette.
A notable feature is the "Track Increment" button, which allows users to manually create new tracks during recording, useful for separating songs or segments. The "Play/Pause" button can also pause recording, automatically creating a new track without stopping the cassette playback. Recording can be manually stopped with the "Stop" button or automatically when the cassette finishes.
After recording, the disc must be "Finalized." This crucial step creates a Table of Contents (TOC) on the disc, making it playable and preventing further data from being recorded. The device guides users through this process by switching to "CD" mode and using the "Finalize/Erase" and "Enter" buttons. The disappearance of "NO TOC" indicates successful finalization.
Similar to cassette recording, the process starts by powering on and selecting "PHONO" as the source. A recordable CD-R or CD-RW is loaded, with the device again checking its recordability.
Users place a record on the turntable and select the appropriate playback speed (33, 45, or 78 RPM) using the "Speed" switch, ensuring correct playback. For 45 RPM singles with large holes, a 45 RPM adapter is required. The tone arm must be unclipped.
The "Record" button is pressed to enter recording mode. Playback of the record is initiated by lifting the tone arm with the lift lever and carefully placing it on the record. Recording begins by pressing the "Play/Pause" button.
Like cassette recording, the "Play/Pause" button can pause recording, automatically creating a new track without stopping the record. Manual stopping is done with the "Stop" button, or it stops automatically when the record finishes and the tone arm returns to its holder.
A specific feature for vinyl recording is the ability to switch sides. Users can pause or stop recording, lift the tone arm, flip the record, and then resume recording from Step 8. After recording, the disc is finalized using the same "CD" mode, "Finalize/Erase," and "Enter" button sequence as with cassettes.
This method involves connecting the device to a computer via USB. After logging in and opening Audacity, users must select "Microphone (USB Audio CODEC)" as the recording source in Audacity.
The "Tape" switch on the device is set to "Normal" or "High" based on the cassette type. After loading the cassette, recording is initiated by pressing the "Record" button in Audacity. Users then press the "Play" button on the cassette player. Audacity will display waveform audio, indicating active recording.
To pause recording, users first pause the cassette playback, then press the "Pause" button in Audacity. Resuming involves pressing "Pause" in Audacity again, followed by "Pause" on the cassette player.
Stopping recording requires stopping the cassette playback first (if not already finished) and then pressing the "Stop" button in Audacity. It's important to note that Audacity does not automatically stop recording when the cassette finishes, requiring manual intervention.
For multiple cassettes or sides, users stop cassette playback, pause Audacity recording, flip the cassette or insert a new one, resume Audacity recording, and then start cassette playback.
Once recording is complete, users save and export the audio from Audacity. This involves selecting "File," then "Export," and "Export Audio..." Users choose a save destination, enter a file name, and select an audio format (e.g., WAV, MP3, OGG) from the "Save As Type" dropdown. Metadata (artist, title, year) can be added in the "Edit Metadata Tags" window before selecting "OK" to begin the export process.
The setup is similar to cassette recording to Audacity: connect via USB, log in, open Audacity, and select "Microphone (USB Audio CODEC)" as the input.
Users place a record, select the correct RPM speed, and unclip the tone arm. Recording starts by pressing the "Record" button in Audacity. Playback is initiated by lifting the tone arm and placing it on the record. Waveform audio in Audacity confirms recording.
Pausing involves lifting the tone arm off the record and pressing "Pause" in Audacity. To resume, press "Pause" in Audacity again, then lower the tone arm back onto the record.
Stopping recording requires lifting the tone arm off the record (if not finished playing) and pressing the "Stop" button in Audacity. Audacity does not automatically stop recording when the record finishes.
For multiple records or sides, users stop record playback, pause Audacity recording, flip the record or place a new one, resume Audacity recording, and then start record playback.
Saving and exporting the audio follows the same steps as for cassette recordings in Audacity: "File," "Export," "Export Audio...", choose destination, file name, format, and add metadata before exporting.
While the manual doesn't explicitly detail maintenance, several points can be inferred:
In summary, the TEAC LP-R660USB is a user-friendly device designed to bridge the gap between analog and digital audio, offering both direct-to-CD and computer-assisted recording options with features that guide users through the process and implicitly encourage careful handling and proper media usage.
| USB Interface | Yes |
|---|---|
| Built-in Speakers | Yes |
| Cassette Deck | Yes |
| Drive System | Belt Drive |
| Platter | Aluminum |
| Power Supply | AC Adapter |
| Playback Speed | 33 1/3, 45 RPM |
| Recording Format | MP3 |
| Inputs | RCA |
| Outputs | RCA, Headphone |
| Cartridge | Moving Magnet |
| USB Compatibility | Windows, Mac |
| Type | Turntable/CD Recorder/Cassette Player Combo |