EN
9
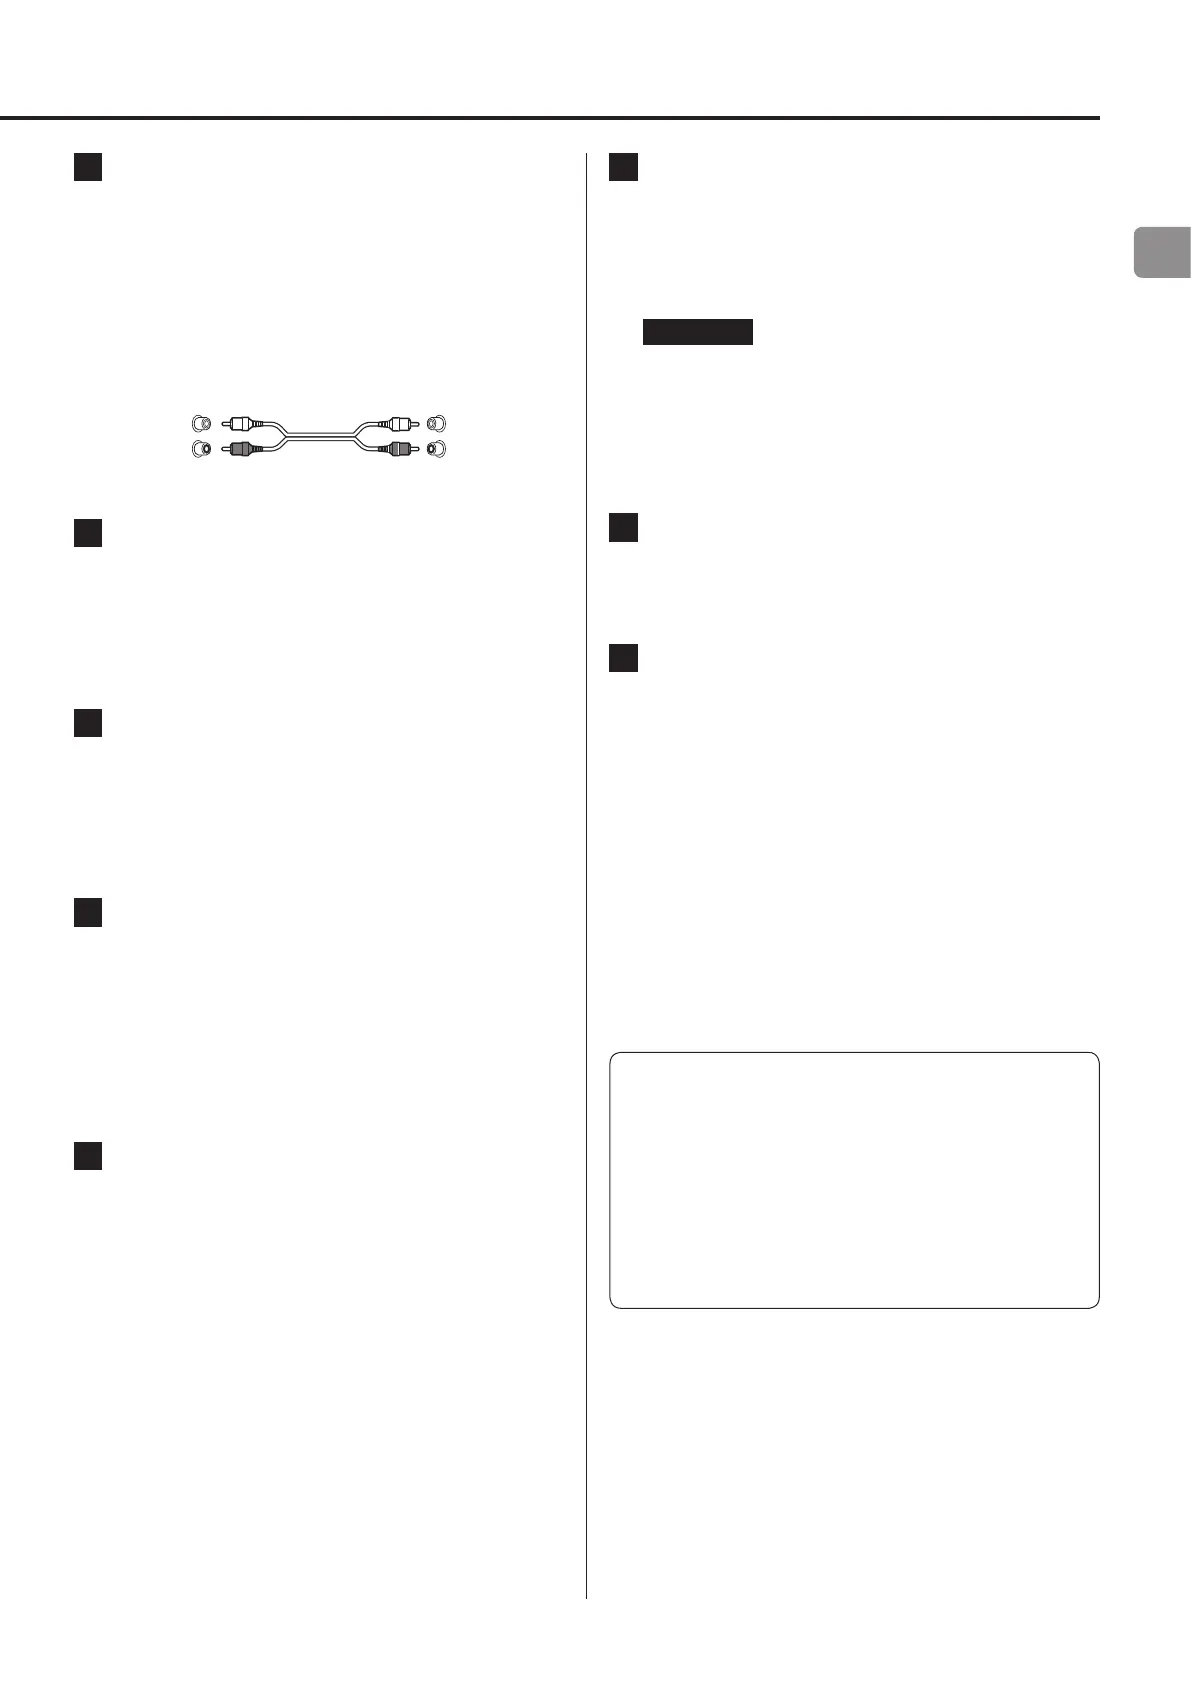
A Analog audio input (LINE IN) connectors
Use these to input stereo analog audio. Connect the audio
output connectors of a cassette deck, CD player or other audio
output equipment to these.
Use commercially-available RCA audio cables for
connections.
Connect this unit’s R input connector to the R output connec-
tor of the audio output device, and this unit’s L input connector
to the L output connector of the other device.
White (L)
Red (R)
White (L)
Red (R)
B RCA COAXIAL digital audio input connector
Use this to input digital audio. Connect the coaxial digital audio
output connector of an audio device to it.
Use a commercially-available RCA coaxial digital cable
for connection.
C OPTICAL digital audio input connector
Use this to input digital audio. Connect the optical digital audio
output connector of an audio device to it.
Use a commercially-available optical digital cable with a
square connector (TOSLINK) for connection.
D CLOCK SYNC input (10MHz IN) connector
Use this to input a synchronization signal (clock sync).
To input a 10MHz oscillator signal, connect the oscillator output
here (page31).
Use a commercially available BNC coaxial cable for
connection.
o Clock sync is possible when the input source is USB.
E Analog audio output (LINE OUT) connectors
These output 2 channels of analog audio. Connect these XLR or
RCA connectors to a stereo amplifier or powered speakers.
Use commercially available cables for connections.
XLR: balanced XLR cables
RCA: RCA audio cables
Connect this unit’s R connector to the R connector of the
amplifier and its L connector to the L connector of the amplifier.
o See “Line output” on page25 for analog output settings.
F USB port
Use this to input digital audio from a computer. Connect it to a
computer’s USB port.
Use a commercially-available USB2.0 cable (A-B type) for
this connection.
ATTENTION
Before connecting a computer that is running a Windows
OS, you must install the dedicated driver on the computer
(page27).
Proper connection is not possible with a computer that does
not have this driver installed.
G Maintenance port
This is used for maintenance. Do not connect anything to this
port unless instructed to do so by our service department.
H Power inlet (~IN)
Connect the supplied power cord here.
After all other connections are complete, connect the power
cord’s plug to a wall outlet.
V
Do not use any power cord other than the one
included with this unit. Use of other power cords
could result in fire or electric shock.
V
Unplug the cord from the outlet when not using
the unit for a long time.
V
Complete all other connections before turn-
ing the unit on.
o Carefully read the manuals of the devices that you are
connecting and follow their instructions when making
connections.
o Do not bundle connecting cables with power cords.
Doing so could cause noise.
o Connect all plugs completely.