12
Operation
continued
involuntarily extinguish while gas is still flowing. This
condition is unsafe; therefore, adjustments should only
be made with the Burner Output Knob positioned at the
LOW setting while keeping a close eye on changes.
Please note that this procedure is best
performed at night or low light to maximize
visibility of the burner flame and that the grill
must be allowed to cool between attempts to
adjust multiple burners.
Procedure:
1. Follow the Burner Ignition Procedures and operate
the grill on HIGH for 3 to 5 minutes or until the
burners glow bright orange.
2. Turn the Burner Output Knob to the LOW position
and wait one minute to permit the temperature to
stabilize.
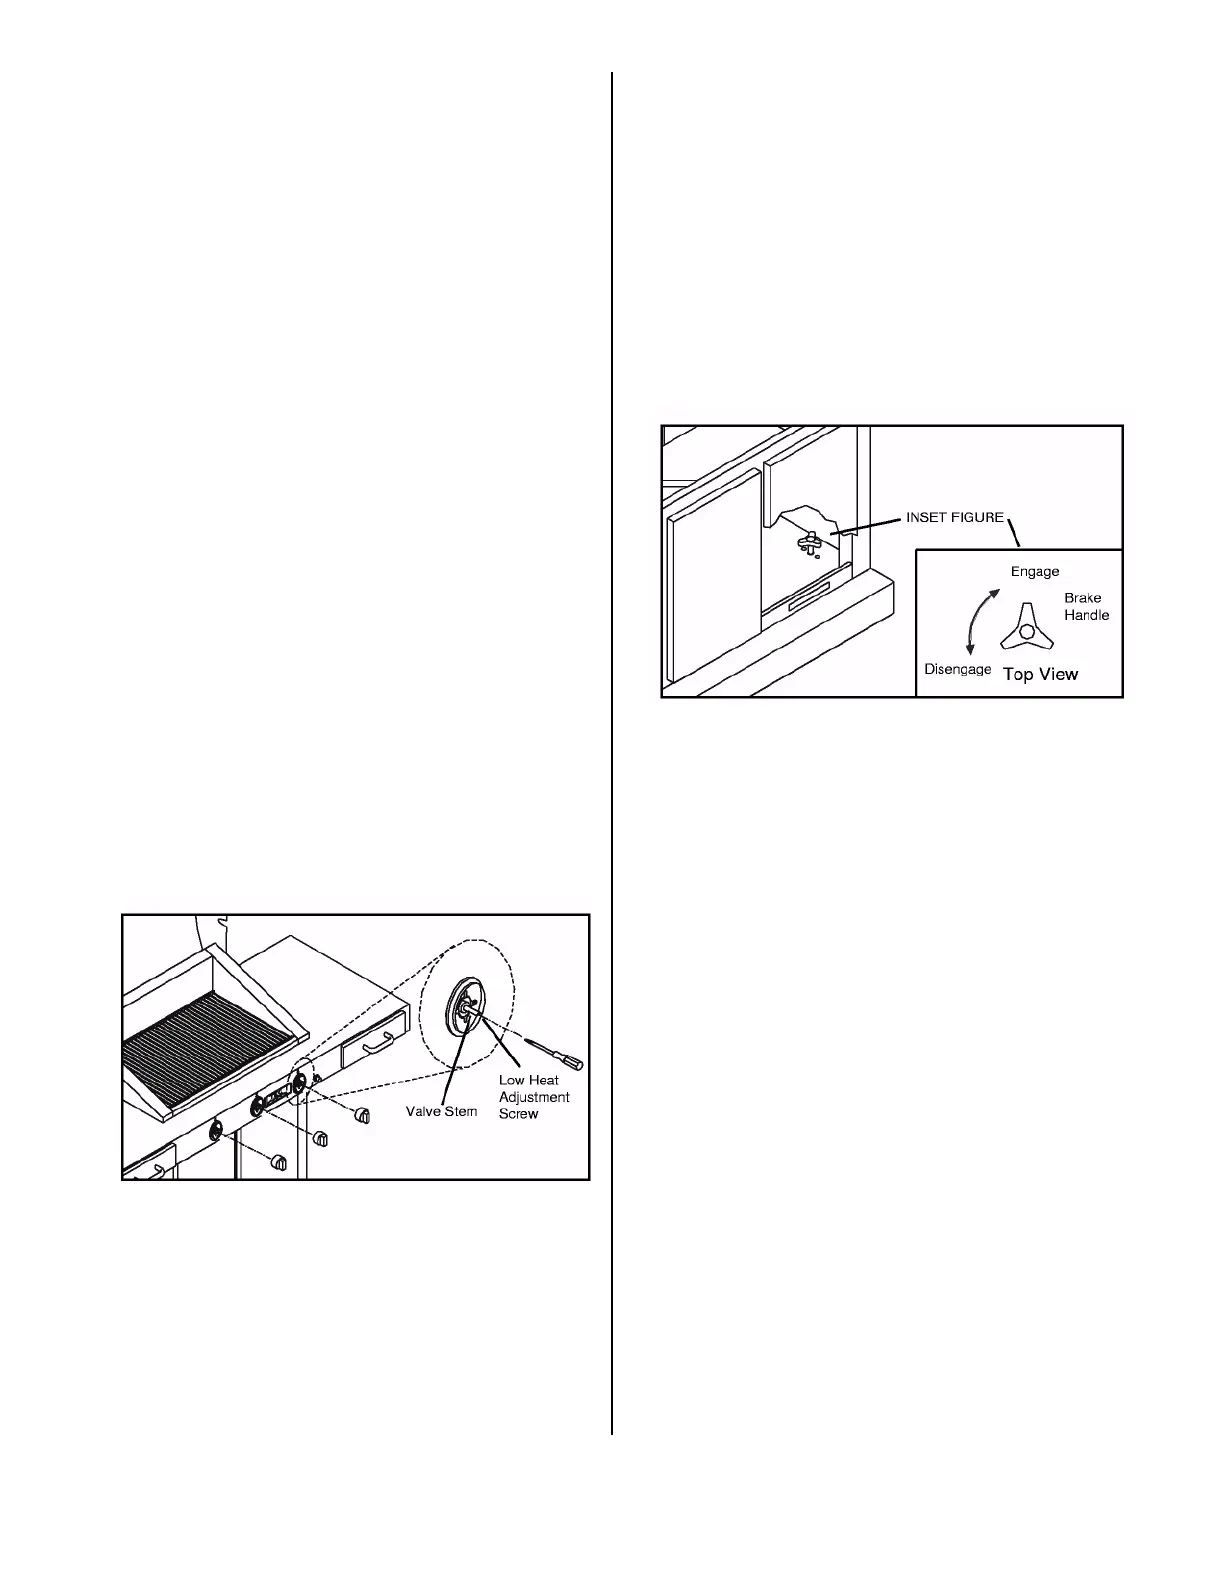
3. Remove the Burner Output Knob from the valve
stem. (See Figure 14 below)
4. Insert a small blade screwdriver into the Valve
Stem.
5. Turn the Low Heat Adjustment Screw clockwise to
reduce the heat intensity or counter-clockwise to
increase the heat intensity. At its optimal low heat
adjustment, the burner input will be just high enough
to produce a stable blue flame. To accomplish this,
look under the glass at the burner, through the Flame
Observation Viewpoint, while turning the
adjustment screw.
Figure 14. Low Heat Adjustment (Sterling G-
3000 FR shown)
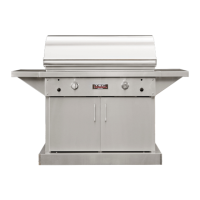
Cabinet Base Brake
Your grill cabinet comes equipped with a Base Brake
mechanism for use while the grill is stationary. The
Brake is located at the right front inside corner of the
Base. Engage the Base Brake by turning the Brake
Handle clockwise until you feel resistance. (Figure 15,
Page 12.) Turn the Brake Handle one half turn past this
point for full engagement. Disengage the Brake by
turning the Brake Handle counter-clockwise.
Figure 15. Cabinet Base Brake