4
Installation
continued
Hazardous Locations and Conditions Continued
g Never leave your grill unattended while it is in
operation.
g Do not wear flammable and/or loose clothing, such
as long sleeves, neckties, scarves, etc., while using
the grill.
Cabinet Base Mounting
Instructions
The Sterling FR and the Sterling G-Series FR grills are
designed for cabinet mounting. The Grill is packaged
separately from the Cabinet Base. Follow the procedures
below to mount the Grill Housing onto the Cabinet Base.
An open-end 7/16" wrench is required to install the
hardware which includes 1/4-20 hex head screws, flat
washers, and lock washers.
1. Set the Cabinet Base upright on a level surface and
set the Base Brake mechanism as shown on page 12.
This will keep the Cabinet Base stationary. Place the
Grill Housing onto the Cabinet Base and align the
mounting holes of both.
2. Place a lock washer followed by a flat washer on to
the hex head screw and from the inside of the
cabinet base, thread each screw upward into the
threaded hole of the grill body.
3. Before completely tightening any of the screws,
hand-tighten ALL of them into the threaded holes
and ensure the sides of the Grill Housing and
Cabinet Base are still aligned.
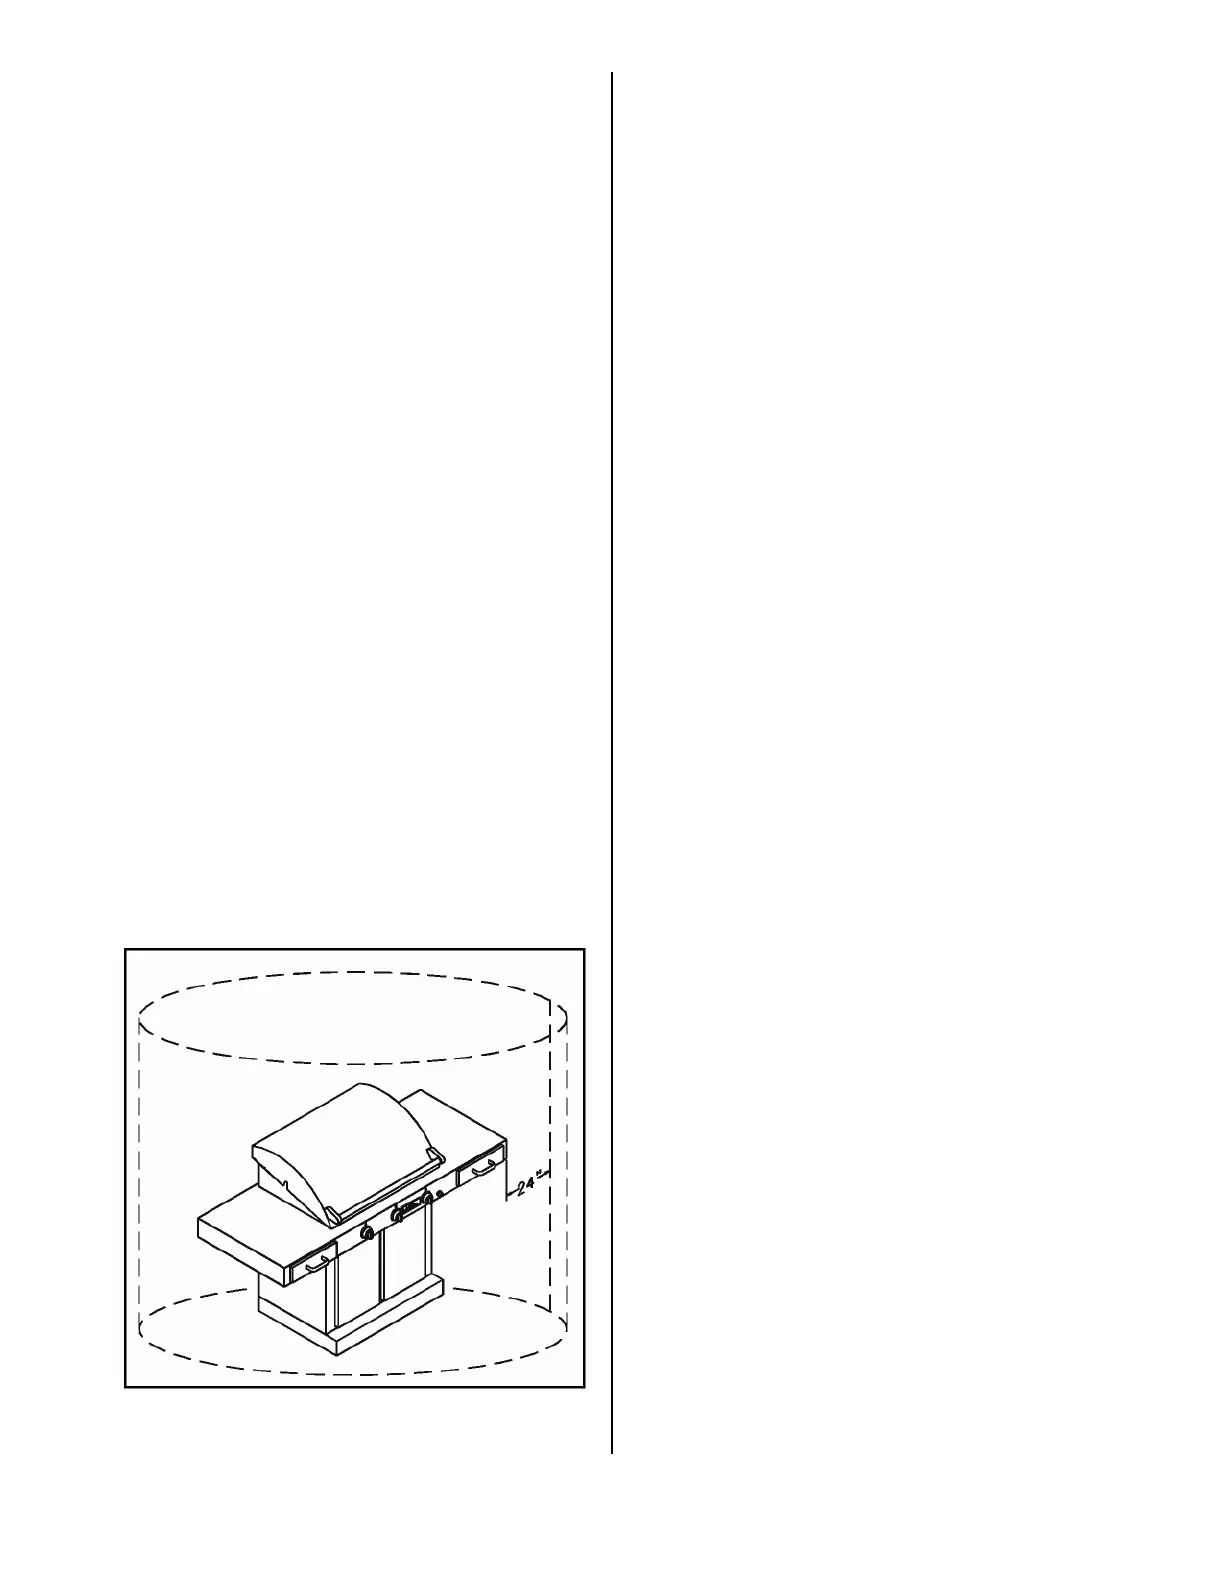
Figure 1. Clearance to Combustible
Construction (Sterling G-3000 FR Shown)
Pedestal Base Mounting
Instructions (Two Burner Sterling FR
Units only)
Assemble the Pedestal Base and mount the Grill Housing
as follows. The required hardware is tied to the top back
corner of the Pedestal Base in a plastic bag. An open-end
7/16" wrench and a #2 Phillips screwdriver are required
to install the included hardware. (See Figure 2, page 5)
1. Remove the Pedestal Base from the packaging
materials and set it on a level surface.
2. Remove the Gusset from the tank storage cavity and
remove the packaging from it. Place Gusset across
front top of Pedestal Base with top flange facing
away from the front of the Pedestal Base towards the
front of the grill. Align the four (4) holes and insert
four (4) 1/4"- 20 truss head screws through the holes
with the threads pointed into the tank storage cavity.
Then, place a flat washer on the screw followed by a
lock washer, followed by a 1/4" nut. Using the
Phillips screwdriver and the 7/16" open-end wrench
tighten each screw. See accompanying diagram with
Gusset.
3. Place the Grill Housing on the Pedestal Base and
align the holes in the bottom of the Grill Housing
with the holes in the top of the Base.
4. Fasten the Housing to the Base with the supplied
hardware: four (4) 1/4"-20 x 1/2" hex head bolts,
four (4) 1/4" flat washers, and four (4) 1/4" lock
washers. Place a lock washer followed by a flat
washer on to each bolt then insert each bolt with the
threads pointed upward into the aligned holes. Using
the 7/16" open-end wrench tighten each bolt.
In-Ground & Bolt-Down
Post Base
(Two Burner Sterling FR
Models Only)
1. Install the In-Ground or Bolt-Down Post Base in
accordance with the instructions accompanying the
Post Base. (See Figures 3 & 4, page 5)