14
support@techage.com
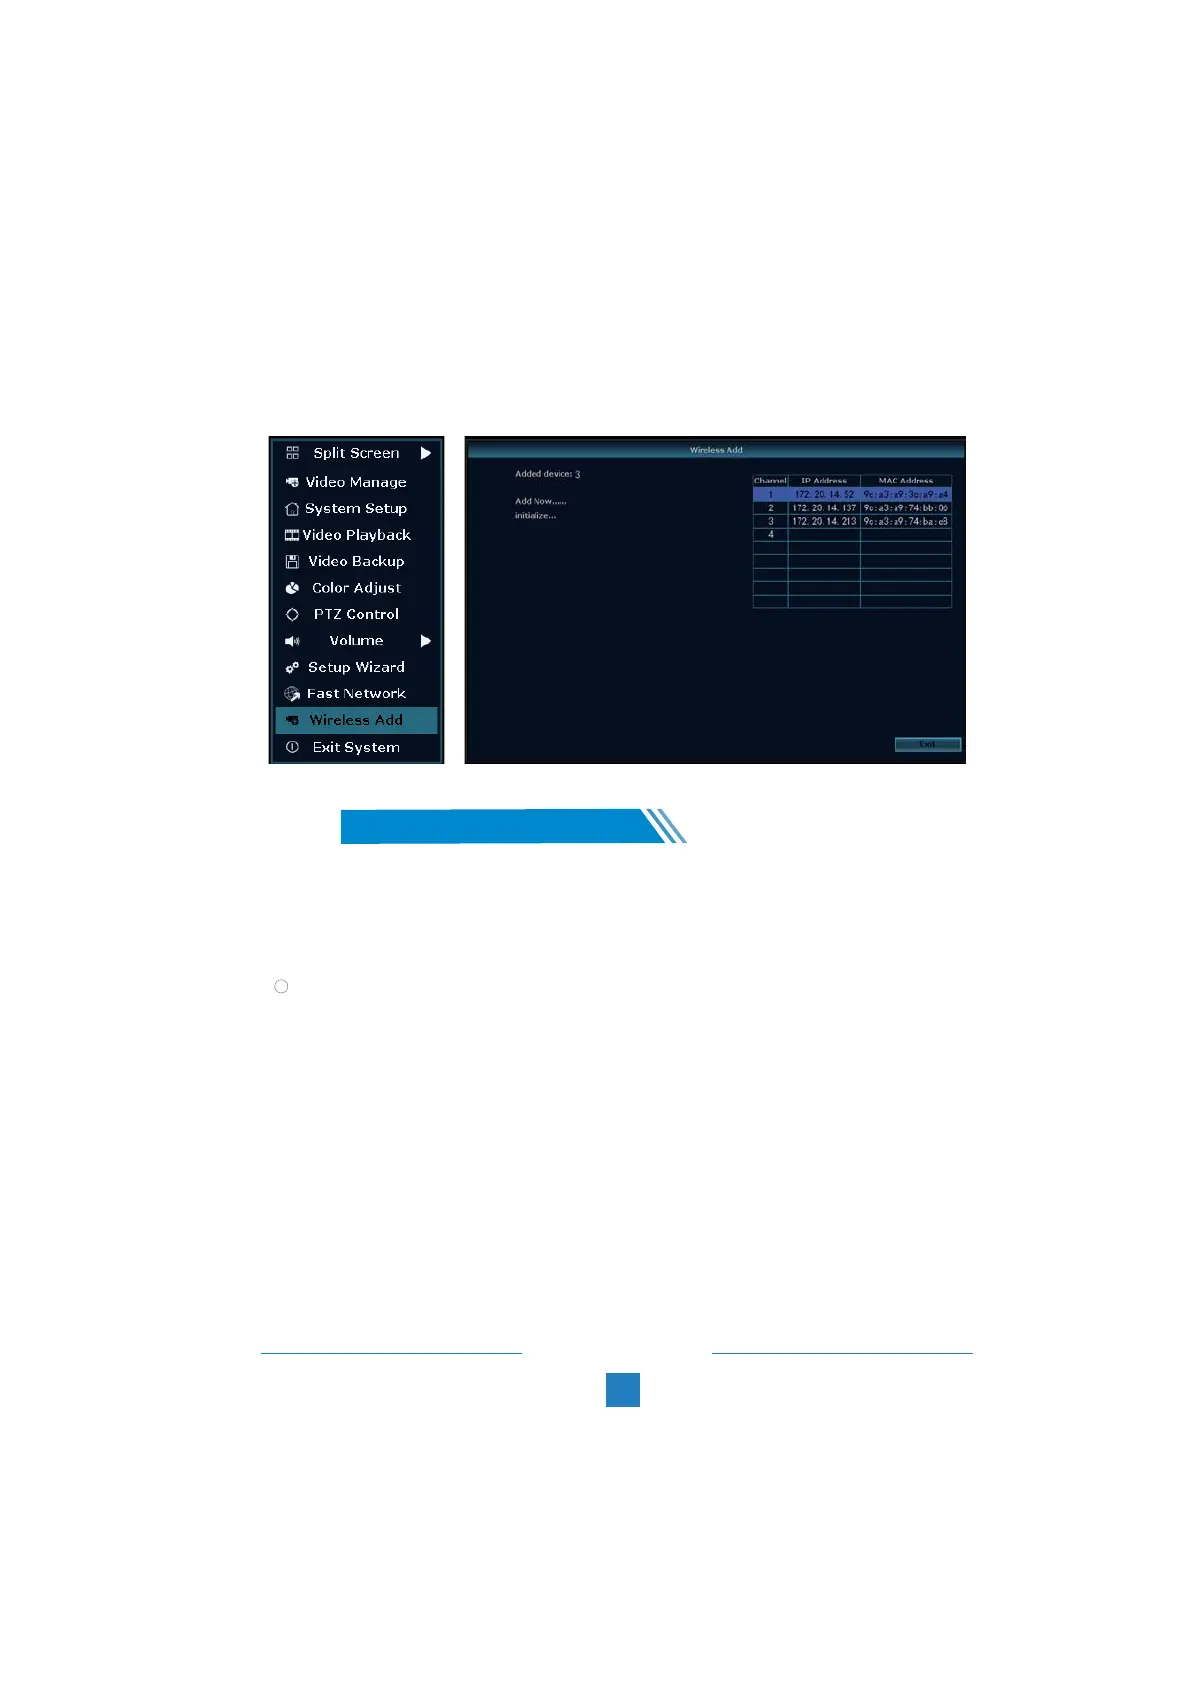
2.2 Right-click mouse in the blank of main interface, select “Wireless Add”, it will search the new
wireless camera that connected to the NVR and add it into the NVR. You will see the video of the
new camera comes out. It means you add an additional camera to the NVR successfully. And now
plug off the network cable from the camera and connect it to the router again.
Right click the mouse > System setup > General setup > HDD Setup > Select the Hard Drive
(format) > Format > Yes > OK.
1. HDD Install
The system may not include HDD if you did not select the kit with HDD. The system can
work with 3.5” or 2.5” SATA Hard Drive.
Unplug your NVR from power, unscrew and remove the top cover.
② Connect the SATA power and data cables from the NVR to the corresponding ports on your HDD
③ Holding the hard drive and the DVR , gently turn it over and line up the holes on the hard drive
with the holes on the NVR. Use a phillips screwdriver, screw the provided screws into the holes
and assemble the cover.
1
Tips:
New HDD has to be formatted before recording.
06
Record Video and Audio
/