14
Note: Your Smartphone needs to be connected to the same local WiFi as the
TX-146.
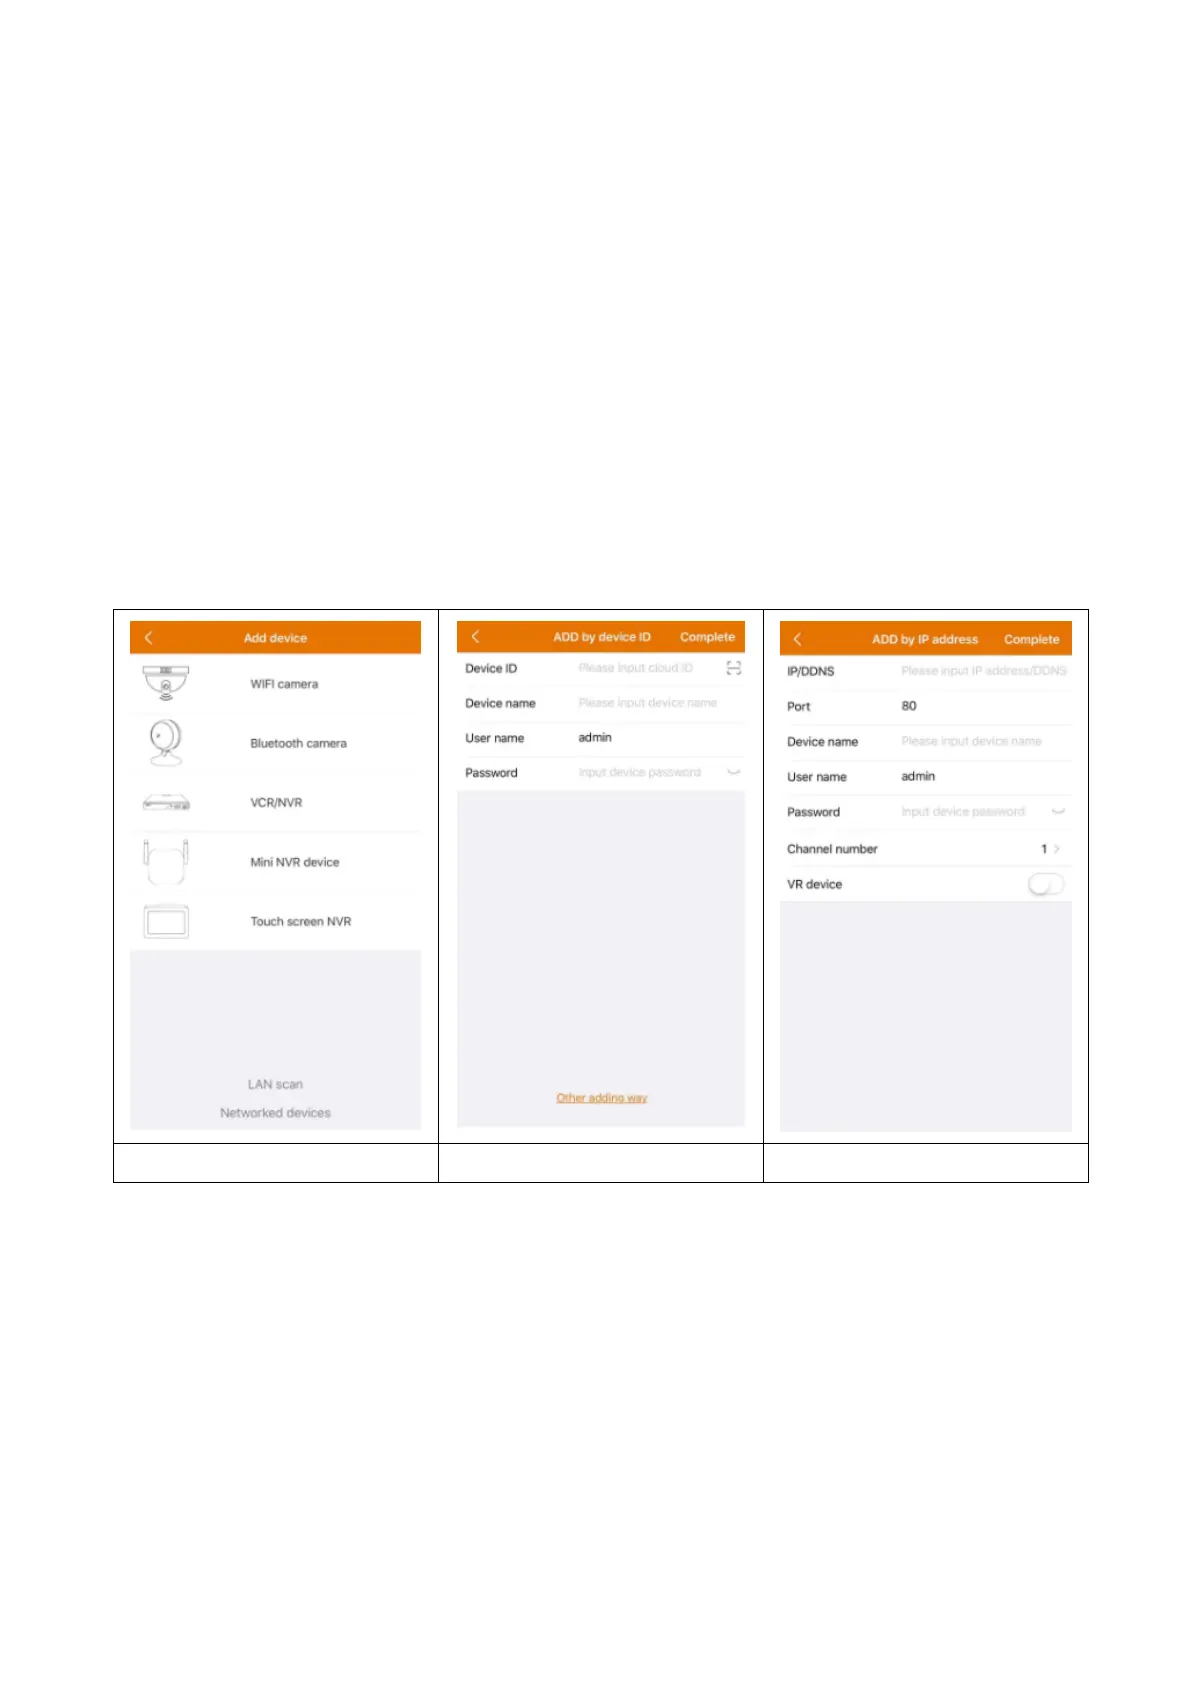
LAN/network scan adding: By clicking on LAN/network scan the App will
search the local network for already configured cameras (TX-146). Choose
the Device ID. Fill in a device name, username and password for the camera.
The password was customized by you while WiFi configuration. The
standard username is admin. Click on complete to save the settings.
5.4 IP/DDNS adding
By clicking on networked devices (1) the ADD by device ID will open. Here you
can click on other adding way (2). Now it is possible to add the TX-146 by IP
or DDNS (3).
Note: Adding the device by IP it is not possible to access the TX-146 from
outside your local network (no connection via mobile network 3G/4G/LTE).
Adding by local device IP: You can find the IP address in the router menu or
in the Security Premium PC Software. Fill in port (standard is 80) a device
name, username and password for the camera. The password was
customized by you while WiFi configuration. The standard username is
admin. Click on complete to save the settings.