Installation Steps & Battery Installation
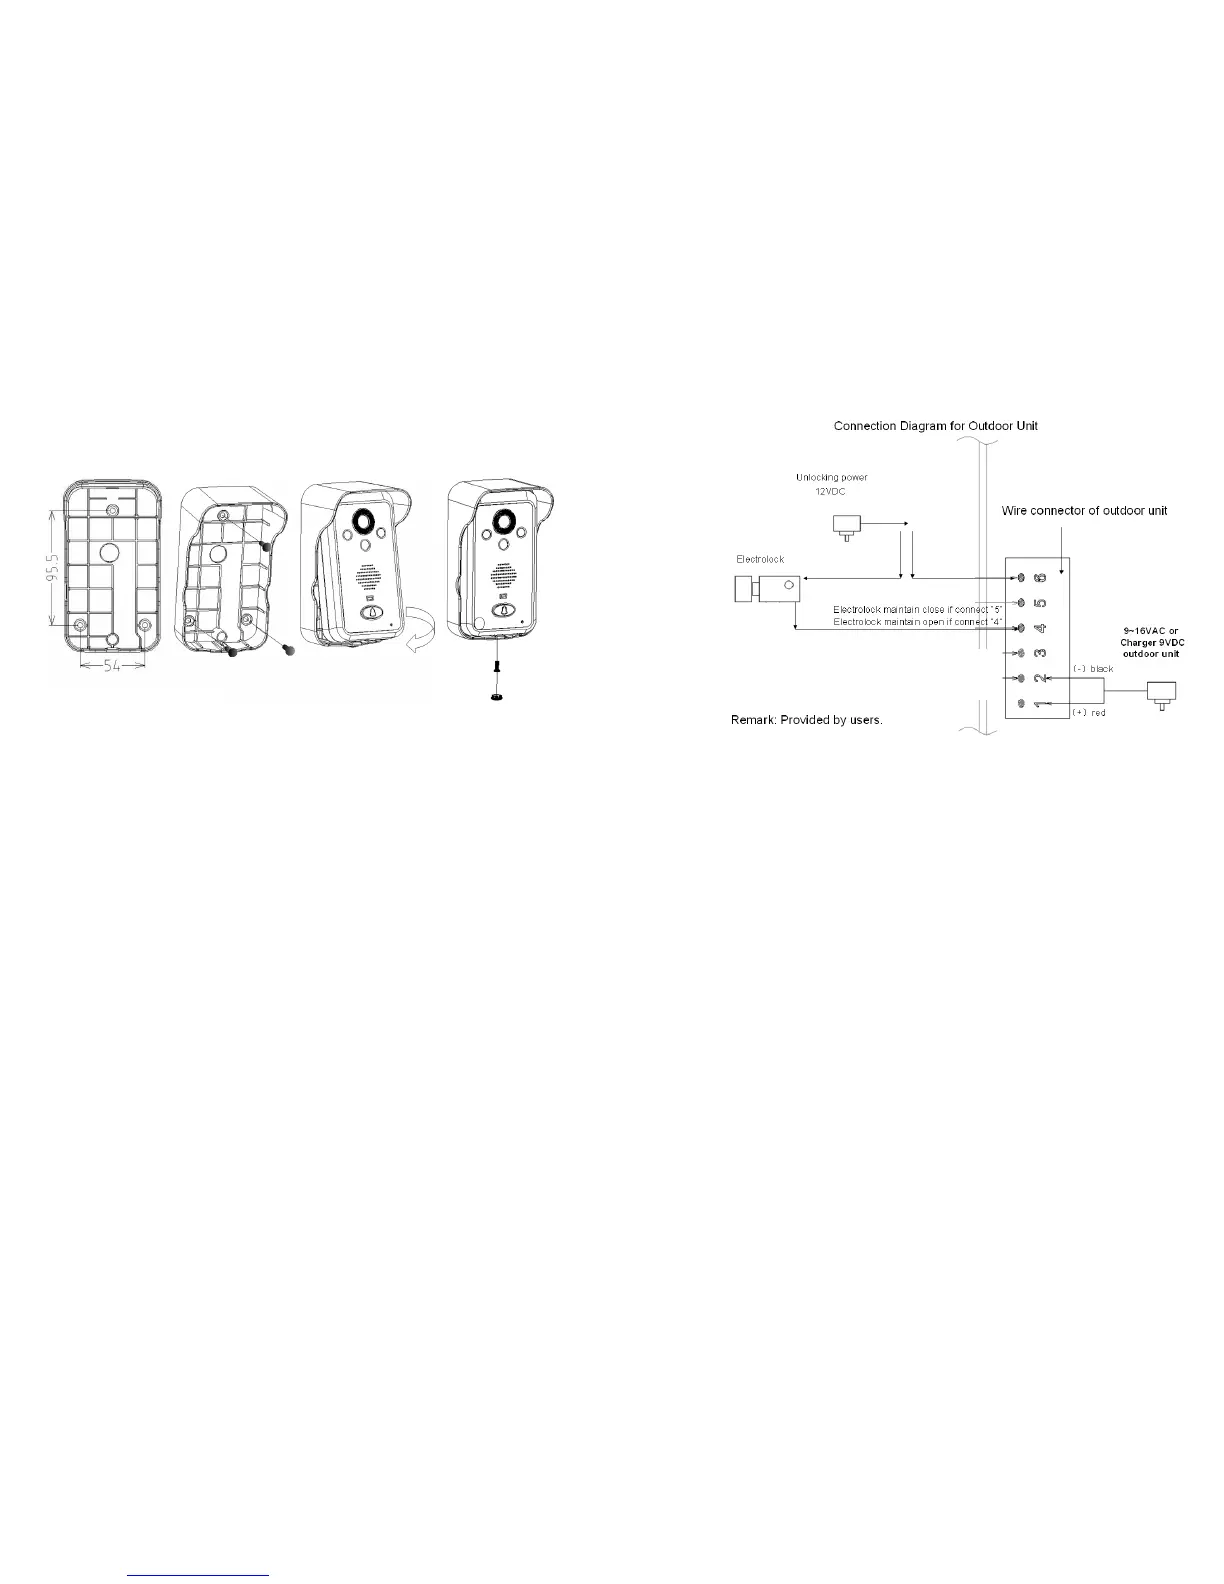
1. Drill a hole refer to the dimension, put the screw rubber plug in, then fix the
rainproof cover on the wall by screws.
2. Connect the charging line according to the wiring diagram(the hole for wire
getting through suggested 16~30mm), if charging line comes from indoor,
lead the charging line pass through the hole, if charging line comes from
outdoor,lead the charging line pass through the bottom of rainproof cover
and connect the line .
3. Install rechargeable lithium battery to outdoor unit, the unit starts up
automatically.
4. Put the top part of outdoor unit into the rainproof cover like the picture, push
the bottom part, make sure its steady and fix it from the bottom by screw, then
fit on the screw cover.
Unlocking Setting
Menu- -》setup- -》unlock set
Attentions during Installation
1. The outdoor photosensitive sensor should not be hidden or blocked by other
objects.
2. Do not face outdoor unit to sunlight directly.
3. Do not stick label on the speaker, otherwise, the sound effect of doorbell will
be affected.
4. Install the connection line correctly; otherwise, door phone disabled may be
caused.