3
5. Connect your network devices
We recommended you to first connect one computer/tablet (if possible via a wired
connection), then complete the rest of the procedure and as a final step connect the
other (wired and/or wireless) devices.
5.1. Connect your wired (Ethernet) devices
LAN
If you want to connect a device using a wired (Ethernet) connection:
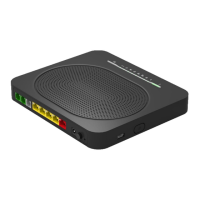
1 Take the Ethernet cable with the yellow connectors.
2 Connect one end of the Ethernet cable to one of the yellow Ethernet ports on your
DWA1230.
3 Connect the other end of the Ethernet cable to your device.
4 Connect your other Ethernet devices.
5 We recommend you to first configure the DWA1230 (see “7. Configure your
DWA1230 to your needs (optional)” on page6) before connecting your
wireless clients (see “5.2. Connect your wireless devices” on page4).
5.2. Connect your wireless devices
Connection procedure
You can connect to an access point:
• Automatically using WPS:
Network Name
WPS
Network Name
1 Start WPS Push Button Configuration (PBC) on your wireless device.
2 If your wireless device prompts you to select your access point from a list, select
the item that uses the Network Name printed on the DWA1230 settings card
or on the bottom label of your DWA1230.
3 Briefly press the WPS button on the front panel of the DWA1230.
4 The WPS LED on the front panel starts blinking orange.
5 After maximum two minutes, the WPS LED will be in either of the following
states:
• Solid green: the registration was successful.
• Blinking red: the DWA1230 could not find your wireless device. Try again or
connect your wireless devices manually.
• Manually:
Configure your wireless device with the Network Name and Wireless Key
printed on the bottom label of your DWA1230.
For APPROVAL
and NOT for distribution
outside Technicolor!!!