EasyManuals Logo

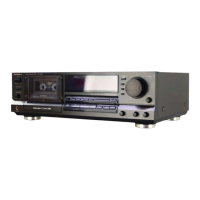
Technics RS-B965 Service Manual

Technics RS-B965
54 pages
To Next Page IconTo Next Page
To Previous Page IconTo Previous Page
Page #7 background imageLoading...
Page #7 background image
Input
level
meter
Q
4e11
2-108
RS-B965
1
ge"
507
3
6
ls
(erereycollare
mer-iiieleclicela)
Depending
on
the
type
of
tape
and
the
brand
used,
cassette
tapes
are
characterized
by
individual
variations
in
sensitivity
differences
(high
and
low
recording
levels)
and
frequency
responses
(particu-
larly
in
the
high
range).
In
addition,
the
recording
and
playback
levels
differ
when
recording
is
done
using
a
noise
reduction
system
so
that
the
sound
quality
is
sometimes
impaired.
To
deal
with
these
problems,
this
unit
comes
with
a
calibration
function
which
takes
the
form
of
bias
adjustment
and
is
based
on
a
test
oscillator.
The
tape’s
performance
can
therefore
be
given
full
rein
by
setting
the
optimum
bias
value
and
compensating
for
the
sensitivity
in
accordance
with
the
recording
characteristics
of
the
tape
while
observing
the
input
level
display.
Before
proceeding
with
calibration
*Switch
to
the
CD
direct
mode
when
recording
directly
from
the
CD
player.
1
Press
the
button
corresponding
to
the
noise-reduction
system
to
be
used.
(The
noise-reduction
indicator
will
illuminate.)
If
no
noise-reduction
system
is
to
be
used,
press
the
noise-reduction
button
corresponding
to
the
noise-reduction
indicator
that
is
illuminated.
(The
indicator
will
then
switch
OFF.)
2
Press
the
record
button.
(The
recording
indicator
will
illuminate
and
the
playback
indicator
will
flash
continuously;
the
unit
will
be
in
the
recording
stand-by
mode.)
3
The
sound
source
to
be
recorded
should
be
played
before
the
recording
is
started
in
order
to
adjust
the
recording
level.
4
Press
the
playback
button.
(The
playback
indicator
will
illuminate
steadily,
and
the
recording
will
begin.)
M
Calibration
procedure
5
Press
the
calibration
selector.
[The
input
level
display
switches
to
the
level
adjustment
indicator.
(in
figure
©
on
next
page)}
6
Compensate
for
the
difference
in
the
record-
ing
levels
using
the
calibration-level
control.
Adjust
the
left
and
right
recording
levels
to
the
indicator
arrow
position.
(in
figure
@
on
next
page)
7
Press
the
calibration
selector
again.
The
level
adjustment
indicator
now
switches
to
the
bias
adjustment
indicator.
(in
figure
@
on
next
page)
8
Compensate
for
the
difference
in
the
high-
range
sound
quality
using
the
calibration-
bias
control.
{Adjust
the
high-range
recording
level
to
the
low-range
recording
level.
(in
figure
@
on
next
page)]

Other manuals for Technics RS-B965

Questions and Answers:

Question and Answer IconNeed help?

Do you have a question about the Technics RS-B965 and is the answer not in the manual?

Technics RS-B965 Specifications

General IconGeneral
BrandTechnics
ModelRS-B965
CategoryCassette Player
LanguageEnglish

Related product manuals