Do you have a question about the Technics RS-TR313 and is the answer not in the manual?
Essential safety advice covering power source, polarization, and power cord protection for safe operation.
Guidelines for placing the unit away from water, moisture, and heat sources for optimal performance.
Advice on ventilation, avoiding foreign materials, magnetism, stacking, and surface stability.
Basic instructions for cleaning the unit's cabinet, panel, and controls with a soft cloth.
Information on when to contact qualified service personnel for unit malfunctions or damage.
Lists and details of included accessories such as power cords and connection cables.
How to connect the unit to your amplifier or receiver using stereo connection cables.
Connecting the remote control cable for remote operation of playback and other functions.
Connecting the synchro edit cable to a Technics CD player for synchronized recording.
Instructions for connecting the unit's power cord to a household AC power outlet.
Identification of common controls like power switch, balance, and recording level adjustments.
Details on controls shared by both tape decks, including power, balance, and reverse mode.
Explanation of controls applicable to individual tape decks, like playback, stop, and eject.
Details on indicators such as input level meter and edit-recording tape speed.
Explanation of indicators unique to tape deck 1 or 2, including reverse, playback, and recording status.
Instructions on connecting headphones and advice for safe listening.
Guide to choosing modes for single-side, continuous, or series playback of cassette tapes.
How to pause playback on deck 2 and resume it later.
Instructions on how to completely stop tape playback.
Explanation of Dolby B, C NR, and HX Pro headroom extension for improved sound quality.
Details on using Dolby B NR to reduce tape hiss, ideal for prerecorded music tapes.
Information on Dolby C NR for wider dynamic range and better tone quality, suitable for broadcasts.
How HX Pro enhances high-frequency output level during recording for better sound.
Explanation of the automatic tape-select feature for optimal bias and equalization.
Using cue/review buttons to find desired tape sections with sound monitoring.
Instructions for fast forwarding or rewinding tapes when the unit is in stop mode.
Step-by-step guide to recording audio from external sources onto cassette tapes.
How to set the recording level using the REC LEVEL control and meters for optimal sound.
Procedure for adjusting the left and right audio channel balance during recording.
How to pause recording on deck 2 and resume it.
Instructions on how to completely stop the recording process.
Guide to copying audio from one cassette tape to another using synchro-start.
How to pause edit-recording on deck 2 and resume it.
Instructions on how to stop the edit-recording process.
Using pause to skip unwanted sections during edit-recording.
How to find specific parts of the source tape while edit-recording.
Steps to erase content from a tape without making a new recording.
Automated recording from a Technics CD player, synchronizing tracks with tape length.
Using the auto-record-muting button to create silent gaps between recorded tracks.
Holding the auto-record-muting button for extended silent intervals.
Instructions for setting up automatic recordings at a specific time.
Instructions for setting up automatic tape playback at a specific time.
Guidance on cassette tape types to use and avoid for optimal performance.
How to prevent accidental erasure by removing or covering tape protection tabs.
Tips for managing tape slack to prevent tape breakage during operation.
Advice on avoiding tape damage by storing them in appropriate conditions.
Routine cleaning of heads, pinch rollers, and capstan for consistent sound quality.
Procedure for demagnetizing the head assembly to maintain sound quality.
Methods for cleaning the unit's exterior surfaces without causing damage.
| Track System | 4-track, 2-channel stereo |
|---|---|
| Tape Speed | 4.8 cm/s |
| Motor | DC motor |
| Frequency Response (Normal Tape) | 30Hz to 14kHz |
| Output (Line) | 0.5 V |
| Dimensions | 430 x 125 x 270 mm |
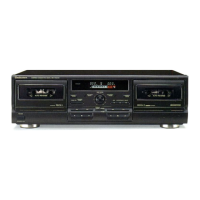
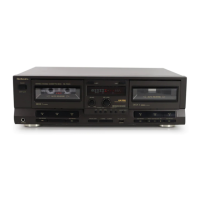
| Type | Double Cassette Deck |