18
Playback
Basic
Playing back music files on the
media server
You can share music files stored in the media
server (PC, Network Attached Storage, etc.)
connected to your home network, and enjoy the
contents with this unit.
1 Press [>INPUT<] repeatedly to select
“DMP”.
• You can also select the input source by
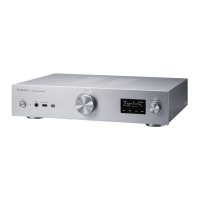
turning the input selector knob on the unit.
• The server selection screen will be displayed.
2 Press [ ], [ ] to select a media
server on the network, and then
press [OK].
• The folder/content selection screen will be
displayed. Repeat this step to make further
selections.
• Folders/content may be displayed in
different order from the order on the server,
depending on its specifications.
3 Press [ ], [ ] to select an item and
then press [OK].
Note
• The connected server and its contents may
not be displayed properly depending on its
condition. (e.g. soon after adding the contents
to the server, etc.)
Please try again later. For details, refer to the
operating instructions of the device.
• The content may not be played back properly
depending on the network condition.
Listening to DAB/DAB+ /
FM Radio Basic
■
Storing DAB/DAB+ stations
To listen to DAB/DAB+ broadcasts, the available
stations need to be stored in this unit.
• This unit will automatically start scanning and
store the stations available in your region if the
memory is empty.
1 Press [RADIO] to select “DAB/DAB+”.
2 “Auto Scan” starts automatically.
• “Scan Failed” is displayed if the auto scan is
unsuccessful. Locate the position with the
best reception ( 11) and then re-scan DAB/
DAB+ stations.
■
To listen to the stored DAB/DAB+ stations
Press [MENU].
Press [ ], [ ] repeatedly to select “Tuning
Mode” and then press [OK].
Press [ ], [ ] to select “Station” and then
press [OK].
Press [ ], [ ] to select the station.
■
Presetting DAB/DAB+ stations
You can preset up to 20 DAB/DAB+ stations.
1 Press [RADIO] to select “DAB/DAB+”.
2 Press [PGM] while listening to a DAB
broadcast.
3 Press [ ], [ ] to select the desired
preset channel, and then press
[PGM].
• Presetting is not available when the station
is not broadcasting or when the secondary
service is selected.
• The station occupying a channel is erased if
another station is preset in that channel.
■
To listen to preset DAB/DAB+ stations
Press [MENU].
Press [ ], [ ] repeatedly to select “Tuning
Mode” and then press [OK].
Press [ ], [ ] to select “Preset” and then
press [OK].
Press [ ], [ ] or numeric buttons to
select the station.
■
Storing FM stations
You can preset up to 30 channels.
• A station previously stored is overwritten
when another station is selected for the same
channel by presetting.
1 Press [RADIO] repeatedly to select
“FM”.
2 Press [MENU].
3 Press [ ], [ ] repeatedly to select
“Auto Preset” and then press [OK].
4 Press [ ], [ ] to select an item and
then press [OK].
Lowest:
To begin the auto preset with the lowest
frequency (FM 87.50).
Current:
To begin the auto preset with the current
frequency.

 Loading...