®
USER’S MANUAL
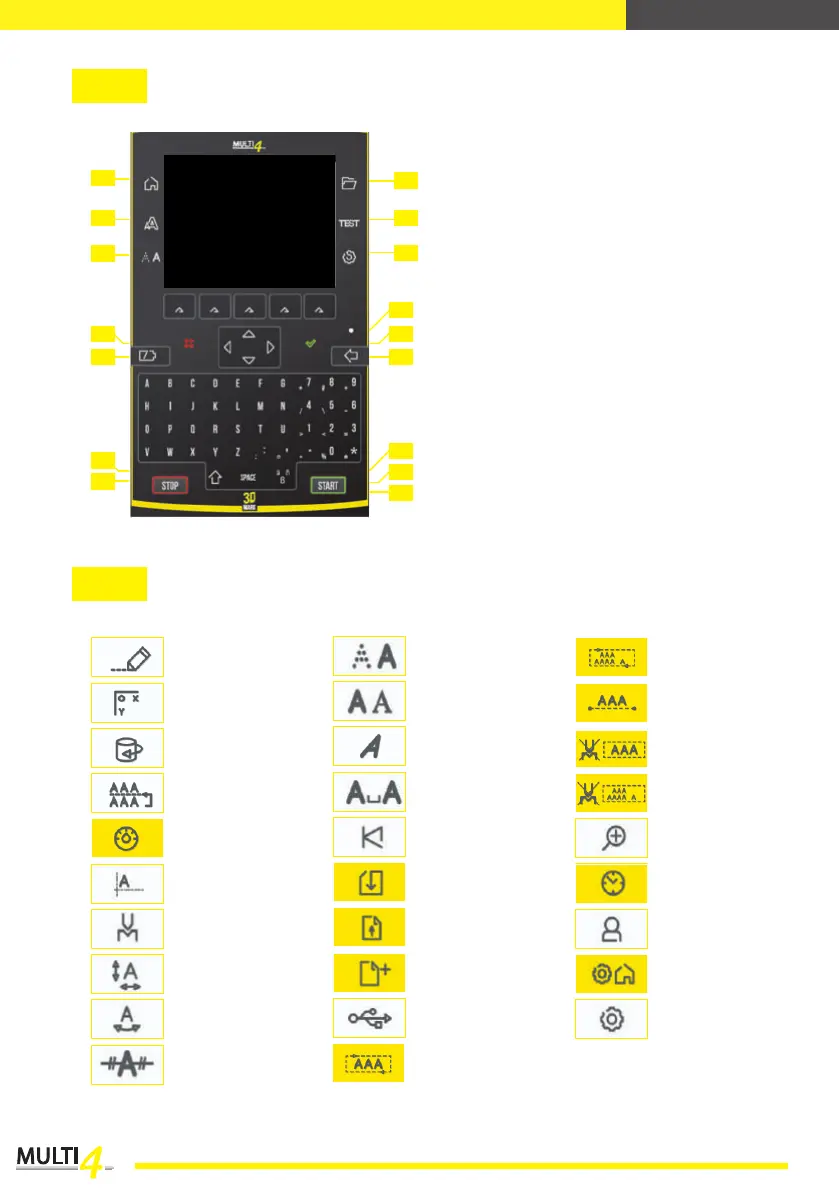
01 - Return to home page
02 - Character height, position
and marking force
03 - Setting point density,
spacing, ...
04 - Cancel input/operation
05 - Start/stop battery (optionnal)
06 - Space bar
07 - "Shift" key. Allow minuscule
when kept pressed + letter
08 - Marking or test stop button
09 - Insert special characters
10 - File (Open an existing
le, create a new le,
save, adjusting speed,
activate D axis)
11 - Marking simulation function
without marking
12 - Parameters setting (zoom,
time, language, accessory,
window size, …)
13 - Secondary functions
(see step 4 underneath)
14 - Battery and sleep mode
indicator
15 - Erase characters
16 - Conrm input/operation
17 - Marking or test start button
Enter data: text,
gures…
Select point density
Testing outline of all the
lines (le)
Edit Menu: copy/stick,
insert, ...
Setting space between
characters
Marking test of all the
lines (le) without impact
Setting marking force Open existing le
Users, licences and
password
Modify marking
parameters
Select character font
Test beginning/end of
the line
File conguration: speed,
accessory and IDI
activation, ...
Back to default values Zoom
Adjust characters
height/width
New le
Interface parameters
(language, ...)
Add mechanical
function: pause, ...
Italic mode
Marking test of the line
without impact
Manual positioning
of data
Save le Setting date and time
Adjustment of slope
angle and radius
Import/Export data with
USB key
Machine parameters
(maintenance,
window,...)
Centring text X, Y, or XY
Testing outline of the
selected line
STEP 3 : Main functions
STEP 4 : Secondary functions (once the main function has been selected)
Yellow buttons open action windows
10
13
11
12
06
09
14
15
16
01
04
02
05
03
08
07
17