USER MANUAL
3.3 Power Supply Connection
Please use attached power adapter to connect DVR. Before power on, make sure the cables on
the audio and video I/O ports and network port are well connected. For audio ports, please use
microphone and other audio devices together with BNC connecting line to input or output audio signals.
Chapter 4 DVR Boot up
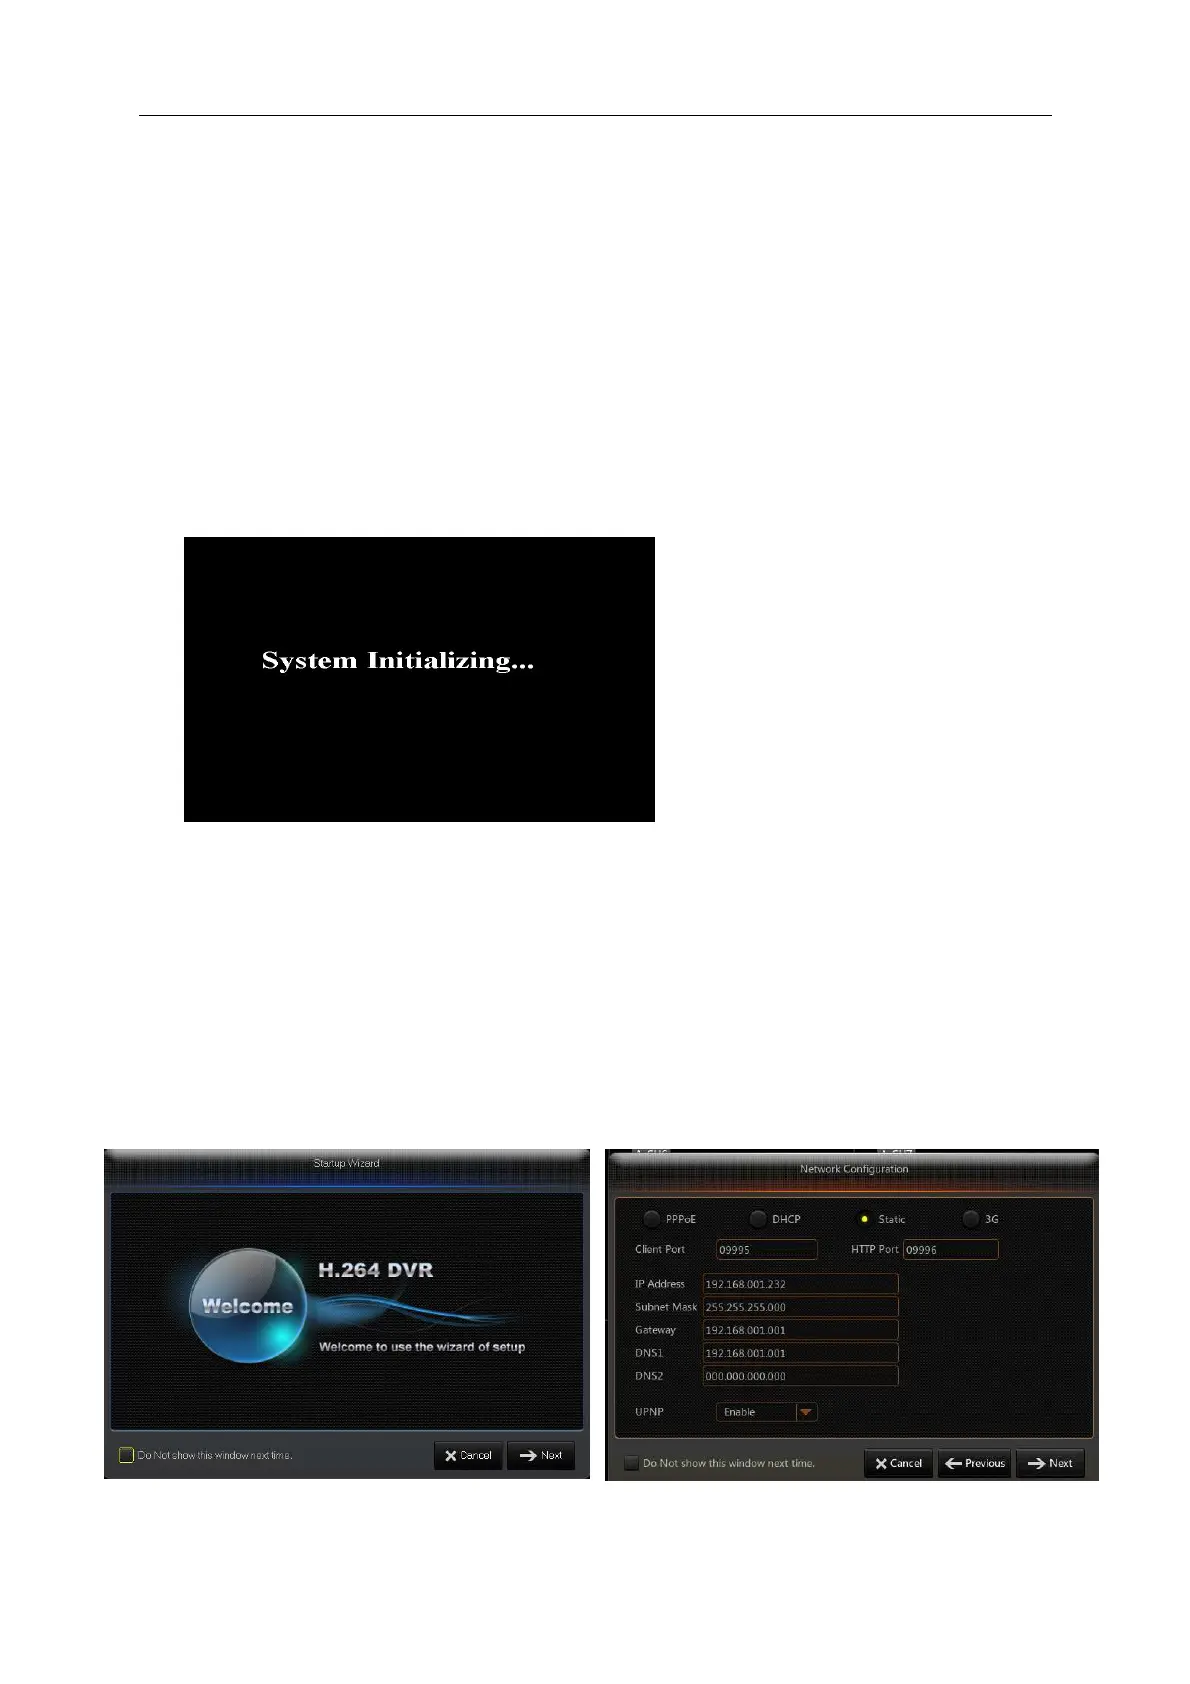
4.1 System Initialization
After connecting the power cable of DVR to wall outlet and pressing the power button, you will
enter into the DVR system initializing screen shown as Picture 4-1.
Picture 4-1
4.2 Startup Wizzard
After DVR startup is completed, the startup wizard will be displayed. If you do not want to
make any setting, you may click “Don't show this window next time” to cancel, as shown in Picture
4-2.
Wizard setting menu includes: Homepage, Network setup, Record Schedule and HDD.
1. Homepage and network setup. In network setup page, user may set the network environment of
DVR, as shown in Picture 4-3
Picture 4-2 Picture 4-3
Note:The illustration in the user
manual may not be the same as the
menu interface in your monitor. All
the illustrations are only for users’
reference.