5 CLOCK AND TIMER FEATURES
SETTING THE CLOCK 3. Within 5 seconds, use the tuning knob
The factory has set the clock to function to set the hour.
4. Within 5 seconds, press/release the
as a 24-hour format clock.
'Time' (2) button, then use the tuning
There are three methods for setting the
knob to set the minute.
5. Within 5 seconds of finishing,
clock.
press/release the 'Time' (2) button or
CLOCK SET METHOD 1 UP AND
wait until the clock digits stop flashing.
DOWN BUTTONS:
You can also set the clock when you turn
on the radio. When the radio is on, the
1. Turn the radio off. The clock digits
appear in the center of the display (34).
clock digits appear in the upper right
2. Press/release the button labeled 'Time'
corner of the display. Set the clock
(2). The clock's HOUR digits flash in
referring to the 3 methods above.
the display, within 5 seconds, set the
hour using the UP/DOWN buttons
SETTING THE TIMERS (USE AS
(9, 10).
WAKE-UP ALARM)
3. Press/release the 'Time' (2) button
again, the MINUTE digits flash in the
The PL-600 has two, independently
display, within 5 seconds, set the
programmable timers, timer A and B,
minute using the UP/DOWN buttons
enabling the PL-600 to turn on and play
(9, 10).
the radio for an alterable period of time
4. Within 5 seconds of finishing,
and then turn off. The playtime can be
press/release the 'Time' (2) button or
selected from 1~90 minutes. The timers
wait until the clock digits stop flashing.
can be used as wake-up alarms. After
setting a timer and a playtime, store a
CLOCK SET METHOD 2 –
radio station into timer memory and
NUMERIC KEYPAD:
activate the timer. See the next sections
titled STORING A RADIO STATION INTO
1. Turn the radio off. The clock digits
TIMER MEMORY and ACTIVATING /
appear in the center of the display (34).
DEACTIVATING THE TIMER.
2. Press/release the button labeled 'Time'
(2). The clock's digits flash in the
NOTE: A radio station must be stored into
display.
timer memory. If this is not done, there
3. Use the numeric keypad to key-in the
will only be static once the timer is
time in 24 hour format. Within 5
seconds of finishing, press/release the
activated.
'TIME' (2) button or wait until the clock
digits stop flashing.
CLOCK SET METHOD 3 TUNING
KNOB
1. Turn the radio off. The clock digits
appear in the center of the display (34).
2. Press/release the button labeled 'Time'
(2). The clock HOUR digits flash in the
display.
TUNING MODE FAST TUNING SLOW INTRODUCTION TO SINGLE SIDE
TUNING BAND (SSB)
The TUNING-FAST/SLOW button (8) Many higher-end shortwave radios have
allows selection of fast or slow tuning special circuitry enabling SSB, a highly
when using the tuning knob or the UP efficient way of electronically processing
and DOWN controls. FAST or SLOW transmitted and received signals for two-
appear in the display. When tuning with way communication. Examples of this are
the tuning knob (28), fast tuning is usually amateur radio (hams), maritime and
appropriate. When tuning with the UP and aeronautical communication. Either upper
DOWN buttons, use slow tuning to tune in side band (USB) or lower side band
stations and fast tuning to move up or (LSB) can be used. Non-voice methods of
down frequency at a rapid rate. Then use communication can also be heard,
slow to actually tune in stations. including CW (Morse code) and RTTY
Experiment with this control to see which (radio teletype). Receiving SSB signals is
tuning mode that you prefer. not always easy. Since this is two-way
communications, transmissions are often
USING THE BANDWIDTH BUTTON
very short and sporadic. Also, most two-
The BANDWIDTH button (14) is used
way communication uses relatively low
when listening to WM and SW stations.
power, 50 to 1000 watts. The amateur
Its purpose is to help minimize
radio operators are easiest to find, best
interference. The preferred setting is
results are experienced when using an
WIDE, which provides best audio fidelity.
outdoor shortwave antenna such as a
Use NARROW when there is
dipole.
interference. W or N will appear in the
display.
Follow your radio's instructions on how to
engage its SSB feature. Shown next are
USING THE PL600'S SSB (SINGLE
some selected frequency ranges on
SIDE BAND) FEATURE
which SSB communications can be
SSB enables listening to shortwave
found. All frequencies are shown in
signals using the single-sideband mode.
kilohertz.
This mode is used for a variety of signals
including amateur radio and other two-
AERONAUTICAL SW FREQUENCY
way communications, Morse code,
RANGES (USUALLY USB)
weather-fax transmissions and other
encoded signals often referred to as
'utility' signals. To use SSB, turn on the
SSB circuit by pressing the SSB button
(13 ) . Note that SSB appears in the
display (42). Tune to the shortwave
frequency of your choice. Use the tuning
knob to coarse-tune the SSB signal, then
fine-tune with the SSB BFO+ knob (30).
This SSB circuit allows tuning of both
upper and lower sideband signals. For
best SSB signal clarity, placing the
DX/LOCAL switch in the LOCAL position
may be desirable.
MARITIME SW FREQUENCY RANGES
(USUALLY USB)
BASIC RADIO OPERATION continued
2850-3155
3400-3500
4650-4750
5480-5730
6525-6765
8815-9040
10005-10100
11175-11400
13200-13360
15010-15100
17900-18030
21870-22000
23200-23350
4063-4438
6200-6525
8195-8815
12230-13200
16360-17410
18780-18900
19680-19800
22000-22720
25070-25110
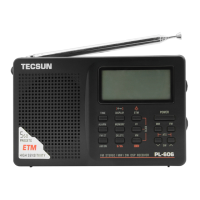
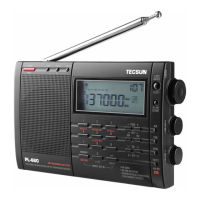
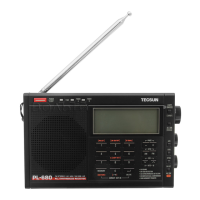
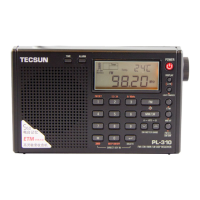
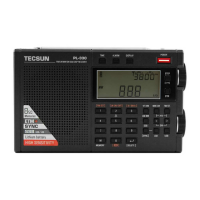
PL-600 OWNER'S MANUAL

 Loading...