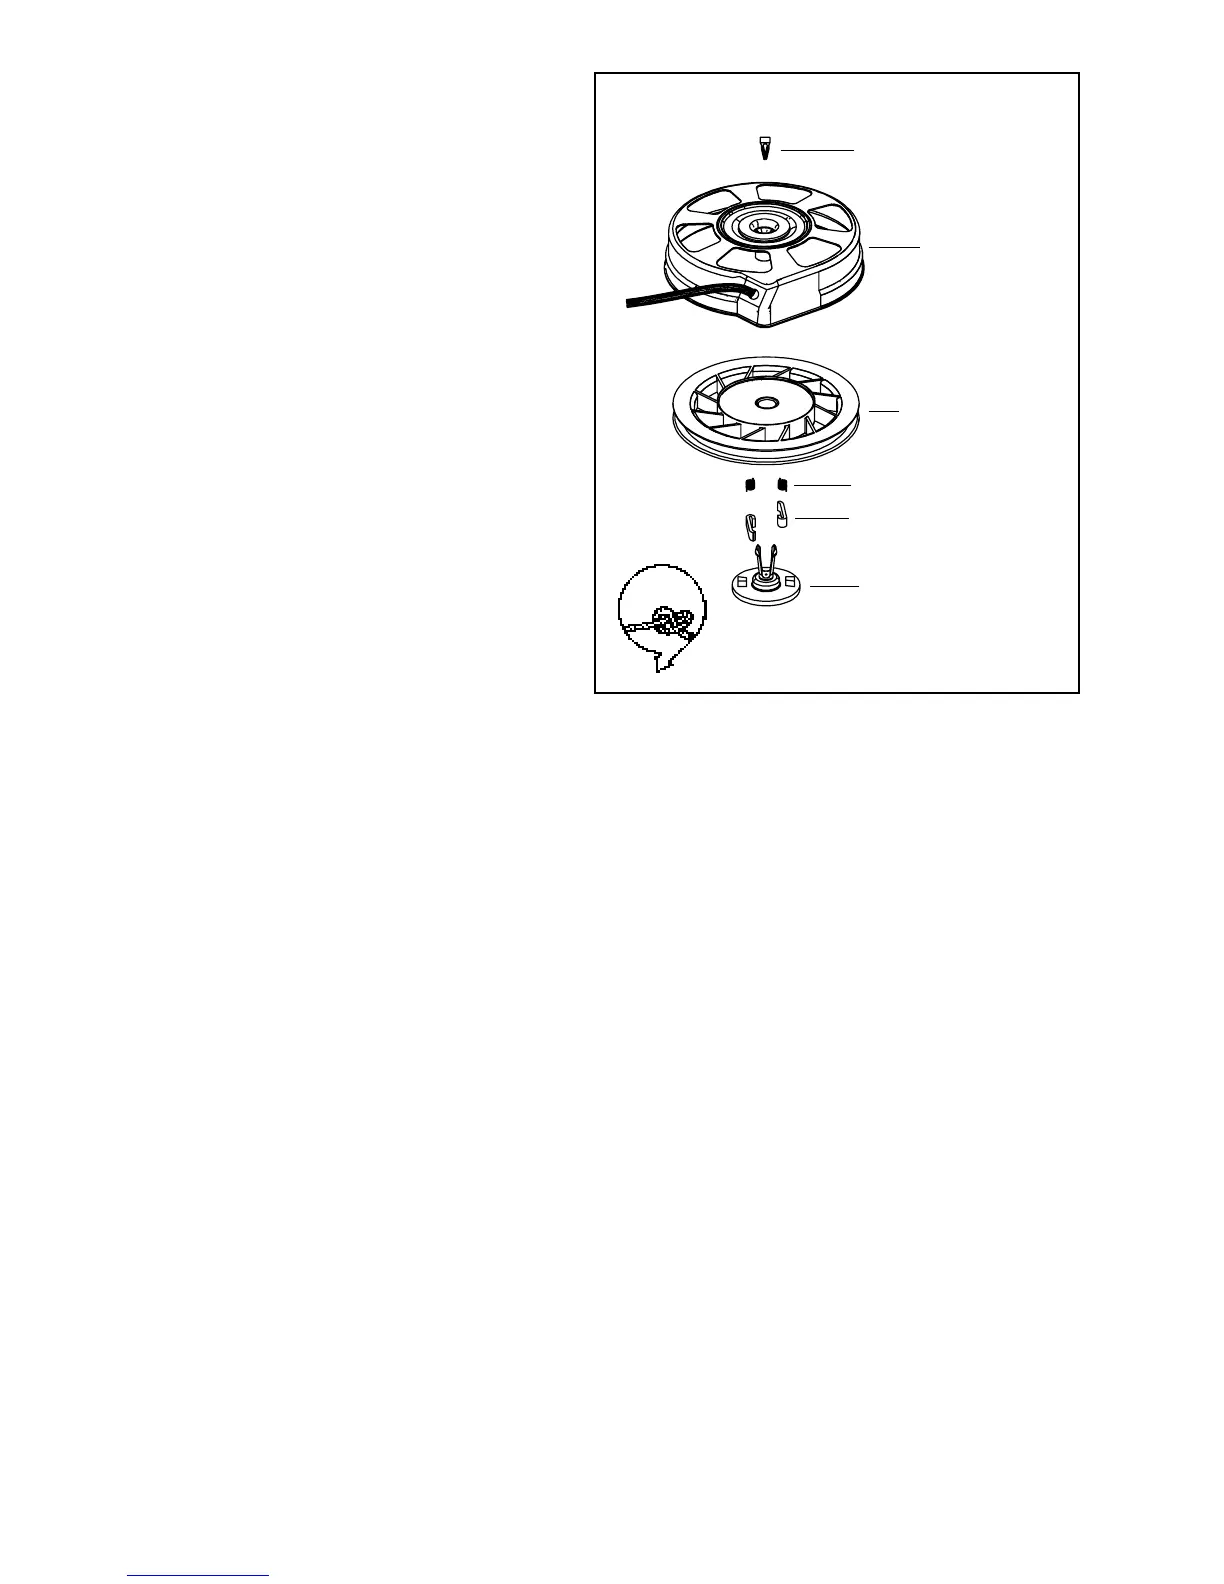
16
2. Untie the temporary knot and slowly allow the rope
to fully retract into the starter housing and the recoil
spring to fully unwind.
3. Remove the decal from the center of the starter
housing.
4. Use a small Phillips screwdriver or similar tool to pry
the retainer legs apart and lift out the retaining
wedge.
5. Pinch the legs of the retainer together and pull on
the head of the retainer to remove it from the housing.
6. Remove the pulley assembly from the recoil housing.
7. Repair or replace as necessary.
Assembly
1. If replacing the starter rope, see Step 8.
NOTE: EXTREME CAUTION AND APPROPRIATE
SAFETY EQUIPMENT MUST BE USED WHEN
WORKING WITH RECOIL SPRINGS.
2. Install a new recoil spring if necessary by pushing
the new spring out of the holder into the pulley cavity
while aligning the outside spring hook into the deep
notch in the pulley. Push the spring cover in until
seated.
3. Apply a small amount of lithium grease to the inner
bore of the center shaft.
4. Replace or check that both starter dogs are in the
pulley pockets and that the dog springs are hooked
on the outer surface of the dog.
5. Pinch the two legs of the plastic retainer together
and start into the center shaft hole.
6. Rotate the retainer so the two tabs on the bottom of
the part fit between the dog and pulley hub (left side
of the dog). Push the retainer in until the leg prongs
pop out of the center shaft.
7. Turn the starter over and snap the locking tab
between the retainer legs, replace the top decal.
8. Carefully turn the pulley counterclockwise until it
stops. Then back the pulley up until the recoil
grommet hole and the pulley hole are aligned. Next
using a rope with a cauterized end, feed it into the
pulley hole. Tie a left handed knot and allow the rope
to be drawn into the recoil slowly.
DOG RETAINER
RETAINER WEDGE
STARTER
HOUSING
DOG SPRING
STARTER DOG
STARTER PULLEY
SPRING & COVER
LEFT-HAND
KNOT
Not For Resale
www.SmallEngineDiscount.com