Maintenance (Continued)
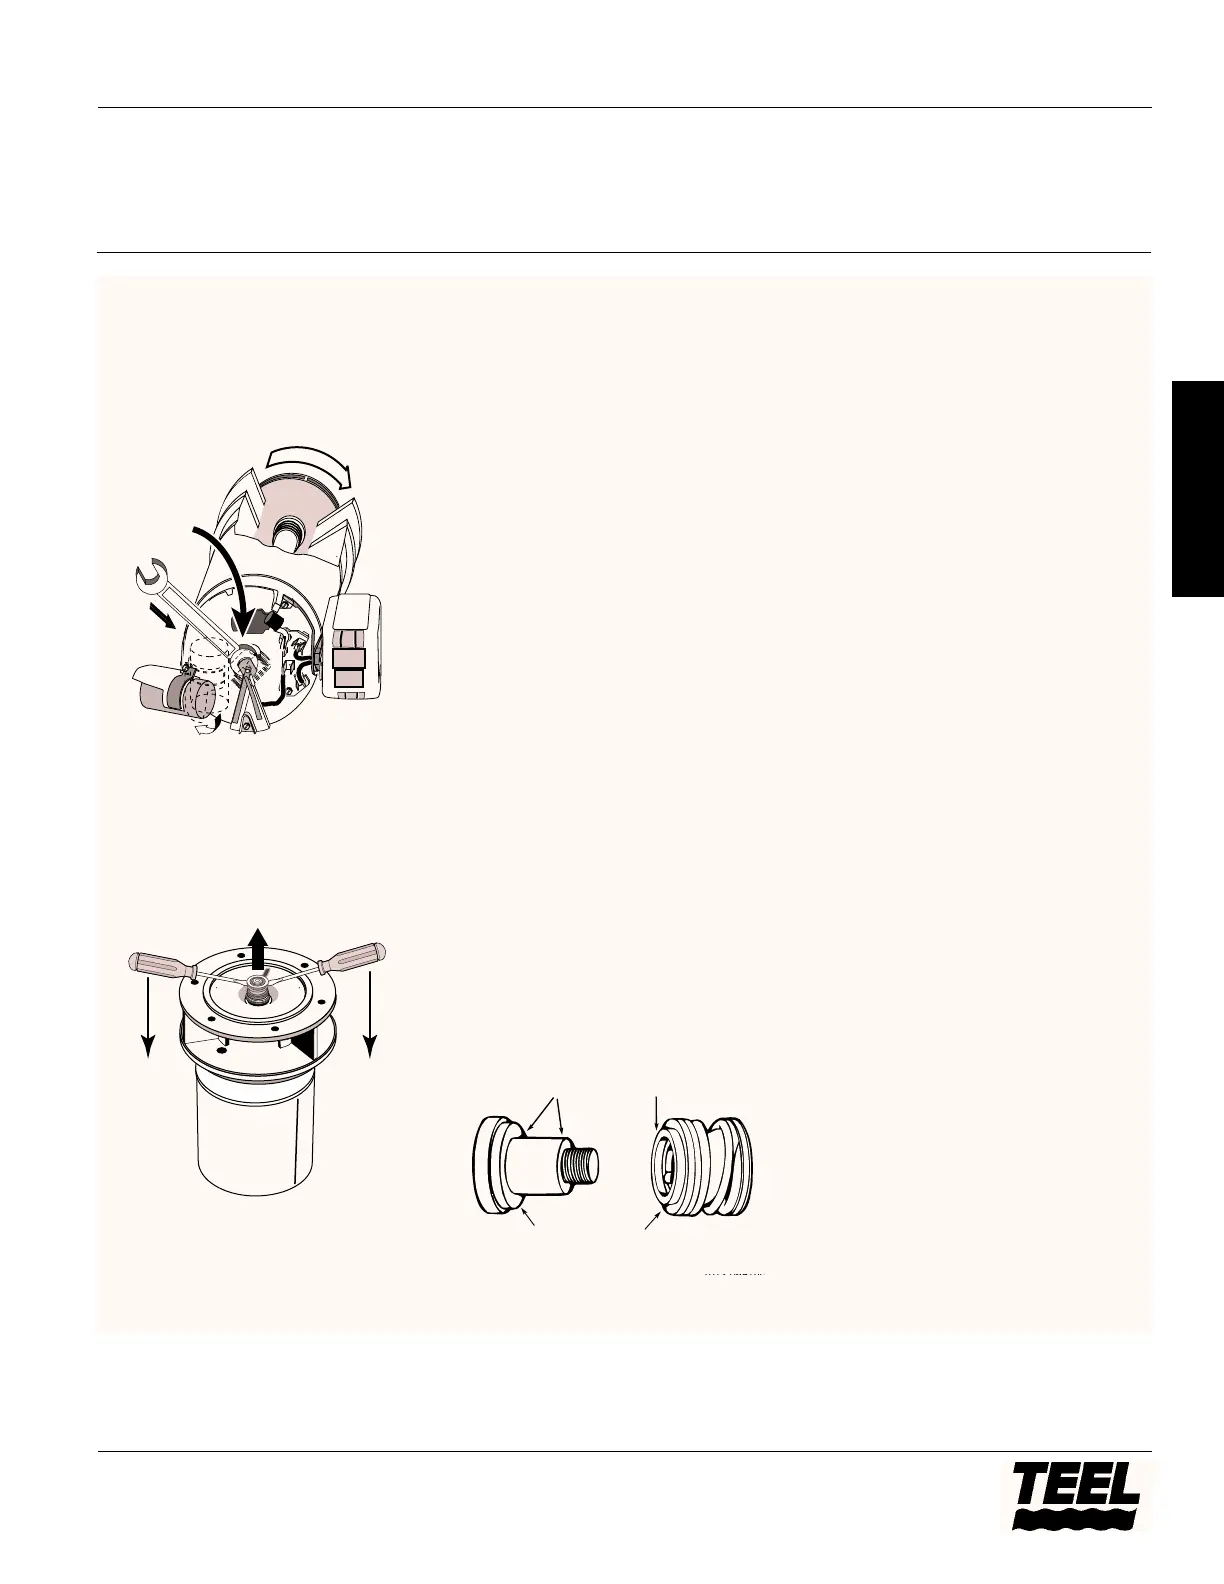
8. Hold the motor shaft with a 7/16”
end wrench on the motor flats (See
Figure 20) and unscrew the impeller
off of the shaft, exposing the seal
(shaft has right-hand threads).
9. Pull the rotating half of the seal off
the shaft with two screwdrivers (See
Figure 21). Be careful not to mar the
shaft.
10.Remove four cap screws and
remove the adapter from the
motor. Place it face up ( that is,
with seal seat up) on the bench.
11.Pry loose the floating seat by
applying a screwdriver between the
seat and the cavity in the casting.
12.Clean the casting cavity and clean
the motor shaft.
INSTALLING NEW SEAL
1. Clean the polished surface of the
floating seat with a clean cloth.
2. Wet the O-Ring on the ceramic seat
with soapy water.
3. Press the seat firmly into the cavity
with finger pressure. If the seat will
not locate itself properly in this
manner, place a cardboard washer
over the polished surface of the seat
and press it in with a piece of 3/4”
standard pipe.
4. Dispose of the cardboard washer
and again make sure that the
polished surface of the seat is free
of dirt and foreign particles and has
not been scratched or damaged in
installation.
5. Reinstall the adapter on the motor,
making sure that you do not
damage the seal when inserting the
shaft through it.
6. Inspect the shaft to make sure it is
clean. Clean the face of the sealing
washer with a clean cloth.
7. Apply a soap solution to the inside
diameter and the outer face of the
rubber drive ring. Carefully slide the
seal assembly onto the shaft (sealing
face first), until the rubber drive
ring slides over the shaft shoulder.
Make sure that you don’t chip or
scratch the sealing surface on the
shaft shoulder.
8. Hold the shaft flats with a 7/16”
wrench and screw the impeller onto
the shaft until the impeller hub hits
the shaft shoulder. This will
automatically locate the seal in
place and pull the sealing washer
face up against the floating seat
face.
9. Reassemble the pump in reverse
order from disassembly.
Models 3P740A, 4P037, 4P038, 4P039 and 4RJ96A
15
Teel Operating Instructions and Parts Manual
E
N
G
L
I
S
H
 Loading...