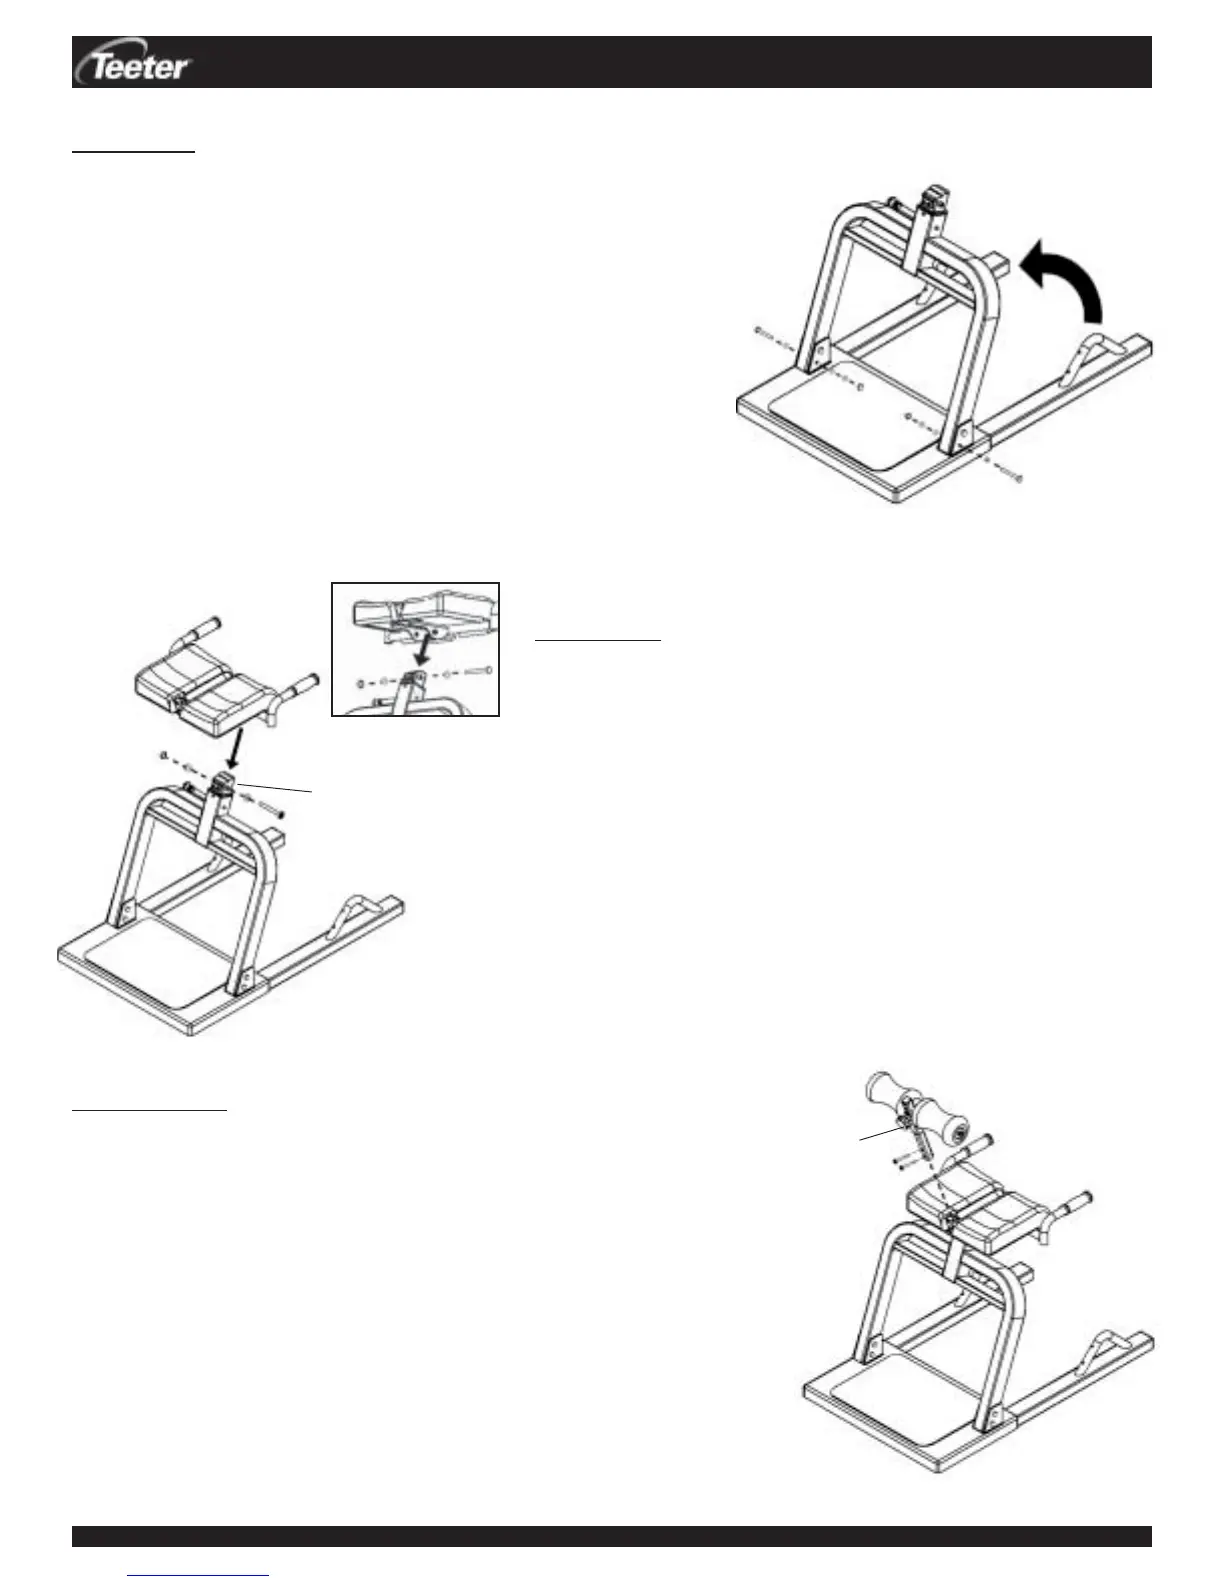
STEP ONE
Fasten the Support Post Assembly (D11003) to the Frame
Assembly (D11002)
• The Frame Assembly and Support Post Assembly arrive pre-
assembled in the storage position. Remove only the LOWER
hex bolt from each column of the Support Post Assembly.
• Rotate the Support Post Assembly up approximately 80
degrees until the two lower holes in the Support Post
Assembly align with the lower holes in the Frame Assembly.
(See Figure 1)
• Insert the hex bolt with flat washer through the lower holes
on each column. Finish with another flat washer and a lock
washer and fasten with the capped nut using a 9/16” wrench.
Figure 1
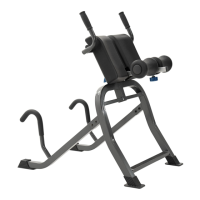
STEP TWO
Secure the Lap Pad Assembly (D11004) to the chrome shaft in
the Support Post Assembly (D11003)
• You must remove the hex bolt, nut and washer from the Lap
Pad Assembly before proceeding (leave the bushings in place).
• Place the Lap Pad Assembly over the chrome shaft in the
Support Post Assembly and align the hole in the Lap Pad
Assembly with the hole in the chrome shaft. (See Figure 2)
• Insert the hex bolt with washer through the bushing in the hole,
securing the Lap Pad Assembly to the chrome shaft. Finish
with another washer and fasten with the nut using a 9/16”
wrench. (See Figure 2A for close-up view)
• Make sure the fasteners are tightened securely and the Lap
Pad rotates smoothly.
DEX
TM
Assembly Instructions #LD-1001 Pg. 2
Figure 2
Figure 2A
chrome
shaft
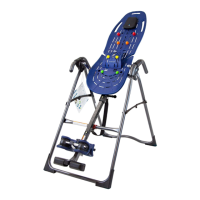
STEP THREE
Attach the Leg Roller Assembly (D11007) to the Lap Pad
Assembly (D11004)
• You must remove the hex bolts and washers from the Leg
Roller Assembly before proceeding.
• Slide the chrome part of the Leg Roller Assembly into the
receiving end of the Lap Pad Assembly. (See Figure 3) Lining up
the two holes, secure with the washers and hex bolts using a 13
mm wrench.
• Loosen and pull out the adjustment knob on the Leg Roller
Assembly to adjust to your preferred setting (refer to the
Instructional Training Manual for adjustment settings). Make
sure the adjustment knob is fully engaged in one of the hole
settings prior to use. Make sure that the Instructional Training
Manual has been read and understood prior to use.
Figure 3
adjustment
knob
ASSEMBLY INSTRUCTIONS